FireGuruMN
Active Member
I bought a pair of Ohm Walsh 3 speakers about a year ago. They sounded fine but as I have learned there is always room for improvement through replacing old capacitors. But it seems Ohm makes almost every step of the recap process a challenge. I found some useful threads that got me started on the path but nothing that took me all the way to the finish line. So here is my story.
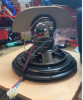
Obviously, remove the "top hat" by removing the 4 screws. You will need a long shaft screw driver to do this easily. I used a drill with a long extension driver. I'm lazy.
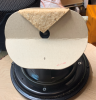
Inside you will find a couple of sheets of insulation supported by a plastic screen. Carefully remove the insulation but it will probably fall to pieces no matter what you do. It can be replace if needed. Remove the screen. I trashed mine and replaced it with regular bug screen from a hardware store.
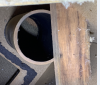
Then you will have this nightmare view:
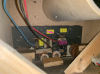
The crossover is 3 feet down inside the speaker with cross beams all in the way. oh, and it's stapled and glued in place. In my case there was an entire haunted house full of spider webs and egg sacks.
Step one:
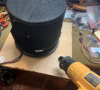
remove at least one cross brace or you cannot get to anything. Some good news: The braces are glued in with hot glue. Get a heat gun. A good $25.00 investment anyway. Mark the top side of the brace, they are mitered to fit the odd angles of the speaker. Hold the heat gun on the ends of the cross brace for a minute or so and the glue will melt enough to twist the brace off. On my first one I removed two but I only removed one for the second one.
You will find three blocks of wood glued to the sides to support the inductors. (curious that the spell check flagged that as a misspelled word on an audio forum).
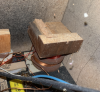
Again, these are also held in place with hot glue. It takes a couple of minutes to melt the glue well enough to remove them without damage. Be patient. DO NOT pry against the inductors. They are soft metal and will break easily. I would have worn a mask but they are needed for medical purposes in the current pandemic so I donated mine. It gets pretty stinky with burning cob webs and such.
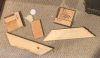
Here is what I removed:
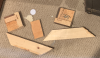
Looks like they were cutting up old speakers to make some of the blocks. How's that for direct recycling!
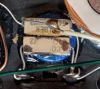
Now it gets hard. Pull four staples out of the cardboard crossover/switch plate. I used a lineman's pliers and pulled straight up. Wear gloves or you will certainly skin some knuckles when they pull loose. The crossover is hot glued in place again. It takes a long time to heat it up enough to soften the glue. 5 minutes in my case. Then turn the speaker upside down and use a FLEXIBLE puddy knife to slide in around the edges of the crossover hole and free up the crossover. DON'T let it drop or the inductors will break. Maybe put the speaker sideways as it frees up. You will probably leave some behind:
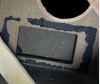
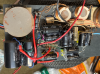
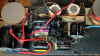
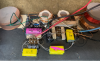
You will be rewarded with this in your hands:
Continued. . .
Obviously, remove the "top hat" by removing the 4 screws. You will need a long shaft screw driver to do this easily. I used a drill with a long extension driver. I'm lazy.
Inside you will find a couple of sheets of insulation supported by a plastic screen. Carefully remove the insulation but it will probably fall to pieces no matter what you do. It can be replace if needed. Remove the screen. I trashed mine and replaced it with regular bug screen from a hardware store.
Then you will have this nightmare view:
The crossover is 3 feet down inside the speaker with cross beams all in the way. oh, and it's stapled and glued in place. In my case there was an entire haunted house full of spider webs and egg sacks.
Step one:
remove at least one cross brace or you cannot get to anything. Some good news: The braces are glued in with hot glue. Get a heat gun. A good $25.00 investment anyway. Mark the top side of the brace, they are mitered to fit the odd angles of the speaker. Hold the heat gun on the ends of the cross brace for a minute or so and the glue will melt enough to twist the brace off. On my first one I removed two but I only removed one for the second one.
You will find three blocks of wood glued to the sides to support the inductors. (curious that the spell check flagged that as a misspelled word on an audio forum).
Again, these are also held in place with hot glue. It takes a couple of minutes to melt the glue well enough to remove them without damage. Be patient. DO NOT pry against the inductors. They are soft metal and will break easily. I would have worn a mask but they are needed for medical purposes in the current pandemic so I donated mine. It gets pretty stinky with burning cob webs and such.
Here is what I removed:
Looks like they were cutting up old speakers to make some of the blocks. How's that for direct recycling!
Now it gets hard. Pull four staples out of the cardboard crossover/switch plate. I used a lineman's pliers and pulled straight up. Wear gloves or you will certainly skin some knuckles when they pull loose. The crossover is hot glued in place again. It takes a long time to heat it up enough to soften the glue. 5 minutes in my case. Then turn the speaker upside down and use a FLEXIBLE puddy knife to slide in around the edges of the crossover hole and free up the crossover. DON'T let it drop or the inductors will break. Maybe put the speaker sideways as it frees up. You will probably leave some behind:
You will be rewarded with this in your hands:
Continued. . .