Optonica RP-4705 warble fix. Service Manual available at:
https://www.servicemanuals.net/en/OPTONICA-RP4705-Service-Manual.
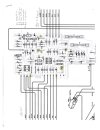
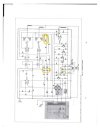
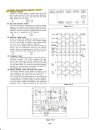
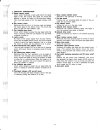
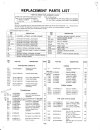
The service manual pages referenced along with the parts list are attached.
After about 10 years of frequent usage and another 40 years of occasional use my Optonica RP-4705 started to warble (it wouldn't hold the speed constant) at 33 RPM. 45 RPM was fine. I bought the turntable new, installed a concord cartridge and loved it, so I wanted to figure out how to repair it.
I don't have experience repairing circuit boards at the component level but I have a basic understanding of circuits and decided to try to fix the warble issue.
First I used a contact cleaner to clean and lubricate all of the variable resistors on the motor control board and then setup the turntable on a stand so I could get under it and adjust the resistors while the plater was turning. It still warbled. I made sure to set the variable resistors back to their original positions after turning them back and forth to clean the contacts.
I obtained a Hantek oscilloscope and connected it to my MAC Air laptop. Then I started to learn how to measure the test points on the motor control board using Figure 10-2 on page 10 of service manual. I found a couple of issues with voltage and the sawtooth pattern that regulates the 33 RPM speed. I heard that electrolytic capacitors can go bad over time. I couldn't measure capacitance while the capacitor was soldered on the board, so I replaced all the electrolytic capacitors on the board. Testing them after removing each of them and against the new capacitor before soldering it in I found that they were pretty close to specs. After installing the new caps the turntable still warbled.
Now I surmised that one or more of the transistors used in Saw Tooth generator and comparator circuits were not in specs. I replaced 4 transistors (Q2, Q3, Q4, Q5). That still didn't fix the warble. Next I replaced the amplifier transistor, Q1. When I turned the turntable on, both 33 and 45 RPM were running fast. The turntable was still on the stand so I could adjust the 33 and 45 RPM variable resistors on the board from underneath the turntable. I centered the manual pitch control knob and then adjusted the VR1 (33 RPM) and VR2 (45 RPM) while viewing the stripes through the window just below the platter. This time I could get the speed perfect with no warble!
At this point I don't know if the last transistor I replaced (amplifier Q1) fixed it or if the combination of replacing all five fixed the issue. But I am happy that it works now and I can enjoy my collection of albums.
BTW the service manual page 11 noted that the VR7 and VR8 variable resistors are for the 33 and 45 RPM adjustments respectively. VR7 and VR8 are not on the motor control board but I found the VR1 and VR2 are the two that adjust the speeds.
The boards uses a lot of wire wrap posts for connections so be very careful when removing and flipping the board over to remove and replace components.
When I started this project I couldn't find any information on this turntable to help diagnose a speed problem. I hope this post will help someone else.