zastin17
Active Member
So, about a month ago, I was on craigslist and saw a pair of very nice ESS AMT1as for sale for $150. I made a lot of people jealous before picking them up as they said its a once in a lifetime opportunity. I snagged them as fast as I could drive. The seller had them going on his front porch as I drove up in awe. I walked up, heared those tweeters, then instantly gave him the money, and left with them. The first thing I noticed when I got home was the tweeter was insanely bright with incredible detail, but barley any bass. Luckily I fixed this issue. I believe this is a very early ESS AMT1 based on the port, 10inch woofer, and old style Heils.
Here is my crazy person restoration story, Please do not repeat.
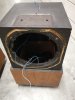
When I got them home, the port was stuffed with stuffing, and the cab was empty. Interesting decision on the owners part. There where a couple gaps on several edges from where the wood pyramid was fitted to the bottom baffle and it pulled apart. I gutted the cabs, removed everything including the Heil. I filled the gaps with wood glue, and also reinforced the bottom baffle edge. Then clamped everything very tight and flush, cleaning up any oosing glue on the edges. Used probably 10 bar clamps per cab to tighten everything up. Once it was dry, I removed the clamps, and everything held, the cab felt perfectly solid at this point. I took this opportunity to repaint the pyramid, and the bottom, as the old paint has faded immensely. I taped all the edges, stuffed any holes with tape, cut a circle the same size out of cardboard to cover the woofer hole. It came out perfect, No one would be able to even tell it was even repainted, as I can't. I have a ton of JBL Acoustic fill material I removed from some blown speakers. Its hard to work, with and it sheds a lot of fibers, so I evenly distributed a lot of it on the walls, then used some Pollyfill sheets to secure it against the cabinate wall making a Aucustafill sandwich. This worked really well as the bass was as perfect as designed after this installation. No matter how loud I have the volume, I hear no resonance or distortion in the bass portion, very clean, unlike when I first got them.
The crazy part. The Heil:
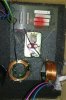
The Diaphragms are perfect. The pleats are flawless. No crushed pleats. This version had the squishy resonance glue installed. The Heils magnetic plate slacks where very oxidized. While studying the Heil, I noticed a manufacturing error. There where 3 extra plates installed onto one stack, they alternate, short, long, short, long, But there was several duplicates, 2 short 2 long. Because I am a crazy person, I wanted to fix this flaw. I looked up how the Heil is assembled finding a diagram. There are 2 half's to the Heil. Both halves are Epoxied together. Oh great, fun fun.. I removed the diaphragm, removed the diaphragms plastic backing on the bottom of the tweeter, and all the putty. I took a soft touch screwdriver and carefully smacked all the edges of the Heil while applying pressure, sure enough, after a few smacks, it broke in half. At this point I was holding 2 halves of the beloved Heil. I wasn't sure how the plate stacks where held in there, I found out they are held in simply by the insanely powerful magnets. I tried prying the stack with plastic driver, struggling for about 30 minutes I used 2 hands, slowly, prying, the stack came off in one piece.
This is when I discovered another problem, I very very thin aluminum rod holds the stack together while also being crimped at both ends. As you know, aluminum is very soft. So this took some serious guts. I twisted the top plate until the crimp became straight and allowed me to remove the plate. I removed every single plate, the started reinstalling them onto the rod correctly. At the end of it, I was left with 3 extra, unused plates. Luckily this was a good thing, as I gave me some extra wiggle room on the aluminum rod. I put the stack on a vice, crimping both ends again, then I removed, took a Philips driver and waked both ends one more time making sure the crimp was flush. At this time I had a perfectly fine stack removed so I had a reference. I crimped it tighter and tighter until it was the same as the other stack. To reinstall was a nightmare, I hard to line up the stack with the plastic lip, while also avoiding the immense magnetic force wanting the pull the stack from my hands, I managed to crush a finger tip while installing the final one, as I was yanked into place while my finger was still there, it looked perfect. After a few minutes looking the the halves, I forgot which one I even repaired.
I took some slow set clear epoxy, applied to the each half, then because both halves repel each other, I had to use my feet the press the halves together so the notches lined up, then with my hands installed 2 clamps. After pressing together, I applied epoxy to all the locations that the factory originally installed. At the same time, I also reapplied epoxy to the other tweeter just to reinforce the old glue. After a day, I removed the clamps and it held perfectly. I also took this time to rust treat the stacks with Navel jelly, After treatment, I taped up the tweeter to prevent scratches, and used a 3M pad to clean up the stack leaving them shiny and new looking.
The Ad listing photo (BEFORE)


Here is my crazy person restoration story, Please do not repeat.
When I got them home, the port was stuffed with stuffing, and the cab was empty. Interesting decision on the owners part. There where a couple gaps on several edges from where the wood pyramid was fitted to the bottom baffle and it pulled apart. I gutted the cabs, removed everything including the Heil. I filled the gaps with wood glue, and also reinforced the bottom baffle edge. Then clamped everything very tight and flush, cleaning up any oosing glue on the edges. Used probably 10 bar clamps per cab to tighten everything up. Once it was dry, I removed the clamps, and everything held, the cab felt perfectly solid at this point. I took this opportunity to repaint the pyramid, and the bottom, as the old paint has faded immensely. I taped all the edges, stuffed any holes with tape, cut a circle the same size out of cardboard to cover the woofer hole. It came out perfect, No one would be able to even tell it was even repainted, as I can't. I have a ton of JBL Acoustic fill material I removed from some blown speakers. Its hard to work, with and it sheds a lot of fibers, so I evenly distributed a lot of it on the walls, then used some Pollyfill sheets to secure it against the cabinate wall making a Aucustafill sandwich. This worked really well as the bass was as perfect as designed after this installation. No matter how loud I have the volume, I hear no resonance or distortion in the bass portion, very clean, unlike when I first got them.
The crazy part. The Heil:
The Diaphragms are perfect. The pleats are flawless. No crushed pleats. This version had the squishy resonance glue installed. The Heils magnetic plate slacks where very oxidized. While studying the Heil, I noticed a manufacturing error. There where 3 extra plates installed onto one stack, they alternate, short, long, short, long, But there was several duplicates, 2 short 2 long. Because I am a crazy person, I wanted to fix this flaw. I looked up how the Heil is assembled finding a diagram. There are 2 half's to the Heil. Both halves are Epoxied together. Oh great, fun fun.. I removed the diaphragm, removed the diaphragms plastic backing on the bottom of the tweeter, and all the putty. I took a soft touch screwdriver and carefully smacked all the edges of the Heil while applying pressure, sure enough, after a few smacks, it broke in half. At this point I was holding 2 halves of the beloved Heil. I wasn't sure how the plate stacks where held in there, I found out they are held in simply by the insanely powerful magnets. I tried prying the stack with plastic driver, struggling for about 30 minutes I used 2 hands, slowly, prying, the stack came off in one piece.
This is when I discovered another problem, I very very thin aluminum rod holds the stack together while also being crimped at both ends. As you know, aluminum is very soft. So this took some serious guts. I twisted the top plate until the crimp became straight and allowed me to remove the plate. I removed every single plate, the started reinstalling them onto the rod correctly. At the end of it, I was left with 3 extra, unused plates. Luckily this was a good thing, as I gave me some extra wiggle room on the aluminum rod. I put the stack on a vice, crimping both ends again, then I removed, took a Philips driver and waked both ends one more time making sure the crimp was flush. At this time I had a perfectly fine stack removed so I had a reference. I crimped it tighter and tighter until it was the same as the other stack. To reinstall was a nightmare, I hard to line up the stack with the plastic lip, while also avoiding the immense magnetic force wanting the pull the stack from my hands, I managed to crush a finger tip while installing the final one, as I was yanked into place while my finger was still there, it looked perfect. After a few minutes looking the the halves, I forgot which one I even repaired.
I took some slow set clear epoxy, applied to the each half, then because both halves repel each other, I had to use my feet the press the halves together so the notches lined up, then with my hands installed 2 clamps. After pressing together, I applied epoxy to all the locations that the factory originally installed. At the same time, I also reapplied epoxy to the other tweeter just to reinforce the old glue. After a day, I removed the clamps and it held perfectly. I also took this time to rust treat the stacks with Navel jelly, After treatment, I taped up the tweeter to prevent scratches, and used a 3M pad to clean up the stack leaving them shiny and new looking.
The Ad listing photo (BEFORE)