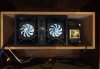
Hi, i would like to share my project with you.
A while ago i got myself a PL400 and short while later i dis full WOPL rebuild. I have AR98LSI 4ohm speaker which made my PL hot at high volume. I decided to add a fan to help cool things down. I realized that there is nothing on the market to make this work easily.
The idea came to my head to design and make my own fan housing and 3D print it.
My design is a three piece assembly.
1. 80mm fan housing for right channel
2. bridge/control piece
3. 80mm fan housing for Left channel
I think, 80 mm fans are best since i have my PL400 in wooden cabinet and larger fan would obstruct hot air going away form heat sinks. For racks and amps without a case 110mm (max size that would fiit) fans would be a better option since hot air can escape on top and bottom of the unit. Fans can be install to push or pull air. I have mine pushing air IN.
Bridge piece has two purposes.
1. it connects left and right housings together.
2. it holds control board, power switch, 12vdc input connector, temperature probe, fan failure buzzer
The idea was to make it simple but officiant.
Every fan housing has two slots where two heatsink fins go into and keep it in place, no screws/bolts needed.
Fan control board uses temp. probe to control fans speed based on the heat sinks temperature.
Failure buzzer alarms when fans stop during normal operation.
External 12vdc power supply provides power and it powers up when i have my power amp turned on via pre-map switched power outlets.
Here is the 3d design:
Right Channel Housing


Left Channel Housing


Control Bridge


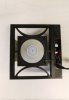
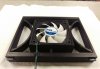
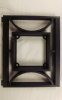
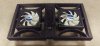
Final ABS 3D print:


A while ago i got myself a PL400 and short while later i dis full WOPL rebuild. I have AR98LSI 4ohm speaker which made my PL hot at high volume. I decided to add a fan to help cool things down. I realized that there is nothing on the market to make this work easily.
The idea came to my head to design and make my own fan housing and 3D print it.
My design is a three piece assembly.
1. 80mm fan housing for right channel
2. bridge/control piece
3. 80mm fan housing for Left channel
I think, 80 mm fans are best since i have my PL400 in wooden cabinet and larger fan would obstruct hot air going away form heat sinks. For racks and amps without a case 110mm (max size that would fiit) fans would be a better option since hot air can escape on top and bottom of the unit. Fans can be install to push or pull air. I have mine pushing air IN.
Bridge piece has two purposes.
1. it connects left and right housings together.
2. it holds control board, power switch, 12vdc input connector, temperature probe, fan failure buzzer
The idea was to make it simple but officiant.
Every fan housing has two slots where two heatsink fins go into and keep it in place, no screws/bolts needed.
Fan control board uses temp. probe to control fans speed based on the heat sinks temperature.
Failure buzzer alarms when fans stop during normal operation.
External 12vdc power supply provides power and it powers up when i have my power amp turned on via pre-map switched power outlets.
Here is the 3d design:
Right Channel Housing
Left Channel Housing
Control Bridge
Final ABS 3D print:
Attachments
-
 Right fan 1.jpg23.4 KB · Views: 20
 -
 Right fan 2.jpg26.3 KB · Views: 19
 -
 Left fan1.jpg21 KB · Views: 20
 -
 Left fan 2.jpg23.4 KB · Views: 20
 -
 power brridge 2.jpg13.3 KB · Views: 20
 -
 power brridge 1.jpg16.5 KB · Views: 20
 -
 PL 400 Fan Print 1s.jpg26.9 KB · Views: 21
 -
 PL 400 Fan Print 2s.jpg118.2 KB · Views: 21
 -
 PL 400 Fan Print 3S.jpg30.7 KB · Views: 20
 -
 Phase Linear 400 Fans 2s.jpg109.1 KB · Views: 23
Last edited: