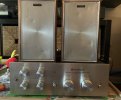
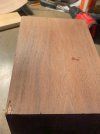
So... I picked up these little fatties about 4 months ago along with the KA-3700 pictured from GoodwillFinds in good ol' Wisconsin. My guess is they were donated by the same individuals as they had matching log and date tags, which is great since the amp was in good shape and never abused. Overall, everything is in great shape: Drivers are like new, cabinets were straight, however, the veneer was so old and dry that it began to fall off in chunks and splinter.
From the looks, these appear to be the earlier versions from 1964/1965.

The tools required were minimal: PH#1/PH#2 screwdrivers, 1/4" ratchet with 6mm/8mm deep sockets and 6" minimum wobble extension.
First step was to completely disassemble each cabinet. Start by removing the back panel/crossover board (PH#2). Each is held in place by 10 screws

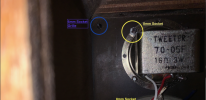
Each driver is held in place by a screw (acts as stud) that is threaded into the metal baffle from the front. An 8mm nut is then threaded onto the screw/stud from the inside to hold each driver in place.


With the drivers removed, you can then remove the grille from the inside. Use the 6mm socket

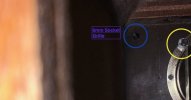
BE EXTREMELY CAREFUL WHEN PUSHING THE GRILLE OUT FROM THE INSIDE. An adhesive or sealant was used around the stud to keep the cabinet airtight. Best way to pop them out is to prop the cabinet up with the baffle facing down and gently tap the stud from the inside with wooden dowel and rubber mallet. I plan on designing a new grille frame with magnets so it can be removed easily for displaying the drivers.
With the grille out you can then remove the 4 pieces of grille trim around the inside edge of the facing lip using the PH#1 screwdriver.

Next post will be the new veneer
From the looks, these appear to be the earlier versions from 1964/1965.
The tools required were minimal: PH#1/PH#2 screwdrivers, 1/4" ratchet with 6mm/8mm deep sockets and 6" minimum wobble extension.
First step was to completely disassemble each cabinet. Start by removing the back panel/crossover board (PH#2). Each is held in place by 10 screws
Each driver is held in place by a screw (acts as stud) that is threaded into the metal baffle from the front. An 8mm nut is then threaded onto the screw/stud from the inside to hold each driver in place.
With the drivers removed, you can then remove the grille from the inside. Use the 6mm socket
BE EXTREMELY CAREFUL WHEN PUSHING THE GRILLE OUT FROM THE INSIDE. An adhesive or sealant was used around the stud to keep the cabinet airtight. Best way to pop them out is to prop the cabinet up with the baffle facing down and gently tap the stud from the inside with wooden dowel and rubber mallet. I plan on designing a new grille frame with magnets so it can be removed easily for displaying the drivers.
With the grille out you can then remove the 4 pieces of grille trim around the inside edge of the facing lip using the PH#1 screwdriver.
Next post will be the new veneer