• The move to the new server is done. There are some software and database maintenance updates in process. This has us passing the hat around to help out. We appreciate any donations. Seriously, even a dollar helps. The payment page may be found here - https://www.audiokarma.org/support.html

Pioneer CS-99A's Recaped

Big Daddy B

It is what it is
:banana: First of all I would like to say Thank You to all the great help I have received over the years from so many of you on AK!

On to the subject at hand...To recap or not to recap? That is the question that many have asked,wondered,speculated,discussed...ect. ect. Many have different opinion's when it comes to the Pioneer CS-99A's...Agreed? From what I can tell it is mostly a love/hate thing, With me before I found my set locally to buy I just loved the way they looked! I had never heard them before I just knew I had to have them!

Well I got them home and started doing the listening thing...Not that impressive I thought and I was bummed. So I took them off the solid state gear and hooked them to my tube rig...Yeah that's much better!

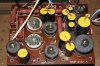
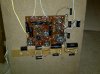
Here is the bottom line I am certainly not the first nor will I be the last to recap these babies, but I can tell you from my experience it was a vast improvement! It's not easy to do however, plus you really are not going to find the right value of caps to fit back on the board. I did mine about 2 months ago and they keep sounding better every day! Check out the pic. :music:
 

Attachments

  • untitled.jpg
    untitled.jpg
    121.3 KB · Views: 473
Register to hide this ad
Wow. That's a much bigger job than I expected. I forgot that there are about 20 drivers in each cabinet. Ha.

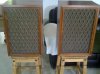
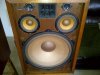
I'd like to see a picture of the front. I remember the CS-99a's being one of the prettiest speakers out there. Walnut veneered baffle?
 
So what brand caps are those ? Where did you purchase them ? I have a set of 99As and was thinking about recapping them just never got around to it .

Thanks

Chris
 
Here is how I did mine. I also added 5 way binding posts. I use Daytons from Parts Express for all my crossovers.
 
Last edited:
:banana: First of all I would like to say Thank You to all the great help I have received over the years from so many of you on AK!

On to the subject at hand...To recap or not to recap? That is the question that many have asked,wondered,speculated,discussed...ect. ect. Many have different opinion's when it comes to the Pioneer CS-99A's...Agreed? From what I can tell it is mostly a love/hate thing, With me before I found my set locally to buy I just loved the way they looked! I had never heard them before I just knew I had to have them!

Well I got them home and started doing the listening thing...Not that impressive I thought and I was bummed. So I took them off the solid state gear and hooked them to my tube rig...Yeah that's much better!

Here is the bottom line I am certainly not the first nor will I be the last to recap these babies, but I can tell you from my experience it was a vast improvement! It's not easy to do however, plus you really are not going to find the right value of caps to fit back on the board. I did mine about 2 months ago and they keep sounding better every day! Check out the pic. :music:

I used Dayton 1%...and to achive the right values I had to double up on four of the seven! I see "loose ends" was able to find ones that fit his board, nice job! I ordered mine from P.E. as well, cost me right at a "c" note with shipping. Also did you guys notice the difference in the pot's and some of the other feature's? Study the pic's between mine and "loose ends"...somewhere along the line Pioneer used two different crossovers in the cs-99a's! Mine believe it or not had one of each style. So I bought another one on ebay to match the one I pictured.

BTW I still contend that these bad boys sound there very best when hooked to my tube rig. Here are a couple of more pic's including one of my Maggie's I pulled and modified...I am currently using this 9302-00 she has a matched quad of 1959 or 1960 vintage Amperex "D" getter 6bq5/el84's and a matched pair of Mullard 6eu7's on the deck and along with my rebuilt Dynaco Pat 4 as the preamp...Sounds soooo sweet!:music:
 

Attachments

  • CS-99A FRT VIEW GRILL.jpg
    CS-99A FRT VIEW GRILL.jpg
    81.6 KB · Views: 202
  • CS-99A GRILL OFF 1.jpg
    CS-99A GRILL OFF 1.jpg
    76.7 KB · Views: 229
  • Magnavox 9302-00.jpg
    Magnavox 9302-00.jpg
    122.3 KB · Views: 246
Member Noodle sent me a pm asking me to post a cap list. Big Daddy B used the Dayton 1% but I don't see a need to spend the extra $. Remember the original electrolytics were 20% caps. This means that a 10uf, 20% cap can be anywhere between 8uf and 12uf (20% of 10=2). The Dayton polypropylene are great caps for the price and everyone I have ever tested is right on.

1.0uf- 027-410 $1.18
2.0uf- 027-414 $1.48
4.7uf- 027-422 $2.57
7.0uf- use a 4.0uf and 3.0uf soldered in parallel 3.0uf- 027-418 $1.99(2)
you will need two 7.0uf for each speaker 4.0uf- 027-421 $2.01(2)
14.0uf- use a 12.0uf and 2.0uf in parallel 12.0uf- 027-430 $4.81
2.0uf- 027-414 $1.48
16.0uf- use a 12.0uf and 4.0uf in parallel 12.0uf- 027-430 $4.81
4.0uf- 027-421 $2.01

That's a total of $26.34 per speaker. I didn't replace any resistors but I did lift one leg and measure all of them and they were right in spec. I only replace resistors that measure out of spec but I do test them all. And remember to clean the pots.

The second question member Noodle asked me if I thought adding the length of wire to the caps to mount them as Big Daddy B did the answer is no. Sometimes I have to make boards to mount caps to and secure them to the inside of the cabinet.

I have included a pic of the wiring diagram .

Roy
 
Last edited:
Here is how I did mine. I also added 5 way binding posts. I use Daytons from Parts Express for all my crossovers.

Looking at the where the 7uf cap(top middle pic view) used to be, is the 4uf and 3uf cap in parallel or series?
 

Attachments

  • 99a board.jpg
    99a board.jpg
    99.6 KB · Views: 272
Parallel. All of the caps that have to be combined to achieve a certain value are soldered in parallel. I bend all the leads with a needle nose first. Then I glue the caps together (the dark area in my crude drawing). Next I cut and solder the top leads together and run the long lead from this splice between the two caps and secure into the glue between the caps. Bend and start the bottom leads through the holes in the board, big glob of hot melt glue and push down and hold the cap in place until the glue dries. Turn the board over and trim and solder the leads.
 
Last edited:
Parallel. All of the caps that have to be combined to achieve a certain value are soldered in parallel.

I understand the parallel combination to achieve the required capacitance, no problem.:yes:
But what's going on under the caps, where they attach to the board?
I'm just having the damnedest time trying to understand what's going on at the board level.
I guess I'm asking which leads from the caps are passing thru the holes?
 
Caps in Parallel

loose ends: The picture you show in post #8 shows the two caps in SERIES not Parallel.
If they were in parallel, you would have one lead from the top of the 2 joined capacitors and one lead from the bottom of the two joined capacitors.
 

Attachments

  • Parallel Caps.JPG
    Parallel Caps.JPG
    8.8 KB · Views: 158
You are right. My first attempt at using paint. Hear is the correct attempt at what I do. You can't see it in my photo but I run the lead from the connection of the top leads from the two caps down the middle of the area where the caps are hot glued together securing the lead in the glue.
 
Last edited:
Ok, that makes sense.:yes:
BTW what did you replace the stock speaker terminals with (part #?)?
The stock ones are kind of flakey :thumbsdn:IMHO
Thanks:music:
 
Hello Colleagues! New Member here who recently acquired a pair of Pioneer CS-99A's. There is little to no bass on both speakers. Can someone provide a link to the CS-99A Crossover Network Schematic? I have searched Web with zero results. Thanks in advance!
David
NorCal
 
Back
Top Bottom