klamsoss
Be willing to fail and try again.
I picked this up for small money because it was in rough shape and I figured I could learn some stuff while restoring it and if I ran into a dead end or mucked something up, it wasn't a big loss.
It follows the popular, simple design of sprung chassis, belt driven by a synchronous AC motor. Nothing automatic here except the tonearm triggers the motor start. One little thing I thought was cool, but now realize is crap is that there are two little holes under the platter for oil. These lead to little string lined tubes that go to the motor bearings. Idea being that you don't have to disassemble the thing to oil the motor bearings, just a few drops and the string will wick it right to the bearing. Great idea, right?
WRONG
These decent but cheap tables were bought by decent but cheap people who probably didn't know what type of oil to use and weren't likely to spend extra dough on it IF they did. Consequently, in my case, they apparently used whatever bacon grease or crank case oil they had laying around.
Anyway.
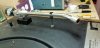
The dustcover has a crack in it but is in half decent shape and I was able to glue the crack well enough. It's never going to win a beauty contest, but it works.
The vinyl veneer is peeling from some of the edges around the plinth and I've been trying to glue it back without ending up with wrinkles or a bunch of overhanging glue. I'm having mixed results. Garden variety super glue is what I tried first, and it doesn't bond well to wood. I tried some gorilla glue (not the foaming kind) which worked okay, but not great. Wood glue didn't work at all on top of the cyanoacrylate. Work in progress...
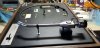
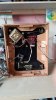
I pulled the bottom off to see what the guts looked like and found that the shredded foam of about half a couch had been crammed in there, along with some straw and other telltale signs of mice. The power cord and RCA leads had been chewed up but were easy fixes just by cutting the chewed parts off and soldering the good section of wire to the appropriate contacts. Tonearm wires were also chewed, but we'll get to that in a bit.
I've had excellent help from @AudioWizard getting the motor working properly. It's not terribly complicated to take apart. As always, make marks, take pictures, lay stuff out carefully so you can put it al back together properly...
1. You want to measure the distance from the top of the spindle pulley to the motor body before you remove it. It's not terribly difficult to get the height right again, but it will take some doing and the little set screw is not the easiest to tighten and loosen a bunch of times. The pulley has a slight bulge on which the belt will center. If that bulge isn't in the right height, the belt will rub on the guides of the speed selector fork.
2. Clean out all the old oil and crud but don't go wild with degreaser because those dumb little oil ports led to sponges around the motor bearings. Those sponges will hold the degreaser and break down the new oil.
Once you have it reasonably clean, I use a q-tip with some steel wool spun onto it, and put the q-tip in a cordless drill and use that to polish the bearings and clear off any patina. Just be extra careful to get any and all wisps of steel wool off before reassembly.
3. Once you have everything clean, don't use mineral oil (3 in one) on the motor spindle or bearings. Instead, use a light oil (I used ProGold bike chain oil). It won't gum up, and it will get where it needs to go without attracting dust and dirt. A drop or two is all you need.
4. as with most of these types of motors, reassemble it carefully and don't tighten anything more than finger tight until you verify that the armature and spindle rotate freely. Then work your way around tightening the screws, checking that rotation is free as you go.
The platter spindle was disgusting and had a little more play than I think it should. Honestly, if I was going to use this for focused listening, I would probably have had to replace it.
Don't lose the ball bearing, OR just plan on replacing it (I did, because I have bearings around from rebuilding bike parts). I did the same steel wool drill thing to polish the inside of the spindle bearing. 3 in one is probably okay there, but I used the bike oil again and then put a light film of grease on the upper portion of the spindle to try and take up some of the play. I put a drop of light oil on top of that, too, to thin it out slightly. The grease will stay put better than a liquid oil, and it took up some of the play in the bearing.
I got the belt on, and fiddled with the pully height until I got it right.
Now I need to replace the tonearm wires and fix the cueing arm height. See you in a few, on the next post. I'll have questions.
It follows the popular, simple design of sprung chassis, belt driven by a synchronous AC motor. Nothing automatic here except the tonearm triggers the motor start. One little thing I thought was cool, but now realize is crap is that there are two little holes under the platter for oil. These lead to little string lined tubes that go to the motor bearings. Idea being that you don't have to disassemble the thing to oil the motor bearings, just a few drops and the string will wick it right to the bearing. Great idea, right?
WRONG
These decent but cheap tables were bought by decent but cheap people who probably didn't know what type of oil to use and weren't likely to spend extra dough on it IF they did. Consequently, in my case, they apparently used whatever bacon grease or crank case oil they had laying around.
Anyway.
The dustcover has a crack in it but is in half decent shape and I was able to glue the crack well enough. It's never going to win a beauty contest, but it works.
The vinyl veneer is peeling from some of the edges around the plinth and I've been trying to glue it back without ending up with wrinkles or a bunch of overhanging glue. I'm having mixed results. Garden variety super glue is what I tried first, and it doesn't bond well to wood. I tried some gorilla glue (not the foaming kind) which worked okay, but not great. Wood glue didn't work at all on top of the cyanoacrylate. Work in progress...
I pulled the bottom off to see what the guts looked like and found that the shredded foam of about half a couch had been crammed in there, along with some straw and other telltale signs of mice. The power cord and RCA leads had been chewed up but were easy fixes just by cutting the chewed parts off and soldering the good section of wire to the appropriate contacts. Tonearm wires were also chewed, but we'll get to that in a bit.
I've had excellent help from @AudioWizard getting the motor working properly. It's not terribly complicated to take apart. As always, make marks, take pictures, lay stuff out carefully so you can put it al back together properly...
1. You want to measure the distance from the top of the spindle pulley to the motor body before you remove it. It's not terribly difficult to get the height right again, but it will take some doing and the little set screw is not the easiest to tighten and loosen a bunch of times. The pulley has a slight bulge on which the belt will center. If that bulge isn't in the right height, the belt will rub on the guides of the speed selector fork.
2. Clean out all the old oil and crud but don't go wild with degreaser because those dumb little oil ports led to sponges around the motor bearings. Those sponges will hold the degreaser and break down the new oil.
Once you have it reasonably clean, I use a q-tip with some steel wool spun onto it, and put the q-tip in a cordless drill and use that to polish the bearings and clear off any patina. Just be extra careful to get any and all wisps of steel wool off before reassembly.
3. Once you have everything clean, don't use mineral oil (3 in one) on the motor spindle or bearings. Instead, use a light oil (I used ProGold bike chain oil). It won't gum up, and it will get where it needs to go without attracting dust and dirt. A drop or two is all you need.
4. as with most of these types of motors, reassemble it carefully and don't tighten anything more than finger tight until you verify that the armature and spindle rotate freely. Then work your way around tightening the screws, checking that rotation is free as you go.
The platter spindle was disgusting and had a little more play than I think it should. Honestly, if I was going to use this for focused listening, I would probably have had to replace it.
Don't lose the ball bearing, OR just plan on replacing it (I did, because I have bearings around from rebuilding bike parts). I did the same steel wool drill thing to polish the inside of the spindle bearing. 3 in one is probably okay there, but I used the bike oil again and then put a light film of grease on the upper portion of the spindle to try and take up some of the play. I put a drop of light oil on top of that, too, to thin it out slightly. The grease will stay put better than a liquid oil, and it took up some of the play in the bearing.
I got the belt on, and fiddled with the pully height until I got it right.
Now I need to replace the tonearm wires and fix the cueing arm height. See you in a few, on the next post. I'll have questions.
Attachments





Last edited: