• The move to the new server is done. There are some software and database maintenance updates in process. This has us passing the hat around to help out. We appreciate any donations. Seriously, even a dollar helps. The payment page may be found here - https://www.audiokarma.org/support.html

Pioneer PL-570 restoration-help/questions

Will2225

AK Subscriber
Subscriber
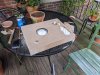
So today I picked up a very rough condition pioneer pl-570, thankfully for only a hundred bucks!

When I picked it up the turntable would start automatically without pressing anything or moving the tonearm. I messed with some things underneath and managed to get the turntable to start when I pick up the headshell and it turns off when I move it back. Success!

The quartz lock works perfectly, speed adjustment works well, both 33 and 45 rpm speeds work well and the platter spins freely.

There was an issue with friction in the tonearm that I managed to adjust by very slightly bending one part.

None of the automatic functions work at all most likely due to a dead motor. I found a seller on ebay is selling replacement motors specifically for this turntable. I'm hoping it will fix a few of these issues.

Also the on and off buttons don't work at all. Would this also be related to the dead motor?

The table makes a clicking motor at the end of the record as the automatic functions try to engage but nothing happens.

Any suggestions on what to lubricate and clean on the turntable? Also how to fix the slight damage on the corners before re-veenering? I already stripped off the old veneer because it was in terrible shape.

I'll upload more photos as I go along.
 

Attachments

  • PXL_20210925_191105599.MP.jpg
    PXL_20210925_191105599.MP.jpg
    128.5 KB · Views: 73
  • PXL_20210925_191115078.MP.jpg
    PXL_20210925_191115078.MP.jpg
    86.1 KB · Views: 64
  • PXL_20210925_191120170.MP.jpg
    PXL_20210925_191120170.MP.jpg
    57.9 KB · Views: 61
  • PXL_20210925_191125442.MP.jpg
    PXL_20210925_191125442.MP.jpg
    57 KB · Views: 64
  • PXL_20210925_191133868.MP.jpg
    PXL_20210925_191133868.MP.jpg
    84.5 KB · Views: 66
Register to hide this ad
Ive started the process of breaking down the turntable in order to prep it for the veneer. I've taken lots of photos of all the parts, separated them into their own specific separate bags and removed the tonearm and almost everything else last night. Here's a photo of the turntable getting prepped and having the corners fixed.

I'm going to attempt to use zebrawood veneer on the plinth finished in maybe Tung oil or Danish oil.
 

Attachments

  • PXL_20210930_173439253.jpg
    PXL_20210930_173439253.jpg
    191.7 KB · Views: 56
I wasn't quite sure how to remove the entire bottom plate from the turntable, so I'll either try to veneer it as is or have another go at removing the entire sub assembly.
 
Just wanted to post an update on my progress. I finished veneering the plinth and I installed a new timing motor that I bought on eBay. It was very expensive but it seems to have helped with some of the issues.

Unfortunately I broke two of the tonearm wires when reinstalling the arm and I need to rewire it. I posted a second thread asking for help just with this issue, but if anyone has any advice that'd be great.

I managed to get some of the automatic functions working again correctly. Although the tonearm wires are inoperative I did try patching the cables with Ethernet cord wire and managed to get sound again but with a high pitched buzzing. I'm going to just rewire the whole tone arm.

Currently I managed to get the start function working and the stop function working but the automatic pick up at the end of the record doesn't work and the repeat function also doesn't work. Could this be caused by a dirty sensor?

Also I did the plinth in zebrawood with a teak oil finish. I kind of regret not doing Danish oil because the finish is matt with no gloss. I've thought about disassembling the table and applying furniture wax but I'm not sure if this is a good idea because I'd most likely have to wax the table again at a future stage.
 

Attachments

  • PXL_20211002_193249382.MP.jpg
    PXL_20211002_193249382.MP.jpg
    146.8 KB · Views: 60
  • PXL_20211003_064805835.MP.jpg
    PXL_20211003_064805835.MP.jpg
    118.5 KB · Views: 63
  • PXL_20211004_032629711.MP.jpg
    PXL_20211004_032629711.MP.jpg
    157.5 KB · Views: 64
  • PXL_20211005_201220125.MP.jpg
    PXL_20211005_201220125.MP.jpg
    141.5 KB · Views: 67
Nice table - and a nice veneer job too! I have it's manual sibling, the PL-550.

Regarding the automatic functions, I recall reading about a plastic gear in the mechanical automation assembly that gets brittle with age and can crack - but I think failure often occurs from people trying to use the auto functions before a thorough cleaning and re-lube of all the parts.

IIRC, there are 4 ICs in this model (possibly at least one is part of the automation circuitry?). Replacements aren't the easiest to find, so it's probably worth recapping the table for peace of mind.
 
I have one. I had a rotational rub, when I got it. I polished the bottom plastic plate below the spindle. Removed a wear spot. Replaced old sealing o'ring. But o'ring compression distorted plate. Took time to flatten out. Doesn't leak the spindle oil now, and no rubbing. I think removing the wear spot, raised spindle enough to eliminate rub. It was a longer frustrating saga than this blurb. I did an AK thread on it. (Pioneer PL-570. Now antiskate not working.)
I lubed the mechanisms the best I could without disassembling the gear boxes.

Nice veneer work. A job to be proud of.

I use mine in semi-automatic fashion. To reduce wear on auto mechanism.
 
Last edited:
Thanks guys! I've put a fair amount of work into the table so far and it seems to be paying off. The gear that you've heard of is in the timing motor I believe. I replaced the entire motor with a brand new one I bought off eBay. Very expensive though, cost 90 bucks.

So far the only automatic function that doesn't work is the auto return and the repeat but I think I can figure it out. When I got the table it would start running immediately and none of the automatic functions worked so at least there has been some progress..

Right now, I managed to patch the tonearm cable with some single strands of cat 5. It sounds very good with the nagoaka no 150 cartridge and 200 stylus I'm using but there's a small high pitched buzzing that's only really noticeable on headphones. I tried shortening the length of the replacement wire and the high pitched buzzing nose became a little quieter. I think it's the poor shielding in the cat 5.

I've ordered some cardas tonearm wire and will attempt to patch it again with this. Otherwise I'll rewire the whole tonearm with the cardas. It should be an improvement in the sound but I'm a bit worried about taking on the rewire. It'll be the first time I've done it so any help would be appreciated.
 
Also I've ordered a recap kit and will probably do it. Never recapped anything before but have built a fair amount of kits and am fairly handy with a soldering iron. Seems pretty simple to do on this turntable.
 
So I ended up rewiring the whole arm. First time I attempted it I failed to check for continuity and had to hurry because I had plans. Checked it quickly before leaving and no left channel. Tore it down again tonight and it ended up being an easy fix, the white wire wasn't making a good connection. Resoldered the connection on the tonearm collar. Checked continuity, assembled everything and plugged it in. Works perfectly! Still a very faint buzzing noise but much much better than before. Only noticeable on headphones with the volume very high and no music playing.

The new cardas wire sounds excellent. Definitely an improvement. Not a gigantic difference but enough to make it feel like an upgrade.

For anyone attempting this at a future date, the two extra black grounding wires are connected in two separate places. One is connected to a piece of metal that secures the tonearm tube to the main assembly, sandwiched between the arm tube and the main assembly and screwed from underneath. The other is in a thin piece of metal that is right inside the bottom shaft of the tonearm where the wires come out. Both solder together on the tab with the green wire.


Happy to have made some more progress and to have successfully finished my first tone arm rewire. The volume output seems a little lower than before, not sure why but it sounds very good with no distortion.
 
So the faint buzzing noise was still bothering me a bit, especially during quiet passages while listening with headphones.

I decided to try a different grounding scheme that I read about. I took the two tonearm ground wires and soldered them to the unused solder pad. Then I hooked up a ground wire to a screw near by and soldered that to the pad with the two ground wires. It reduced the high pitched frequency substantially and really helped quiet down any background noise. The noise floor is much better now. In case anyone had this issue while working on one of these, this might help.

The only other thing I did was shorten the wires to the timing motor I had installed.

I'm very happy with the sound quality now, sounds very good with the nagoaka mp150 with mp200 stylus.

Just have to figure out how to get the autoreturn working.
 
I ended up recapping the auto return board and the power supply board and now the turntable is dead silent in quiet passages.

I also reread one of the service manuals and reset the voltage on the auto return board for the auto return. Also adjusted the plate with the sensor at the base of the tonearm.

The auto return now works well but I messed up the metal string wire on the start button and it doesn't pop back in place. This is causing the turntable to be stuck in repeat. I fixed one thing and broke another. Very frustrating.

Any advice on a replacement wire thats connected to the the start button? I need a thin metal wire and was considering 32 gauge galvanized wire.
 
…For anyone attempting this at a future date, the two extra black grounding wires are connected in two separate places. One is connected to a piece of metal that secures the tonearm tube to the main assembly, sandwiched between the arm tube and the main assembly and screwed from underneath. The other is in a thin piece of metal that is right inside the bottom shaft of the tonearm where the wires come out. Both solder together on the tab with the green wire...

Congrats! You have discovered the secret to Pioneer tone arm grounding!
 
Back
Top Bottom