• The move to the new server is done. There are some software and database maintenance updates in process. This has us passing the hat around to help out. We appreciate any donations. Seriously, even a dollar helps. The payment page may be found here - https://www.audiokarma.org/support.html

Pioneer SA-8500 Recap/Rebuild/Restoration/BOM

spence0nasty

New Member
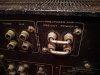
A few days ago I picked up an SA-8500 that my neighbor left on the curb. Other than the fact that it's missing one of its feet it's in okay cosmetic shape. It does have some corrosion on the rear contacts, pre/main jumpers, etc., presumably from being stored in a damp basement or something, but hopefully I'll be able to clean it up.

The guts look better than the outside, no signs of bulging caps or fried components, but when I tested it out it played fine for a few minutes then in the left channel there was a pop and then the sound cut out. If I put it in any of the mono modes it plays and sounds fine, the left channel only cuts out in stereo mode.

I'm going to do a full recap but I'm wondering if I should attempt to debug/fix this issue before or after the recap.

I'll try to post pics and my proposed BOM for the recap as soon as I get the chance.
 
Register to hide this ad
I pulled my recap BOM from mattsd's post in this thread: http://audiokarma.org/forums/index.php?threads/pioneer-sa-8500-rebuild.354908/
I swapped out the ECQ caps with Wima MKS2 caps because the ECQs aren't available anymore. I got the Wima suggestion from this thread: http://audiokarma.org/forums/index....anasonic-ecq-v-capacitor-discontinued.696600/
All parts are in stock from Mouser at the time of posting.
Code:
Misc (Supply Filter Caps)
Misc: C1: 15000 50V ACH: 80-ALT22A153DE063 15000 63V
Misc: C2: 15000 50V ACH: 80-ALT22A153DE063 15000 63V

Code:
Equalizer Amp Assembly (AWF-016-A)

AWF-016-A: C1:  1uF   25v  CSSA:  505-MKS2B041001C00JS 1uF   50v
AWF-016-A: C2:  1uF   25v  CSSA:  505-MKS2B041001C00JS 1uF   50v
AWF-016-A: C7:  330uF 6.8v CEA:   647-UPW1A331MPD      330uF 10v
AWF-016-A: C8:  330uF 6.8v CEA:   647-UPW1A331MPD      330uF 10v
AWF-016-A: C11: 3.3uF 25v  CEANL: 647-UKL1H3R3KDDANA   3.3uF 50v
AWF-016-A: C12: 3.3uF 25v  CEANL: 647-UKL1H3R3KDDANA   3.3uF 50v
AWF-016-A: C17: 100uF 25v  CEA:   647-UPW1E101MED1TD   100uF 25v
AWF-016-A: C18: 220uF 25v  CEA:   647-UPW1E221MPD      220uF 25v
AWF-016-A: C19: 100uF 10v  CEA:   647-UPW1A101MDD6     100uF 10v <- Omitted from parts list in service manual
AWF-016-A: C20: 100uF 10v  CEA:   647-UPW1A101MDD6     100uF 10v <- Omitted from parts list in service manual

Code:
Control Amp Assembly (AWG-034-A)

AWG-034-A: C1:  .33uF 25v CSSA:  505-MKS2B033301A00JF .33uF 50v
AWG-034-A: C2:  .33uF 25v CSSA:  505-MKS2B033301A00JF .33uF 50v
AWG-034-A: C7:  100uF 10v CEA:   647-UPW1A101MDD6     100uF 10v
AWG-034-A: C8:  100uF 10v CEA:   647-UPW1A101MDD6     100uF 10v
AWG-034-A: C13: 2.2uF 25v CSSA:  647-UKL1H2R2KDDANA   2.2uF 50v
AWG-034-A: C14: 2.2uF 25v CSSA:  647-UKL1H2R2KDDANA   2.2uF 50v
AWG-034-A: C15: 4.7uF 25v CSSA:  647-UKL1H4R7KDDANA   4.7uF 50v
AWG-034-A: C16: 4.7uF 25v CSSA:  647-UKL1H4R7KDDANA   4.7uF 50v
AWG-034-A: C23: 4.7uF 25v CEANL: 647-UKL1H4R7KDDANA   4.7uF 50v
AWG-034-A: C24: 4.7uF 25v CEANL: 647-UKL1H4R7KDDANA   4.7uF 50v
AWG-034-A: C25: 10uF  16v CSSA:  647-UKL1C100MDDANA   10uF  16v
AWG-034-A: C26: 10uF  16v CSSA:  647-UKL1C100MDDANA   10uF  16v
AWG-034-A: C29: 100uF 10v CEA:   647-UPW1A101MDD6     100uF 10v
AWG-034-A: C30: 100uF 10v CEA:   647-UPW1A101MDD6     100uF 10v
AWG-034-A: C31: 4.7uF 25v CSSA:  647-UKL1H4R7KDDANA   4.7uF 50v
AWG-034-A: C32: 4.7uF 25v CSSA:  647-UKL1H4R7KDDANA   4.7uF 50v
AWG-034-A: C39: 4.7uF 25v CEANL: 647-UKL1H4R7KDDANA   4.7uF 50v
AWG-034-A: C40: 4.7uF 25v CEANL: 647-UKL1H4R7KDDANA   4.7uF 50v
AWG-034-A: C41: 10uF  16v CSSA:  647-UKL1C100MDDANA   10uF  16v
AWG-034-A: C42: 10uF  16v CSSA:  647-UKL1C100MDDANA   10uF  16v
AWG-034-A: C45: 100uF 10v CEA:   647-UPW1A101MDD6     100uF 10v
AWG-034-A: C46: 100uF 10v CEA:   647-UPW1A101MDD6     100uF 10v
AWG-034-A: C47: 2.2uF 25v CSSA:  647-UKL1H2R2KDDANA   2.2uF 50v
AWG-034-A: C48: 2.2uF 25v CSSA:  647-UKL1H2R2KDDANA   2.2uF 50v
AWG-034-A: C49: 100uF 16v CEA:   647-UPW1E101MED1TD   100uF 25v
AWG-034-A: C50: 100uF 16v CEA:   647-UPW1E101MED1TD   100uF 25v
AWG-034-A: C51: 100uF 16v CEA:   647-UPW1E101MED1TD   100uF 25v
AWG-034-A: C52: 100uF 16v CEA:   647-UPW1E101MED1TD   100uF 25v

Code:
Power Amp Assembly (AWH-042-0)

AWH-042-0: C1:  .47uF 25v  CSSA: 505-MKS2D034701E00JS .47uF 100v
AWH-042-0: C2:  .47uF 25v  CSSA: 505-MKS2D034701E00JS .47uF 100v
AWH-042-0: C3:  33uF  16v  CEA:  647-UPW1C330MDD      33uF  16v
AWH-042-0: C4:  33uF  16v  CEA:  647-UPW1C330MDD      33uF  16v
AWH-042-0: C9:  220uF 6.8v CEA:  647-UPW1A221MED      220uF 10v
AWH-042-0: C10: 220uF 6.8v CEA:  647-UPW1A221MED      220uF 10v
AWH-042-0: C11: 47uF  50v  CEA:  647-UPW1H470MED      47uF  50v
AWH-042-0: C12: 47uF  50v  CEA:  647-UPW1H470MED      47uF  50v

Code:
Switch Circuit Assembly (AWS-083-D)

AWS-083-D: C6:  220uF 63v  CEA:  647-UPW1J221MPD6     220uF 63v
AWS-083-D: C7:  220uF 50v  CEA:  647-UPW1H221MPD      220uF 50v
AWS-083-D: C8:  47uF  16v  CEA:  647-UPW1C470MDD      47uF  16v
AWS-083-D: C9:  220uF 50v  CEA:  647-UPW1H221MPD      220uF 50v
AWS-083-D: C11: 220uF 63v  CEA:  647-UPW1J221MPD6     220uF 63v
AWS-083-D: C12: 220uF 50v  CEA:  647-UPW1H221MPD      220uF 50v
AWS-083-D: C13: 47uF  16v  CEA:  647-UPW1C470MDD      47uF  16v
AWS-083-D: C14: 220uF 50v  CEA:  647-UPW1H221MPD      220uF 50v
AWS-083-D: C16: .22uF 25v  CSSA: 505-MKS2C032201B00JA .22uF 63v
AWS-083-D: C17: .22uF 25v  CSSA: 505-MKS2C032201B00JA .22uF 63v
AWS-083-D: C18: 330uF 6.8v CEA:  647-UPW1A331MPD      330uF 10v
AWS-083-D: C19: 330uF 6.8v CEA:  647-UPW1A331MPD      330uF 10v
AWS-083-D: C20: 100uF 16v  CEA:  647-UPW1E101MED1TD   100uF 25v
AWS-083-D: C21: 2.2uF 25v  CSSA: 647-UKL1H2R2KDDANA   2.2uF 50v
AWS-083-D: C36: 100uF 25v  CEA:  647-UPW1E101MED1TD   100uF 25v
AWS-083-D: C37: 100uF 25v  CEA:  647-UPW1E101MED1TD   100uF 25v
AWS-083-D: C38: 1uF   50v  CEA:  647-UPW1H010MDD1TD   1uF   50v
AWS-083-D: C39: 1uF   50v  CEA:  647-UPW1H010MDD1TD   1uF   50v
AWS-083-D: C40: 10uF  25v  CEA:  647-UPW1E100MDD      10uF  25v
AWS-083-D: C41: 10uF  25v  CEA:  647-UPW1E100MDD      10uF  25v

BOM List:
Code:
Mouser P/N           | Qty.
----------------------------
80-ALT22A153DE063    | 2
505-MKS2B041001C00JS | 2
647-UPW1A331MPD      | 4
647-UPW1A101MDD6     | 8
647-UPW1E101MED1TD   | 8
647-UKL1H3R3KDDANA   | 2
647-UPW1E221MPD      | 1
505-MKS2B033301A00JF | 2
647-UKL1H2R2KDDANA   | 5
647-UKL1H4R7KDDANA   | 8
647-UKL1C100MDDANA   | 4
505-MKS2D034701E00JS | 2
647-UPW1C330MDD      | 2
647-UPW1A221MED      | 2
647-UPW1H470MED      | 2
647-UPW1H221MPD      | 4
647-UPW1J221MPD6     | 2
505-MKS2C032201B00JA | 2
647-UPW1C470MDD      | 2
647-UPW1H010MDD1TD   | 2
647-UPW1E100MDD      | 2

This list is missing the two 15000uF 50v power supply caps. Anyone have suggestions for which caps will fit in the old clamps? <--- Supply caps added and BOM has been updated
 
Last edited:
What is the diameter of the clamps? and height of the existing ecap, terminals. That will make the selection process easier.
 
Any Filter caps I'd increase the voltage to 63V. Right now the rails are spec'ed at +44V and -45V. With a 50V cap back in the mid to late 80's was ok, but with today's increased wall voltages you're playing with maybe 2-3 volts difference. Increasing to 63V caps will give you some Headroom in case the B+ or B- is higher than normal.
 
Okay, thanks for the tips, guys. Just to be clear - For a supply filter cap I shouldn't exceed the 50V spec by an awful lot so sticking around 63V would be a good idea, however, I can go as high as I please in capacitance to get the right canister size, correct?

I won't be able to measure the clamps until tomorrow night, rcs16, so I'll post an update (with pics) then. I'm probably going to put together a BOM for the trouble transistors called out in this thread, too.
 
Last edited:
Increasing capacitance, and voltage to an extent. Some guys go hell bent for leather, but conservatively you shouldn't go more than 50%-100% capacitance more than original in this case. 3300uf 63v would be max I'd toss at it. You CAN gut the original cans, and stuff the new can's INSIDE and re-install the original shells. Voltage you could go up to 80V-100V, but the extra voltage headroom isn't going to get you anything except some size in the casing.
 
Okay for the silicon BOM I again referenced this thread as well as this one. I know from both threads that 2SA725/2SA726, 2SC1312/2SC1313, and 2SC1451 should be replaced. In that first thread markthefixer also suggests replacing 2SC945 and 2SC1384. Given that, here's what I've come up with.

Equalizer Amp Assembly (AWF-016-A)

AWF-016-A: Q1: 2SA725: 512-KSA992FBU
AWF-016-A: Q2: 2SA725: 512-KSA992FBU
AWF-016-A: Q3: 2SC1313: 512-BC33725BU
AWF-016-A: Q4: 2SC1313: 512-BC33725BU
AWF-016-A: Q5: 2SC1313: 512-BC33725BU
AWF-016-A: Q6: 2SC1313: 512-BC33725BU

Control Amp Assembly (AWG-034-A)

AWG-034-A: Q1: 2SA725: 512-KSA992FBU
AWG-034-A: Q2: 2SA725: 512-KSA992FBU
AWG-034-A: Q3: 2SC1312: 512-BC33725BU
AWG-034-A: Q4: 2SC1312: 512-BC33725BU
AWG-034-A: Q5: 2SC1312: 512-BC33725BU
AWG-034-A: Q6: 2SC1312: 512-BC33725BU
AWG-034-A: Q7: 2SC1312: 512-BC33725BU
AWG-034-A: Q8: 2SC1312: 512-BC33725BU

Power Amp Assembly (AWH-042-0)

AWH-042-0: Q1: 2SA726: 512-KSA992FBU
AWH-042-0: Q2: 2SA726: 512-KSA992FBU
AWH-042-0: Q3: 2SA726: 512-KSA992FBU
AWH-042-0: Q4: 2SA726: 512-KSA992FBU
AWH-042-0: Q5: 2SC1451: 512-KSC3503DSTU
AWH-042-0: Q6: 2SC1451: 512-KSC3503DSTU

Switch Circuit Assembly (AWS-083-D)

AWS-083-D: Q2: 2SC945: 512-KSC2383YTA
AWS-083-D: Q7: 2SC945: 512-KSC2383YTA
AWS-083-D: Q8: 2SC945: 512-KSC2383YTA
AWS-083-D: Q10: 2SC945: 512-KSC2383YTA
AWS-083-D: Q11: 2SC1384: 512-KSC2690AYS
AWS-083-D: Q12: 2SC1313: 512-BC33725BU
AWS-083-D: Q13: 2SC1313: 512-BC33725BU

BOM List:

512-KSA992FBU | 8
512-BC33725BU | 12
512-KSC3503DSTU | 2
512-KSC2383YTA | 4
512-KSC2690AYS | 1

This BOM contains two changes to markthefixer's original suggestions:

2SC1312/2SC1313 to 512-KSC1845EBU is now 512-BC33725BU
2SC945 to 512-KSC2383YBU is now 512-KSC2383YTA

Do these substitutions look okay?
 
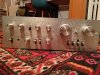
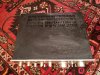
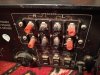
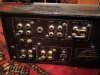
As promised, here are some pics. It's not in the best shape but I wanted to get some "before" pics up. It's pretty dirty and as you can see in the last few pics there's a fair amount of corrosion on the rear panel. I plan on hitting it with some vinegar but any other tips/tricks to tackle this kind of thing are welcome.

IMG_20180608_205825_HHT.jpg IMG_20180608_205904_HHT.jpg IMG_20180608_205952_HHT.jpg IMG_20180608_210040_HHT.jpg IMG_20180608_210110_HHT.jpg
 
Before you get all hell bent on changing every component, try cleaning up all the switches, pots and measure the power supplies, offsets/bias first.
It would be a shame to go through changing all the components and still have the same issue.
 
I would clean the front panel first and make sure it meets your standards. If not, fixing it is a waste of time and money. I know that I am very picky and if there are any marks or scratches, a piece of equipment has zero value to me.
 
I would clean the front panel first and make sure it meets your standards. If not, fixing it is a waste of time and money. I know that I am very picky and if there are any marks or scratches, a piece of equipment has zero value to me.

I've cleaned up the front panel and it's in good enough condition for me. It's got light scratches in some places and some dings to the top edge but it's not too bad IMO. This thing cost me $0 so I'm going to try to flip it to fund my next rebuild (SA-9100).
 
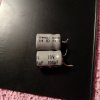
Okay, so I started my recap job tonight and I noticed that the service manual omitted two electrolytics from the Equalizer Amplifier Assembly (AWF-016-A) parts list. C19 & C20 are both 100uF/6V caps that appear in both the schematic and the board layout diagram but not in the parts list. I had already removed them from the Equalizer board before I realized I didn't have any replacements. I'll have to place another Mouser order but I'm having a hard time deciphering the schematic to decide whether these caps should be UPW or UKL. Here they are:

IMG_20180612_082943.jpg IMG_20180612_083056.jpg

Both the following are currently stocked at Mouser:

647-UPW1A101MDD6 100uF 10v 20% $0.32/ea
647-UKL1A101KED1TD 100uF 10v 10% $0.29/ea

Another question I had -- should I be concerned about replacing the trimmers on the power amp board with multi-turn trimmers? Are the originals prone to failure at all or am I good with just some deoxit?
 
Last edited:
Combing through the SM some more this morning I noticed that the Control Amp Assembly (AWG-034-A) BOM I pulled from this thread has a mistake. It lists C49-C52 as 100uF/10V caps, whereas the SM lists them as 16V caps so p/n 647-UPW1A101MDD6 100u/10V is NOT a suitable replacement. Instead 647-UPW1E101MED 100u/25V should be used:
Code:
AWG-034-A: C49: 100uF 10v CEA: 647-UPW1A101MDD6 100uF 10v ---> becomes ---> 647-UPW1E101MED 100u 25V
AWG-034-A: C50: 100uF 10v CEA: 647-UPW1A101MDD6 100uF 10v ---> becomes ---> 647-UPW1E101MED 100u 25V
AWG-034-A: C51: 100uF 10v CEA: 647-UPW1A101MDD6 100uF 10v ---> becomes ---> 647-UPW1E101MED 100u 25V
AWG-034-A: C52: 100uF 10v CEA: 647-UPW1A101MDD6 100uF 10v ---> becomes ---> 647-UPW1E101MED 100u 25V
I'm going to update the BOM above with the correct parts list for anyone that might try looking at this in the future.

I'll be placing another Mouser order soon for EQ Amp C19-C20, Control Amp C49-C52, and supply filter caps C1-C2. The original supply caps are ~41mm in diameter and it seems like a 40mm diameter solder-lug Kemet cap should be a drop-in replacement. I've added it to the BOM, above.

80-ALT22A153DE063 15000uF 63V | 2
 
Last edited:
After looking at the SM and Mark's recap lists it looks like the replacement technique is CEA -> UPW, CSSA/CEANL -> UKL, less than 1uF -> film cap. Also, at least in the BOM for this job, all caps greater than 10uF are UPW. That means I'm going with the UPW for AWF-016 C19 & C20:

647-UPW1A101MDD6 100uF 10v 20% $0.32/ea

The capacitor BOM has been updated, above, and is now 100% COMPLETE for this job. All parts in stock by Mouser as of 6/13/2018.
 
Okay so I finished the re-cap (sans supply filter caps) two nights ago. I was able to set the offset/bias after discovering the VR typo in the service manual (info here) and I listened to it for probably 40 minutes without any issues. However, last night when I turned it on again there were immediately some scratchy/poppy noises coming from the speakers and then smoke came from the area around the relay.

I immediately shut off the power, connected it up to the dim bulb tester, turned it back on and it powered up fine without lighting the 100W bulb so it looks like no catastrophic damage was done. I'll open it up again this weekend and see what I fried...
 
You can use the 100V version 647-UPW2A010MDD, it is in stock for now. Nichicon is slimming down the UPW product line and replacing with newer types. There are many other equiv suppliers as well just match specs.
 
Back
Top Bottom