• The move to the new server is done. There are some software and database maintenance updates in process. This has us passing the hat around to help out. We appreciate any donations. Seriously, even a dollar helps. The payment page may be found here - https://www.audiokarma.org/support.html

Pioneer SA8500II - Recap & Refresh

PTL-Pioneer

Super Member
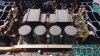
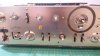
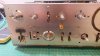
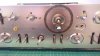
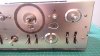
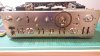
Picked up a fairly rough one of these, the plan is to restore it and go for a nice Recap, cosmetically got a few scratches, internals are very dusty, but for once I do believe this is a totally virgin unit. I'll try take plenty of pictures etc and as usual I'll be hoping for your help and advice too. Pictures to follow
 
Register to hide this ad
Ok so first question, apologies if this is another silly question - For the filter caps, i ordered dimensionally correct caps, but they are 15000uf 63v as opposed to the original 10000uf 50v.
I am hoping that this should not cause any major issues with the inrush current (30% increase), but i am wondering if i should replace D1 through D8 on the power supply with 1N5404 as a result, or even all of the diodes and rectifiers?
What do you think?

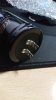
Another question is that i see a nice black alps volume pot, having a quick look at it seems to be a difficult one to get deoxit into, do i have to partially crack it apart so that can get some cleaner inside it? Its quite stiff and i doubt very much it has ever been cleaned, i know they are had to get and to open one is not for the faint hearted
 
Last edited:
Ok so first question, apologies if this is another silly question - For the filter caps, i ordered dimensionally correct caps, but they are 15000uf 63v as opposed to the original 10000uf 50v.
I am hoping that this should not cause any major issues with the inrush current (30% increase), but i am wondering if i should replace D1 through D8 on the power supply with 1N5404 as a result, or even all of the diodes and rectifiers?
What do you think?

Another question is that i see a nice black alps volume pot, having a quick look at it seems to be a difficult one to get deoxit into, do i have to partially crack it apart so that can get some cleaner inside it? Its quite stiff and i doubt very much it has ever been cleaned, i know they are had to get and to open one is not for the faint hearted
The extra 5,000uF is just fine. Do D1-8 if you feel like it.

Best way to clean those big Alps is to open them up entirely if possible. See how good you can get it without I guess.
 
I really look forward to this thread. My own SA8500II is on my list to be refurbished. I have not switched off the amp for several years now, it runs and sounds fairly well, but I have it since new. My main concern are the pots and switches.

What type of cap did you use for the filter caps?
 
I better take some photos, I already done a few caps and transistors, so I'll try get them up in next few days, but the pictures might not be great. It's the volume control I'm worried about at the minute, some more dismantling to do before I can figure this stuff out.
 
That is interesting. Those caps are of a bit older construction. I will take a look at Nichicon, however there are only10 000 µF 50 V available (647-UKW1H103MRD and 647-UFW1H103MRD), which is similar to the original types. I have to look at the dimensions (edit: They are 25 x 50 mm big). That are audio grade capacitors, the Kemet is more a heavy duty high temperature type for industrial purposes. Of course it will work.

Regarding capacitor types and the outcome of a recapping: In this moment I have finished replacing the filter - and the bass coupling capacitor of one of my Philips AH 532 active speakers (they were shot in one of the speakers as were one rectifier). I am just listening to both speakes (of course...), the second is equipped with the original parts. I believe the recapped one has a slightly more substantial bass....... The other caps in both speakers are already new. For the caps I replaced I chose the Nichicon audio caps.
 
Last edited:
Screenshot_20200724-214948.png

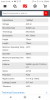
Looks like decent specs on those caps I bought, but I'm not really knowledgeable on this stuff, I would love if someone could compare a few and describe the specs which perform best for audio filter caps.
Low esr and high ripple figures is generally the specs I looked at. I think they are a good choice for the filter caps anyway and should look close to the originals also
 
Last edited:
Paul - 7.2 A ripple looks good on the compares... that is important in the filter location. That is the spec I would be eyeing... that on top of size.

Since I started using Kemits on some builds... I don’t hesitate to use them.

Be sure to throw some 2.2 uF polypropylene bypass caps on those filters.

Best of luck my friend!

1b18c626007755.5634e2c9374a2.gif
 
Last edited:
So I been working away on this unit, and took plenty of pictures, but unfortunately they are all lost now, due to having mobile phone problems, and having to factory reset. I have completed the power supply and protect, as well as the phono stage board also. Few transistors to change out on tone control board and then it's the power amps and filter caps last. Nice unit to work on, access is pretty good actually, phono board took a bit of fettling, but so far all is good, everything worked nicely once power supply and protect were rebuilt.

Much more sparsely populated unit when compared with the sa8500 mk1, even though the specs on paper for the MK2 are a little better

https://www.audiokarma.org/forums/index.php?threads/cant-find-sa8500ii-recap-list-anywhere.485668/
Thanks to Mark for this thread, use that BOM heavily, and i very much appreciate all the work that went into it. Very grateful for it, thank you
 
Last edited:
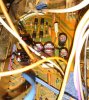
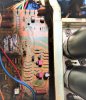
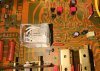
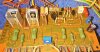
Here is the PSU and Protect Board, thankfully phone sent most photos to cloud so didn't really lose much at all!


Switch Assembly (AWS-108)
Pictures are labelled up but please make positively sure, if using them, to verify against service manual, i make mistakes.

aK1.jpg

ak2.jpg

ak3.jpg


AWS108 C7 .68uF 35v - Replaced with Film Capacitor
AWS108 C8 .68uF 35v - Replaced with Film Capacitor
AWS108 C9 .22uF 10v - Replaced with Film Capacitor
AWS108 C10 .22uF 10v - Replaced with Film Capacitor
AWS108 C11 470uf 6v - Replaced with Nichicon UPW Series
AWS108 C12 100uF 16v - Replaced with Nichicon UPW Series
AWS108 C13 2.2uF 50v - Replaced with film capacitor
AWS108 C20 100uF 35v - Replaced with Elna Silmic
AWS108 C21 100uF 35v - Replaced with Elna Silmic
AWS108 C22 220uF 50v - Replaced with Nichicon UFG Series
AWS108 C23 220uF 50v - Replaced with Nichicon UFG Series
AWS108 q1 2SC869 512-KSC1845FTA
AWS108 q2 2SC869 512-KSC1845FTA
AWS108 q3 2SC945 - As is
AWS108 q4 2SC945 - As is
AWS108 q5 2SA733 - As is
AWS108 q6 2SC945 - Replaced with KSC2383YTA
AWS108 q7 2SC1384 - Replaced with KSC2690AYS
AWS108 q8 2SD381 -Replaced with KSC2073TU
AWS108 q9 2SB526 - Replaced with KSA940TU
AWS108 d13 wz-250 - Replaced with 1N5253B
AWS108 d14 wz-250 - Replaced with 1N5253B
AWS108 s12 Relay - Replaced with MY4-02DC24
 
Last edited:
No Pictures of AWF-023 Equalizer amplifier sorry, i had it done and reinstalled and tested, apologies for that, i do not want to go pulling at it again.
Made sure to give the pots a good clean while i was in there
 
Control Amp AWG-044

Pictures are labelled up but please make positively sure, if using them, to verify against service manual, i make mistake
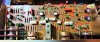
ak4.jpg

AWG044 C15 4.7uF 50v - Replaced with Film Cap
AWG044 C16 4.7uF 50v - Replaced with Film Cap
AWG044 C17 2.2uF 50v - Replaced with Film Cap
AWG044 C18 2.2uF 50v - Replaced with Film Cap
AWG044 C37 4.7uF 50v - Replaced with Film Cap
AWG044 C38 4.7uF 50v - Replaced with Film Cap
AWG044 C39 4.7uF 50v - Replaced with Film Cap
AWG044 C40 4.7uF 50v - Replaced with Film Cap
AWG044 C43 100uF 16v Error Replaced with Nichicon UPW -Remediation Required :crazy:
AWG044 C44 100uF 16v Error Replaced with Nichicon UPW -Remediation Required :crazy:
AWG044 C45 2.2uF 50v - Replaced with Film Cap
AWG044 C46 2.2uF 50v - Replaced with Film Cap
AWG044 C47 100uF 25v - Replaced with Nichicon UPW
AWG044 C48 100uF 25v - Replaced with Nichicon UPW
AWG044 C49 100uF 25v - Replaced with Nichicon UPW
AWG044 C50 100uF 25v - Replaced with Nichicon UPW
AWG044 q1 2sa725 = KSA992FBU
AWG044 q2 2sa725 = KSA992FBU
AWG044 q3 2sa725 = KSA992FBU
AWG044 q4 2sa725 = KSA992FBU
AWG044 q5 2sc1919 = KSC1845FTA
AWG044 q6 2sc1919 = KSC1845FTA
AWG044 q7 2sc1919 = KSC1845FTA
AWG044 q8 2sc1919 = KSC1845FTA

 
Last edited:
Power Amp AWH-051
ak5.jpg


AWH051 C4 22uF 50v - Replaced with Nichicon UKT
AWH051 C5 330uF 6v - Replaced with Nichicon UPW
AWH051 C13 1uF 50v - Replaced with Film Cap
AWH051 q1 2sa798 - Replaced with 2x KSA992FBU
AWH051 q2 2sc1885 - Replaced with KSC1845FTA
AWH051 q3 2sc1885 - Replaced with KSC1845FTA
AWH051 q4 2sa912 - Replaced with KSA1220AYS
AWH051 q5 2sd358 - Replaced with KSC2690AYS
AWH051 q6 2sb528 - Replaced with KSA1220AYS
AWH051 d4 1s1885 - Replaced with UF4004
AWH051 vr1 100 ohms - Replaced with 652-3386H-1-101LF
 
I buttoned everything up after each board and tested on DBT, to try limit my mistakes to a single area!
All pots and switches got the deoxit treatment.
Idle current set nicely per the manuals procedure to 30mv DC

Next up are the filter capacitors, i was thinking of using female spade connectors and soldering them on, how do you folks normally do these??
Its kind of a weird terminal how are they to be used normally?

ak6.jpg
 
Back
Top Bottom