• The move to the new server is done. There are some software and database maintenance updates in process. This has us passing the hat around to help out. We appreciate any donations. Seriously, even a dollar helps. The payment page may be found here - https://www.audiokarma.org/support.html

Pioneer Spec 1 Question

jojo0416

aka Karipas
Hi Folks,

I have a line for nice a Pioneer Spec 1, in case I decided to purchase the Spec 1 I would like to rebuild it myself. I only have one recapping experience with my SA-8800ii (SA 8500) though. I am trying to gauge if I have the confidence to do this myself with your help and guidance of course.
Between these 3 units, which is the easiest and safest to recap/overhaul; an SX-1250, Spec 4 or a Spec 1?

Thanks in advance.

Jojo
 
Register to hide this ad
Hi Folks,

I have a line for nice a Pioneer Spec 1, in case I decided to purchase the Spec 1 I would like to rebuild it myself. I only have one recapping experience with my SA-8800ii (SA 8500) though. I am trying to gauge if I have the confidence to do this myself with your help and guidance of course.
Between these 3 units, which is the easiest and safest to recap/overhaul; an SX-1250, Spec 4 or a Spec 1?

Thanks in advance.

Jojo
I've restored all 3, all three are going to be equally difficult. If you've done any of the x5x line, the 1250 should be a breeze because of the pluggable boards and the screw terminal filter caps. The Spec set is a little messy, the 4 requires some relay mods and isn't the easiest to work on, the 1 is straightforward but again needs a lot of disassembly and maneuvering boards without breaking the wire wraps.
 
I concur.
The Spec 1 is a slight treat due to the light weight, compared to tossing around receivers and amps.
 
Thanks Guys, when I look at the innards of the 1050/1250 seems like doable for me because of the modular design, but on the Spec 4 kind of scratching my head on where to start so I sent it out to a qualified tech.
My thoughts on the with a Spec 1 has less risk since there are no outputs to fry (?). I am a bit mechanically adept, I think I can make do with the dis-assembly and maneuvering part.
If there are other tips to for the Spec 1 will be highly appreciated.

When I get the Spec 1 next week I will play with it first for a few weeks and will start the work and ask questions from there. Thanks again @zebulon1 and @ivandezande.
 
Spec 1:
Remove the volume control from the front face first. This will give much needed harness slack.
Loosen as much harness as needed to access the boards. The input board can be flipped over by loosening the wire harness.
The PS is the toughest to access the trace side and desolder the components, just take your time.
Double check the dimensions on the PS board replacement big caps. I remember the ones I ordered were to tall.
I don't remember what list I used.
There is one in the queue so your thread will help me out too.
 
Thanks and noted zebulon1. I copied Mattd's BOM list and will run it tomorrow, hoping no EOL components yet on this list.
 
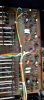
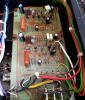
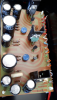
So the Spec 1 was delivered yesterday, sounds very good. I believe the unit was restored already. What do you guys think, do I need to restore it again if this unit was already retored?
upload_2019-3-9_11-27-11.pngupload_2019-3-9_11-27-35.pngupload_2019-3-9_11-27-58.pngupload_2019-3-9_11-28-17.png

I see Nichicon caps and 3 Sanyo transistors.
 
Hi JoJo,
My advise is to leave it alone and enjoy it. It is so clean that it has you thinking that it has been worked on before but I and above member do not see any evidence of such.
Rick
 
There are a handful of the 2sa726's in a diff pair arrangement. Located in the input and on the tone boards.
Maybe think about replacing those? If they go bad, their not going to blow anything up, you'll hear issues or the channel will quit.
So, wait until then.
 
Last edited:
Thanks everyone, I was mistaken then, you are right Rick et al, the Spec 1 was so clean I thought that someone has gone over it already, also thought Nichicons are newer brand of caps and Elnas are the ones mostly used in these vintage gears.
So it it's good sounding I will leave it be and a recap/restore will not do the sound any better?
Spec 1 and Spec 4 are really an amazing combo. Where even just CD source directly connected to the Spec 4 is already a treat.
 
Last edited:
A restore can only help, I doubt all of those caps meet spec. And like zebulon said, there's leaky transistors in the phono amp. There's a relay for mic mixing that the signal goes through that should be replaced as well.
 
Elna is still making ecaps, some say they like the silmic II made with silk they say ;-)
I think we can say new ecaps are better, I measured those old orange Nichicon in a 1980 they all measured fine. we know the Sanyo ecaps leak badly but I do not see any in your pics.
Sometimes it depends on how many hours are on the unit, your spec1 looks new, maybe hardly used.
If stuff acts up then dig in.
I would think that new parts should make it sound better, the amount is debatable. Would suggest to measure performance before and after to know if the differences are measurable.
 
I guess I am bored this winter months, I purchased BOM list of this Spe c1 except for one with an MOQ = 200 with Mouser, so I will be getting that part from DK.
If I am going to attempt to replace the caps/x'sistors and to make sure I am doing it right every step I plan to do it one board at a time. A quick look at the soldering, this thing is untouched.
The BOM has that relay @ivandezande , it will be replaced.

A few more questions:
1) The power switch feels sticky not snappy as other Pioneer power switches I have but fine/quite when turned on. How do you clean those? Is really sealed as I see it, if it is I will leave it alone.
2) Which assembly do you guys usually start with and in what sequence?
3) I don't think I see a replacement part for the trimpots in the BOM list, I'll just leave it alone?

Thanks in advance.
1: You should be able to disassemble and clean if desired.
2: I disassemble to the max that I'll need, then work backwards. So remove the phono amp and tone board and work on the switching board.
3: The trimmer on the power supply board? 3386F from bourns I believe....
 
I am at least 60% done disassembling the spec 1, visualizing how to work on it along the way. From where I am at I can now work on 3 smaller boards, I will then now kit the components per board one at a time.

Couple of quick question:

I jumped too soon on buying the parts so I missed the note that "(AWF-017) (Q1 & 3 and Q2 & 4 is recommended for gain matching)" how many parts do you guys usually use to pair or match transistors"?

How will I know that Filter Amp Board (AWM-082) is Rev B?

Edit: I guess I have the rev B
as this is what I have on the Fuse board for C8,C9 and C10.
AWX-091: C8: 1000uF 80v CEA (Snap-in): 647-LGY2A102MELA30 1000uF 100v
AWX-091: C9: 1000uF 80v CEA (Snap-in): 647-LGY2A102MELA30 1000uF 100v
AWX-091: C10: 1000uF 50v CEA: 647-UPW1J102MHD 1000uF 63v


Thanks.
 
Last edited:
Thanks! :thumbsup:
I started with the Fuse board, thought that will be easy but took me at least a good 50 minutes to remove the glue and de-solder three capacitors. The snap-on type cap terminals were off the hole position too so I ended up slightly bending and filing the terminals to barely reach and fit the holes. Do you guys try enlarge the holes in this case as I am so tempted? Anyways the caps are now in place.
I enlarge, drill new, etc....
It’s about doing it cleanly and knowing the best solution.
In that case I wouldn’t have used snap in, I use leaded Nichicon VR and bend to fit.
 
I am not sure if I would be using a snap in type, as said above, what is the lead spacing of the original, they are standard 7.5, 10mm etc. Select a ecap that matches the original pin spacing, if possible, no need to fuss and enlarge holes unnecessarily.
As a hint when you buy the KSA992,KSC1845, get them on paper tape, "TA" suffix, I find the ones side by side are very close. I measure Vbe with the DMM in diode test mode (use lead clips so you are not having to use probes) and select them when they measure within a mV of each other. Mark the numbers on the paper tape so you have them already measured for next time. Price break is at 10/100, buy them in those multiples.
https://www.mouser.ca/ProductDetail...=sGAEpiMZZMshyDBzk1/Wi8oN7VHZ91OkoO4jKvCu2tk=
 
Back
Top Bottom