• The move to the new server is done. There are some software and database maintenance updates in process. This has us passing the hat around to help out. We appreciate any donations. Seriously, even a dollar helps. The payment page may be found here - https://www.audiokarma.org/support.html

Pioneer SX-1010 Restoration

Ben Rothman

Active Member
Hello all! I have my grandfathers original pioneer sx 1010. It works perfectly, and I have been using it pretty much everyday all day for the past 4 weeks. The only things I have done to it is adjust the bias and DC offset. I was able to get the DC offset to 0 for both channels. Besides that I have replaced the relay just to be on the safe side. I Have also cleaned all the controls and switches with DeoxIT and then lubricated all the pots with FaderLube. I keep reading all over the internet that I should restore this unit with all new parts, and I'm totally up for it! But I need the help from you pioneer experts! I have searched day and night for the BOM list on this and I have uploaded it to mouser and it was well... a mess! Can someone please upload the spreadsheet to this forum with all the parts from mouser? I have tried the copying and pasting method by seeing what other members have posted on forms and tried but with no luck. If someone could upload their spreadsheet I would be forever grateful!
 
Register to hide this ad
Hey, Slow down and do some critical Listening. I.D. the source of any problems and research here and on other forums the project before you.

"I keep reading all over the internet that I should restore this unit with all new parts," you're reading the wrong forums. TO much great gear has been destroyed with this type of BAD advice. I got a few such projects gifted to me on my bench as a result of unbridled enthusiasm. You're Grandpa I sure would prefer that you move in a stepwise approach. The first area to start, if I.D.ed as in poor condition, would be to replace the Power Supply filter capacitors. Only after this would you possibly be in a good position to Listen and identify anything that is needed to be done beyond that.

Unrealistic Expectations can lead you to defeat more often than your worst adversary !

Good Luck !
 
Hey, Slow down and do some critical Listening. I.D. the source of any problems and research here and on other forums the project before you.

"I keep reading all over the internet that I should restore this unit with all new parts," you're reading the wrong forums. TO much great gear has been destroyed with this type of BAD advice. I got a few such projects gifted to me on my bench as a result of unbridled enthusiasm. You're Grandpa I sure would prefer that you move in a stepwise approach. The first area to start, if I.D.ed as in poor condition, would be to replace the Power Supply filter capacitors. Only after this would you possibly be in a good position to Listen and identify anything that is needed to be done beyond that.

Unrealistic Expectations can lead you to defeat more often than your worst adversary !

Good Luck !
That makes perfect sense! There is a kit on eBay that includes everything I need to restore the power supply. Nothing is wrong with the unit. But I guess for good safety measures I should just go ahead and replace the caps on the power supply.
 
These receivers, espeically with the first revision power supply board suffer from a lot of heat on the board, the EL caps and much of that board is likely "toast" and way out of spec., there are several noisy transistors in this model that can cause noise problems, they do occasionally short output transistors which blows the main fuse and part of the associated amp board, the dimmer switch can have high resistance and melt down, there are tantalum caps as well as several EL caps that will likely be out of tolerance (sometimes far out), but do what you wish and yes I have seen all of these occur in SX-1010s that I have serviced and if you spend enough time reading here you will find several stories of failures in SX-1010s including those I've listed.

A very nice unit, one of my favorites, I hope that you enjoy and appreciate what you have there your Grandfather chose well.
 
These receivers, espeically with the first revision power supply board suffer from a lot of heat on the board, the EL caps and much of that board is likely "toast" and way out of spec., there are several noisy transistors in this model that can cause noise problems, they do occasionally short output transistors which blows the main fuse and part of the associated amp board, the dimmer switch can have high resistance and melt down, there are tantalum caps as well as several EL caps that will likely be out of tolerance (sometimes far out), but do what you wish and yes I have seen all of these occur in SX-1010s that I have serviced and if you spend enough time reading here you will find several stories of failures in SX-1010s including those I've listed.

A very nice unit, one of my favorites, I hope that you enjoy and appreciate what you have there your Grandfather chose well.


Well that just about answers my questions! My 1010 is getting a rebuild! Do you happen to have a list you can upload of all the parts I need?
 
Not on the computer, I just order what I don't already have so even my Mouser BOM wouldn't help, but there is at least one great list on here (I'll look for it for you), just be careful when you do this:

- I believe that the SM has the wrong idle current / bias setting by a factor of 2, maybe I'm remembering the 1250 but pretty sure it's the 1010
- There are several revisions of the boards, be sure you're replacing the same values (at least two power board, four amplifier board revisions, more) as your board has, ask here if you're not sure
- Take multiple angle photos of each board before moving any wires or components including the values on resistors, p/n on transistors, orientation of: transistor legs, diodes, and electrolytic capacitor polarity, values of capacitors.

Once you start replacing components check each one against your photos to ensure proper orientation/value/polarity. This has saved me many times from powering up and letting the smoke out of my hard work, it's not just a rookie mistake and in some cases the artwork on the PC board and the schematic don't agree, replace exactly. There are also some transistors where the pinout (ECB) is not the same as the one you're replacing and it will look different, you will need to consult the datasheet for each transistor to be sure. Ask here if you're not sure.

There is a sequence for rebuilding boards. Most here start at the beginning of the current path, the power supply, then move to the protection, eq/flat-amp/etc. and finally the amplifier sections with a complete check-over of voltages or what's appropriate and a slow power-up on a DBT / Dim Bulb Tester to limit current in case there's a solder bridge, bad component, or incorrect component. I've started testing all transistors before installation also, have bought two small transistors in the past year or two that were shorted, the first one I had installed without checking and it had me chasing my tail for hours.

Best of luck, and if you start a thread on the rebuild where you can ask questions there will be some of us following it and helping as needed.

 
Thanks for your help! the thing is I’m a total novice. I don’t know what to order and what I need. If someone could get me a list that would be fantastic!
 
Not on the computer, I just order what I don't already have so even my Mouser BOM wouldn't help, but there is at least one great list on here (I'll look for it for you), just be careful when you do this:

- I believe that the SM has the wrong idle current / bias setting by a factor of 2, maybe I'm remembering the 1250 but pretty sure it's the 1010
- There are several revisions of the boards, be sure you're replacing the same values (at least two power board, four amplifier board revisions, more) as your board has, ask here if you're not sure
- Take multiple angle photos of each board before moving any wires or components including the values on resistors, p/n on transistors, orientation of: transistor legs, diodes, and electrolytic capacitor polarity, values of capacitors.

Once you start replacing components check each one against your photos to ensure proper orientation/value/polarity. This has saved me many times from powering up and letting the smoke out of my hard work, it's not just a rookie mistake and in some cases the artwork on the PC board and the schematic don't agree, replace exactly. There are also some transistors where the pinout (ECB) is not the same as the one you're replacing and it will look different, you will need to consult the datasheet for each transistor to be sure. Ask here if you're not sure.

There is a sequence for rebuilding boards. Most here start at the beginning of the current path, the power supply, then move to the protection, eq/flat-amp/etc. and finally the amplifier sections with a complete check-over of voltages or what's appropriate and a slow power-up on a DBT / Dim Bulb Tester to limit current in case there's a solder bridge, bad component, or incorrect component. I've started testing all transistors before installation also, have bought two small transistors in the past year or two that were shorted, the first one I had installed without checking and it had me chasing my tail for hours.

Best of luck, and if you start a thread on the rebuild where you can ask questions there will be some of us following it and helping as needed.
Thank you for your help. Thing is that I’m a total novice and I don’t know what I need to do replace and what I need to get. So does anyone have a list?
 
I spent a bit of time searching, which is a task you need to do yourself or there will be people here who won't be very helpful, ... use terms like "SX-1010 recap list" or "SX-1010 list" and search first the Pioneer forum, you can also spend a couple of hours reading results from "SX-1010" and find a lot of advice from people who have gone down that path, step-by-step recaps and photos.

Here is a start, scroll down to the SX-1010 link: https://audiokarma.org/forums/index.php?threads/pioneer-recap-lists-sticky-suggestion.457663/
 
I should add that if you haven't done much circuit-board level repair including desoldering and resoldering, you can do damage. Components (especially semiconductors) can't take soldering heat for long without damage, solder pads on the circuit boards will be damaged and sometimes lift if you apply too much heat or for too long trying to desolder components.

It is my strong suggestion that you obtain a good temperature-controlled soldering station, and at very least a good solder-sucker (the bulb-type works, but cheap ones can get too hot so be careful), soldering wick can work once you've practiced at it but suckers are faster and easier on the circuit board, .. if you can get or use a good desoldering station (with a vacuum pump) that is the best.

Further, if you haven't done this before, tear apart an old clock-radio or something to practice on first, you'll save yourself a lot of frustration.

A good DMM is necessary to check and set voltages, it can also be useful if you don't have a transistor tester to check for bad transistors (a crude diode-test will do this).
 
I spent a bit of time searching, which is a task you need to do yourself or there will be people here who won't be very helpful, ... use terms like "SX-1010 recap list" or "SX-1010 list" and search first the Pioneer forum, you can also spend a couple of hours reading results from "SX-1010" and find a lot of advice from people who have gone down that path, step-by-step recaps and photos.

Here is a start, scroll down to the SX-1010 link: https://audiokarma.org/forums/index.php?threads/pioneer-recap-lists-sticky-suggestion.457663/
Thanks so much for all of this! I’ve done plenty of soldering and desoldering. I just have zero clue on how to order the parts
 
You can use the PN in these lists in Mouser I believe. If you search enough you will find lists (in case the linked one doesn't have the Mouser P/Ns) that are designed just for Mouser, Digikey, other suppliers where you can save the list and upload directly using Mouser's upload tool, ... or the slower way is to add each Mouser P/N which will work. The lists are there, it just takes a while to find them.
 
You can use the PN in these lists in Mouser I believe. If you search enough you will find lists (in case the linked one doesn't have the Mouser P/Ns) that are designed just for Mouser, Digikey, other suppliers where you can save the list and upload directly using Mouser's upload tool, ... or the slower way is to add each Mouser P/N which will work. The lists are there, it just takes a while to find them.
Ok well the parts have all been ordered!!!!!!! I ordered everything including the big blue filter caps. Even though there is nothing wrong with my current unit. I am excited to have a fully restored pioneer sx 1010!
 
You can use the PN in these lists in Mouser I believe. If you search enough you will find lists (in case the linked one doesn't have the Mouser P/Ns) that are designed just for Mouser, Digikey, other suppliers where you can save the list and upload directly using Mouser's upload tool, ... or the slower way is to add each Mouser P/N which will work. The lists are there, it just takes a while to find them.


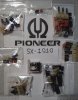
I was lucky to find a kit that included everything I need to restore this. It comes with all the capacitors, transistors and the trimmers that I need.
 

Attachments

  • DCF6CD0E-EB08-4F51-AC2B-2BA12F09A0BF.jpeg
    DCF6CD0E-EB08-4F51-AC2B-2BA12F09A0BF.jpeg
    112 KB · Views: 36
Back
Top Bottom