• The move to the new server is done. There are some software and database maintenance updates in process. This has us passing the hat around to help out. We appreciate any donations. Seriously, even a dollar helps. The payment page may be found here - https://www.audiokarma.org/support.html

Pioneer SX-1280 restoration

cbusuttil

Active Member
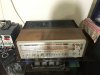
Recently acquired this marvelous receiver. I already own an SX 980, which I restored around 6 years ago. Now I am restoring this SX-1280. Full recap, new output transistors and some other troublesome transistors, full re-soldering of all joints etc. Hope you will enjoy some pictures of my restoration. Greetings from the tiny island of Malta, central EU!
IMG_0812.JPG
 
Last edited:
Register to hide this ad
Begun by dismantling the front facade & bonnets in order to reach the tone control boards ( need some patience to get them out it seems!!) ... bloody hell this thing is heavy to turn around ....

faccata.JPG
 
Last edited:
Tuner board got new, Nichicon audio grade caps from Mouser. I accidentally blew up the 5 chips because of the +13V (tuner B+) regulating transistor's heatsink touched one of the main 5151 rectifier diodes ....and ended up frying the 6V1 zener and other things. Anyway, managed to source out all chips except that pesky PA1002A IC, for which I am currently designing a PCB for a copied bufer circuit derived from an SX 780.

IMG_0789.JPG
 
Last edited:
Power supply got new 105 degrees caps, new, higher current handling transistors; heatsinks on these are really small for their dissipation, so I fixed another heatsink which bolts on to the original one. I also, where deemed necessary, replaced the large power resistors (presumably some 2W or 3W) with higher handling resistors (5W) etc. to ensure reliability in the long run..

IMG_0806.JPG ..
 
another shot of the power supply section - notice the added heatsinks on the original ones. New softstarter relay was installed as the old one had some dodgy contacts which I did not like.
psu.jpg
 
Main rectifier diodes were replaced with very high current, very low recovery time (500nS @ 30amp IIRC) and very high reverse voltage schottky diodes - STTH30L06-Y. We all know that this powersupply runs extremely hot, so I installed a small computer fan to circulate air. At least, now I can touch the transistors without getting burnt fingers. Notice the new 10nF ceramic caps. I changed these as I had them in stock.
IMG_0840.JPG
 
Last edited:
The speaker protection relay was in really good shape; no signs of burned contacts whatsoever, so i used some metal polishing cream to refurbish it's contacts. Note the higher wattage resistors ( green ones) i replaced.

IMG_0810.JPG
 
Refurbishing all of the boards (tone, flat amp, etc) ..... I realised the SX1280 uses those pesky 2SA726 in the flat amp... which are known to be a source of trouble, by time. I replaced those with the 2SA970, which, although it has higher gain, it should not interfere with the performance, because the circuit is designed in a way so that the transistors are in a common emitter with emitter degeneration configuration. the emitter degeneration provides some sort of negative feedback - this topology is used to provide stable output because the transistor's gain is subject to biasing and temperature hence it varies. Anyway, i plugged it in and i did not hear any distortion or unpleasant sound, so it must be doing it's job quite well.
rear.jpg
 
Supposingly the original outputs in the 1280 are the 2SB706 and it's complementary. I realised that in the past, this unit blew it's outputs (presumably related to driving extremely low impedance speakers?) , and someone replaced the original ones with some odd 2STC5949 and their complementary. Never mind, i was planning to change them anyway.

boq.jpg
 
Last edited:
The new outputs - MJL4281 and it's complementary. I used these power transistors in a subwoofer amplifier i designed some 10 years ago. Very good transistors. IIRC they are one of most powerful transistors in TO-264 package i think.

new.jpg
 
Last edited:
New, 22000uF main filter caps installed. These should also improve the dynamic headroom. The original ones were 15,000uF. I also covered the facade bulb holder with foil to help disperse more light in the front facade. old filament bulbs have been upgraded to LED warm white - very happy with the result; Still looks vintage but without lots of heat dissipation into the clear perspex light deflector

IMG_0854.JPG
 
Last edited:
Finally, since most of the capacitors I used, have a lifetime of 1000 hours, ive installed a cheap hourmeter. From experience, i know that they will last much longer if they are not exposed to their limits (say, working voltage and temperature). But i've put this as a guide to show me how much the unit worked after this restoration.

IMG_0856.JPG
 
Next would be to change the EQ amplifier's output with some TO126 and i should be done with it. .... for now, it seems that it's working as it should. I am also looking for a PA1002A, so if any good soul has a spare one that is willing to sell, kindly let me know!
 
Last edited:
Back
Top Bottom