mquinn25
New Member
Hi Everyone,
Just wanted to start a thread to let folks know how this is going. I've received a lot of help and good advice from people, so I thought it would be right to share my experience.
A brief history...
I grew up in the 80's and my neighbor and good friend purchased an SX-3800. We were all simply in love with it. In my opinion the Fluoroscan Receivers are some of the prettiest looking ever made. Well, about 2 1/2 years or so ago, I found an SX-3900 on Craig's List from a member here. It played well, but had the typical lights out and scratchy controls. I brought it home, hooked it up to some Infinity Crescendo's and it's been my primary source of entertainment ever since.
Recently, the scratchiness of the switches started bothering me to the point where I needed to open it up and clean them properly. I didn't want to be without it, so low and behold, I found a suitable temporary replacement in an Onkyo TX-7000 (which that same member had posted!) So, we got to reconnect and he told me where to get the replacement lamps (Dave, you are the best, thanks.), so ordered them and ready to go.
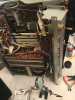
Taking the SX-3900 apart is as big a nightmare as it is made out to be. It's just difficult and everything is really packed in. I work on arcade PCB's all the time, but those are very easy to access. Not so with the pots and switches on this receiver. Once you remove the faceplate, there is a sort of secondary plate behind it, which blocks all access to switches and pots. This plate, in my opinion, must be removed to clean the pots and switches properly, so I did....but it is very invasive and not for the faint of heart. I am still worried about the tuner cord (pitting a rubber band around it was another great idea I learned here.
So...here is where I am at...
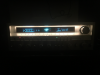
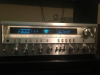
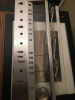
1) Faceplate cleaned with 50/50 Simple Green and water. Easy and makes it look nice! One thing I couldn't get right was the buttons. They seem oxidized to the point where they are as good as they will get. I tried toothpaste and Brasso, but that is as far as I am willing to go as far as abrasives go. See Pics and tell me what you think. They look better, but not perfect.
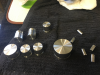
2) Knobs And switches soaked in hot water with Cascade. BEAUTIFUL results.
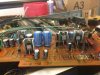
3) Inside. General Inspection and dusting/blowing/vacuuming. I did not see any causes for concern, so I will not be recapping this unit.
4) Pots and Switches. They got a really good De-Oxit this morning. I was surprised that some of the switches had mechanical leads that went to the back of the receiver (tape 1, tape 2, etc.) So, I did the dexoit on the back switches too of course. I was wondering if the De-Oxit for plastics would be a better choice for those? The other surprise was that the volume pot seems sealed. I sprayed from underneath where the leads com out, but not sure any got it there.
Anyway, I let it dry for a few hours and fired it up. The results are OUTSTANDING. No issues at all with crackling or cutting out. I am so impressed by this result, I can't even express it. Night and day is an understatement. I plan on applying the de-oxit gold before re-assembly.
5) Lamps. Let's start with the little ones that light up speakers, input, FM Stereo and Quartz Lock. I got all 9 that I needed from dgwojo (they are perfect). I decided I was not going to re-run all the wires, so I cut the old lamp off, and hook/soldered the new ones on. I used several coats of electrical liquid tape to protect the connection and insulate it well.
The light bar lamps are next. During disassembly I placed the receiver on one of the lamp sockets...it shattered...they are REALLY brittle. So, markthefixer sent me to Mousser for replacements that fit 100% perfectly with no mods needed. Awesome. I bought both LED's and old school wedge bulds to see what I like better...again, from dgwojo.
Thank you all for the help!
So far, things are going well. I just need to be really careful reassembling. Some pics...

Just wanted to start a thread to let folks know how this is going. I've received a lot of help and good advice from people, so I thought it would be right to share my experience.
A brief history...
I grew up in the 80's and my neighbor and good friend purchased an SX-3800. We were all simply in love with it. In my opinion the Fluoroscan Receivers are some of the prettiest looking ever made. Well, about 2 1/2 years or so ago, I found an SX-3900 on Craig's List from a member here. It played well, but had the typical lights out and scratchy controls. I brought it home, hooked it up to some Infinity Crescendo's and it's been my primary source of entertainment ever since.
Recently, the scratchiness of the switches started bothering me to the point where I needed to open it up and clean them properly. I didn't want to be without it, so low and behold, I found a suitable temporary replacement in an Onkyo TX-7000 (which that same member had posted!) So, we got to reconnect and he told me where to get the replacement lamps (Dave, you are the best, thanks.), so ordered them and ready to go.
Taking the SX-3900 apart is as big a nightmare as it is made out to be. It's just difficult and everything is really packed in. I work on arcade PCB's all the time, but those are very easy to access. Not so with the pots and switches on this receiver. Once you remove the faceplate, there is a sort of secondary plate behind it, which blocks all access to switches and pots. This plate, in my opinion, must be removed to clean the pots and switches properly, so I did....but it is very invasive and not for the faint of heart. I am still worried about the tuner cord (pitting a rubber band around it was another great idea I learned here.
So...here is where I am at...
1) Faceplate cleaned with 50/50 Simple Green and water. Easy and makes it look nice! One thing I couldn't get right was the buttons. They seem oxidized to the point where they are as good as they will get. I tried toothpaste and Brasso, but that is as far as I am willing to go as far as abrasives go. See Pics and tell me what you think. They look better, but not perfect.
2) Knobs And switches soaked in hot water with Cascade. BEAUTIFUL results.
3) Inside. General Inspection and dusting/blowing/vacuuming. I did not see any causes for concern, so I will not be recapping this unit.
4) Pots and Switches. They got a really good De-Oxit this morning. I was surprised that some of the switches had mechanical leads that went to the back of the receiver (tape 1, tape 2, etc.) So, I did the dexoit on the back switches too of course. I was wondering if the De-Oxit for plastics would be a better choice for those? The other surprise was that the volume pot seems sealed. I sprayed from underneath where the leads com out, but not sure any got it there.
Anyway, I let it dry for a few hours and fired it up. The results are OUTSTANDING. No issues at all with crackling or cutting out. I am so impressed by this result, I can't even express it. Night and day is an understatement. I plan on applying the de-oxit gold before re-assembly.
5) Lamps. Let's start with the little ones that light up speakers, input, FM Stereo and Quartz Lock. I got all 9 that I needed from dgwojo (they are perfect). I decided I was not going to re-run all the wires, so I cut the old lamp off, and hook/soldered the new ones on. I used several coats of electrical liquid tape to protect the connection and insulate it well.
The light bar lamps are next. During disassembly I placed the receiver on one of the lamp sockets...it shattered...they are REALLY brittle. So, markthefixer sent me to Mousser for replacements that fit 100% perfectly with no mods needed. Awesome. I bought both LED's and old school wedge bulds to see what I like better...again, from dgwojo.
Thank you all for the help!
So far, things are going well. I just need to be really careful reassembling. Some pics...
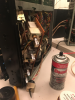
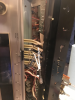
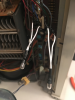
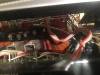
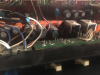


 . The digital tuner being out real scares me, and no sound from any input is also distressing, but I am 99.9% sure it's a power issue because the top lamps are not working and I am getting no voltage reading from several pins that should have them. It's just lousy having my favorite component down and out.