yachtfather
New Member
I found a lot of useful info on this site, and wanted to post for karma.
I bought a clean SX-450 with a horribly noisy right channel, and after a lot of research I tried this method of cleaning the power contacts in the black/grey box. Surprisingly this fixed my issue!! I did this without disassembling the unit, just removing the top.
Problem: the power contacts in the little black box burn over time, causing a distorted ****-sounding channel.
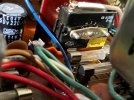
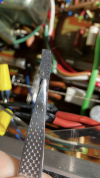
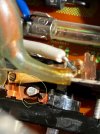
To access these, remove 2 5.5mm bolts removed from the black box. I have small hands and was able to remove them with just a tiny socket. Next part requires steady hands, lots of light, nice cotton swabs (preferably the long wooden stick ones from amazon), contact cleaner (naptha or heptane), and some nice sandpaper and 2 sets of long tweezers. Gently bend back the big Advil capacitor and work the box open - you will need to remove a fuse and bend the fuse clips to get this open enough to gently work them out. they are soldered to the big pill capacitor. Be careful not to bend these or you will have disassemble!!! When they are accessible, clean all burned material you can from both contacts with a swab soaked in contact cleaner (second photo is after I cleaned as much as possible). Here's where it gets tricky, and it may not be possible if you have big hands. Slice a thin piece of sandpaper with a razorblade, i used 400 grit but slightly finer may be better. I used tweezers to hold the sandpaper and gently work away all of the burned corrosion. (Maybe you could glue the sandpaper to the swab stick also.) This is trickier for the top contact - I used a dentist mirror to see what I was doing. I used some automotive hook picks to push the contacts back into the box and surprisingly they fit into tiny grooves in the black box. I re-attached the nuts with a magnetized tweezer.
I blew out the unit with compressed air and shop vac'd it. I also cleaned the other contacts on the channel dial with naptha. They werent too bad.
Both channels sound perfect when cold several days later. So relieved, I didn't start re-capping the unit.
I bought a clean SX-450 with a horribly noisy right channel, and after a lot of research I tried this method of cleaning the power contacts in the black/grey box. Surprisingly this fixed my issue!! I did this without disassembling the unit, just removing the top.
Problem: the power contacts in the little black box burn over time, causing a distorted ****-sounding channel.
To access these, remove 2 5.5mm bolts removed from the black box. I have small hands and was able to remove them with just a tiny socket. Next part requires steady hands, lots of light, nice cotton swabs (preferably the long wooden stick ones from amazon), contact cleaner (naptha or heptane), and some nice sandpaper and 2 sets of long tweezers. Gently bend back the big Advil capacitor and work the box open - you will need to remove a fuse and bend the fuse clips to get this open enough to gently work them out. they are soldered to the big pill capacitor. Be careful not to bend these or you will have disassemble!!! When they are accessible, clean all burned material you can from both contacts with a swab soaked in contact cleaner (second photo is after I cleaned as much as possible). Here's where it gets tricky, and it may not be possible if you have big hands. Slice a thin piece of sandpaper with a razorblade, i used 400 grit but slightly finer may be better. I used tweezers to hold the sandpaper and gently work away all of the burned corrosion. (Maybe you could glue the sandpaper to the swab stick also.) This is trickier for the top contact - I used a dentist mirror to see what I was doing. I used some automotive hook picks to push the contacts back into the box and surprisingly they fit into tiny grooves in the black box. I re-attached the nuts with a magnetized tweezer.
I blew out the unit with compressed air and shop vac'd it. I also cleaned the other contacts on the channel dial with naptha. They werent too bad.
Both channels sound perfect when cold several days later. So relieved, I didn't start re-capping the unit.