• The move to the new server is done. There are some software and database maintenance updates in process. This has us passing the hat around to help out. We appreciate any donations. Seriously, even a dollar helps. The payment page may be found here - https://www.audiokarma.org/support.html

Pitiful X-202

IT WORKS !!!!!... just powered her up then set the dc balance and bias no problem... no smoke, no flames

have only listened for 10 minutes, but so far, sounds pretty incredible... shocking reserves of deep powerful bass, will have to cut it back

stay tuned!

thanks to all, and especial Dave G.... Dave you were an amazing help on this project, can't tell you how much I appreciate it
 
Last edited:
ARRRRGGGGGGHHH... suddenly lost a channel, wtf?

to recap:

my initial playing session went very well, played for 20 minutes with no issues and sounded great

then had to go out for a couple of hours, got home, powered her up again from cold, and now I've suddenly lost the LEFT channel!

- ruled out the left speaker (itself) by switching speaker connections... the dead channel moved to the opposite side.. both speakers are fine
- checked the dc balance and bias... still set correctly on in BOTH channels and very stable
- all 4 output tubes are glowing normally and the same intensity... no red-plating
- actually, the dead channel is not fully dead... I can hear some music coming through VERY faintly and that seems to be volume dependent
- played around with all switches and controls and found:
> changing Mono/Stereo control to Reverse does NOT play the opposite stereo track in the good channel as one would expect... seems to be unchanged, and the left channel is still dead
> rotating the Stereo Dimension control to the right (ie., full minimum position) DOES bring some sound out of the dead channel!... weird (previous to my work, this control was always best set to full maximum position for decent stereo sound... it did nothing to alter the balance between channels)
> turning Balance control fully to the left loses all sound (and the Stereo Dimension "fix" from above no longer works... no sound at all)

I checked all my connections and work pretty carefully... in this unit, I implemented these:
- the "separate bias" mod with external bias testing points on terminals C and X (1/4 W resistors, perfectly matched)
- "screen stability resistors" mod (1/4W)
- "low frequency boost" mod (removed restrictions on the low frequencies as per Dave G.)
- all electrolytics replaced... all big filter caps were boosted a bit, except for the first one after rectifier
- all switches, controls, and tube sockets thoroughly cleaned with Deoxit... tube sockets flushed clean with 100% alcohol (after Dexoit)
- Phase Inverter adjustment was made using Dave G's "multimeter method" (above)... seemed to go well

what a letdown... the strangest part is that it was (apparently) working fine at first, then something major changed during the cool down and restart period.. I did nothing else during that time in between, except to remove & replace the faceplate and install the knobs

I've been playing it for 1.5 hours now.. no change, left channel still dead all else seem stable... output transformers are warm, but the big (main) transformer is getting pretty hot... very hot actually

any suggestions as to how to best diagnose?... help!

thanks
 
Last edited:
Sounds like a loose connection in one of the tubes. Take a small pointed tool and tighten the sockets, Do this for all tubes.
 
OK -- some pointer to help you out:

1. With the balance control centered, if the turning the Stereo Dimension to Mono produces sound (albeit somewhat lower) out of the left channel, then almost certainly the power amplifier section for the left channel (V5, V6, V7 Sams) is working properly. Keep it set to full stereo.

2. If no setting of the Mode Switch will result in sound from the left channel, then the problem must appear after that switch appears in the circuit. Since we know this fact, and the fact that the power amplifier is likely working fine, then the problem must be between those two points, or somewhere in the circuits of V3 or the half of V4 that serves the left channel (pins 1, 2, and 3).

3. Check to make sure that the dummy plug is properly seated, and that the plug and socket are clean.

4. If still no sound from the left channel, then take a jumper clip lead and jump the two shorting links on the dummy plug together. If sound is now produced in the left channel, then the problem appears before that point -- somewhere in the circuits of V3 (Sams). If there is still no sound, then the problem will be in the tone control stage V4, pins 1, 2, and 3 (Sams).

No doubt you'll find it. These are just some things to help you focus your efforts in pin-pointing where the problem lies.

Keep us posted!

Dave
 
thanks Larry & Dave, I'm on this...

given the fact that all was working fine after initial power-up, then all I did was turn it off for 2 hours, really what could have changed significantly?

not much, but perhaps a tube pin connection after a heat up / cool down cycle, eg. maybe some oxidation or physical distortion, especially since these tube sockets are over 50 years old!

so, I will start by fiddling with the pins on V3 and V4 (Sams #s), or equivalent V4 and V6 (Fishers #s)

Q: do you recommend leaving any Dexoit D5 residue in tube sockets and on tube pins?

I've seen some people saying that leaving Deoxit in tube sockets "ruined the sound", so am leery of this

I have only regular D5 5% spray, NOT the new "high temp" version I've seen recently that might be better suited for tube socket applications(???)

btw, my tube socket cleaning regime consisted of:
- soak in D5 spray, leave for a few hours
- add 100% Dexoit red liquid into each individual pin socket dripped off a toothpick, leave overnight
- shove an old dead 9-pin tube in & out of each socket a few times (with Dexoit still in place)
- flush out sockets with 100% pure alcohol under pressure
- clean pins of the tubes themselves with Deoxit, followed by clean off with 100% alcohol
- insert tube in/out 3 times, then leave tube in place

PS: I hard-soldered 2 jumpers into the rear of the remote control socket... since I will never use (or find) a remote, wanted to prevent this questionable and critical connection from ever causing problems

stay tuned...
 
Keep us posted. You can still use a jumper clip lead to jumper the two hard wired jumpers you installed to aid in your troubleshooting efforts. It will help you pin-point as to where the problem lies.

Dave
 
Your tube (socket) cleaning protocol is fine. You can actually leave the DeOxit in place as it evaporates and just leaves a protective residue. It won't hurt the sockets, or the pins. Continued in/out working of the tubes will help the DeOxit clean or keep clean the pins and the sockets. And you don't need the 100% DeOxit after the D-5. Either or but not both. Instead of the alcohol, just blow them down with compressed air and leaveit at that. High Temp DeOxit??? Now we're getting into "Boutique" stuff. It's up to you but I find that regular DeOxit 5% works just fine and lasts as long on Tube gear as it does on Solid State.

Add the tube socket re-tensioning to Dave's stuff and it should come back to life with no problems.
 
OK, here's what I've tried so far:

- removed & replaced every single tube including outputs... checked each male pin in the process, straightened out any bent ones (not many)
- used a sewing pin to retension every single socket by shoving the pin into both sides of the pin hole to squeeze together the two halves... none seemed to be weird and retensioning didn't seem to change much (visually anyway)
- tried a different 12AX7 tube into Tone Control Amp position (Sams V4 = Fisher V6)
- swapped the Scratch Filter / Remote Control tubes (Sams V3/V9 = Fisher V4/V5)
- swapped the Phase Inverter tubes (Sams V5/V10 = Fisher V7/V8)
- inspected underside to see if all my new resistors in the output area were still intact... all looked OK, did not see any blown ones

all above resulted in no change or improvement

[[[ WRONG!!! SEE CORRECTED BELOW - then I used a jumper clip lead to connect the two hard-wired jumpers I have installed on the remote control socket... ***** doing this did NOT restore the missing channel, however the sound was now noticeably DISTORTED, especially in the midrange (voices) *** ]]]

any thoughts or suggestions? thanks!
 
Last edited:
proper!!! CORRECTION !!!

then I used a jumper clip lead to connect the two hard-wired jumpers I have installed on the remote control socket... this ***DID*** restore the missing channel, and it sounds pretty good, no obvious distortion... not sure if it's playing in full proper stereo though (TBD), but both channels have equal volume

next step please?
 
and now, GET THIS...

I removed the jumper wire from the remote control socket (the one that I had temporarily connected between my jumper), and suddenly, everything is working PERFECTLY again!!!

perfect stereo, equal volume between channels, stereo mode "Reverse" working as it should, same goes for the Stereo Dimension and Balance controls... sounds great all around

I did nothing other than remove this temporary jumper wire, and I suppose in the process moved the pins/terminations on the rear of the remote control socket, but I did nothing else

what the HECK???

sorry for all the back and forth...
 
for good measure, I'm going to re-flow all of the solder connections on the back of that remote control socket... who knows, I might have invisibly broken a solder joint while I was installing my permanent jumpers?... it is pretty tight in there... this could be barking up the wrong tree, but worth a try

(man, I'd really like to just completely eliminate the entire remote control function and socket from my amp... SO much extra circuitry and complication for something that will never be used!)

addendum:
I was just listening a bit more, PRIOR to re-flowing the solder joints as per the above, and have noticed the right channel (B) is slightly distorted... the left channel (A) seems to be OK... putting the mode into REVERSE or MONO does not change this... ie., it is always the right channel distorting... hopefully the solder re-flowing will fix this, although I doubt it... so that might be the next issue to tackle
 
Last edited:
Glad you found it! The fact that installing the jumper clip lead produced sound (which was in fact mono sound) from the dead left channel proved that the tone control stage was good, and not the problem. It narrowed the field of interest down to just V3. Further testing -- had we gotten that far -- would have narrowed down the problem rather quickly from there, since we'd already limited it from the whole left channel, to just the V3 circuits.

If you want to completely eliminate the Remote Control Jack wiring, remove the shielded cable lead connected to pin 3 of the Remote Control jack, and connect it directly to the top (hot terminal) of the left volume control. Trace the lead from pin 1 of the Remote Control Jack back to the volume control, and remove it from the volume control section it is connected to, which will be the left volume control section. Do the same for the right channel. The lead connected to pin 6 of the Remote Volume Control jack should be disconnected, and connected to the right volume control section in the same manner as was done for the left channel. Make sure that the ground lead of each shielded cable is grounded at one end only (usually the volume control end).

Glad you got it going!

Dave
 
thanks Dave!... maybe I will just try to remove the entire remote control circuit... looking at it now
 
RE: completely eliminating the Remote Control Jack wiring

please clarify the procedure:

LEFT CHANNEL
a) remove the lead (coated + bare wire pair) going to pin 3, and reconnect to the Volume control instead... connect it to the top (hot) terminal, and connect bare wire to ground... on my unit, this wire is solid BLACK and originates at the terminal strip situated beside the bias and dc balance pots
b) remove and discard the lead from pin 1 back to Volume control, disconnect both leads of the pair (coated + bare wire pair) from the volume control and discard... on my unit, this wire is WHITE/GREEN

RIGHT CHANNEL
a) remove the lead (coated + bare wire pair) going to pin 8, and reconnect to the Volume control instead... connect it to the top (hot) terminal, and connect bare wire to ground... on my unit, this wire is WHITE/BLUE and originates at the terminal strip situated beside the bias and dc balance pots
b) remove and discard the lead from pin 6 back to Volume control, disconnect both leads of the pair (coated + bare wire pair) from the volume control and discard... on my unit, this wire is WHITE/RED

questions...

Q1: which is the "hot" terminal on the Volume control -- position A, B or C as per my photo?

Q2: when I connect the shielded cable "to ground" on the Volume control, do I connect to position C as per my photo, or to another spot that is grounded to chassis?

Q3: the two leads that I have to relocate to the Volume control are not long enough to reach (the BLACK and WHITE/BLUE wires)... so, I think I will re-purpose the two wires already attached to the Volume control (the WHITE/GREEN and WHITE/RED wires)... they are very long, and I can easily route them back to the terminal strip... and there's even a chance they might ALREADY be connected correctly to the Volume control as required by step a) above?... that would be very convenient... please comment

Q4: after I do this rewiring, is it safe to remove ALL other wires remaining attached to the remote control socket? (just to clean things up)

thanks!
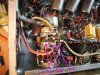
zzz_vol_control.jpg
 
Terminal A is the hot terminal. You see the white shielded wires, one with green stripe and one with red stripe? You will find that the other end of these appear at the Remote Volume Control Jack. They are the wires to remove. When you bring the new wires over that come from the terminal strip on the upper deck (based on being turned upside down) behind one of the OPTs, be sure to ground the ground lead of those wires at the volume control terminal C. If you want to leave in the existing wires that connect to the volume control and run them to the terminal strip behind the OPT, that's fine too. Use whichever ones will get the job done. If the ones on the volume control will work (they probably will), then you won't have to do a thing at the volume control -- just connect them to the T-strip behind the OPT. The ground lead at the T-Strip end should be clipped off. Answer to last question -- Yup.

Dave
 
OK, all done!... the remote control circuit removal was super simple... I just re-used the wires *already attached* to the volume control with no alterations needed, ran them to the terminal strip to the correct spot, and two simple solder connections later I was all done... then removed all other wires leading to and connected to the remote plug (used snippers, not de-soldered... looks fine)

ahhhh, feels good to have all that extraneous remote control-related extra wiring out of there... plus, the signal route is shorter and simpler with fewer connections... that can only help the sound and reliability

then, I powered her up again, and BINGO, started like a charm, and the best part, the earlier noticed distortion in the one channel is TOTALLY GONE... maybe the simplified wiring really is helping here?

playing music now, and I have to say, this amp sounds truly excellent

keeping my fingers crossed that she'll be stable now with no more weird issues

THANK YOU all again, especially Dave G... you're the man

will post back here after I've had more experience and hours playing it, and hopefully I won't have too many more questions!... also, will post a few photos

cheers!
 
listening update: it ran like a champ last night for 3 hours solid... no issues, sounded really great... creates a big "wall of sound", about 6 feet high and extending out past outer sides of speakers... very muscular, deep rich bass and gobs of it, nice mids and highs... crisp and clear... awesome so far!

Q: I'd like to disable the Stereo Dimension function...

seems to be another useless thing that does not make sense to keep... it's only a matter of time that someone inadvertently turns it to min. setting (thinking it's the volume or something), and I won't necessarily notice... why would I ever want less than full stereo???... also, it's another thing to get dirty, worn out, and more connections to fail

what is the best and safest way to disable this please?

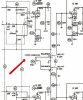
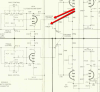
schematic attached below (Sams and Fisher versions):

z_dimension_sm.jpg 2016-10-31_1226.png 2016-10-31_1228.png

thanks!
 
Last edited:
The control used for the Stereo Dimension Control is a special one, such that when turned to the full stereo position, the carbon track within it ends early, so that there is effectively infinite resistance (no connection) between the terminals connected into the circuit. If you want to disable it, simply remove one of the leads (either one) connected to it, which will then leave the circuit operating in full stereo mode.

Dave
 
If you want to keep it "historically correct", leave it as is, turned to the full right position, clean the switch as you would all others and don't worry about it. I have a X202B and with the same switch, never a problem with it. Fisher designed this Dimension feature for folks that have different sized rooms if I recall and thus the need to adjust the stereo affect. If one reads the owners manual you'll get a better explanation than I can give....it does serve a great function if one needs it. Al
 
The stereo dimension control sounds like it is what some other manufacturers called a blend control. I have one on my old Harman-Kardon A300 amplifier. I used it as a means of minimizing noise on weak FM stereo stations while still maintaining enough separation to enjoy the stereo effect. If you do not listen to any weak FM stations, you may never have any need for this control.

Joe
 
Back
Top Bottom