• The move to the new server is done. There are some software and database maintenance updates in process. This has us passing the hat around to help out. We appreciate any donations. Seriously, even a dollar helps. The payment page may be found here - https://www.audiokarma.org/support.html

Polishing a scratched TT dust cover

My recommendations:

Wet sand with:
-800 grit
-1000 grit
-1500 grit
-2000 grit
-3000 grit
Avoid sanding in the same direction as this will gauge the plastic leaving deep grooves that are hard to get out.

Finally, polish with headlight restoration kit.

I did that, minus the 800 and the 3k.

Are you saying I should sand in all directions??? I thought I read to go in straight, back n forth motions....but that seemed wrong.

****, I might have to start over.

And yes, the left side was more polished than the right at that time.
 
I did that, minus the 800 and the 3k.

Are you saying I should sand in all directions??? I thought I read to go in straight, back n forth motions....but that seemed wrong.

****, I might have to start over.

And yes, the left side was more polished than the right at that time.
If you have an oribital sander thats the best thing to use. I hand sanded mine first and ended having "grooves" from sanding in the same direction to much. You can see it from a couple feet away.
 
If you have an oribital sander thats the best thing to use. I hand sanded mine first and ended having "grooves" from sanding in the same direction to much. You can see it from a couple feet away.

Isaac C. buddy, you've ignited a war in the section of my mind where the perfectionist in me is ready to drag out the sandpaper and go at it again, and the lazy slob in there as well, saying, "ahh, it's good enough."

I have an orbital buffer, but not a sander. I couldn't find sanding pads higher than 300 or so at Wallyworld, might have to hit Harbor Freight or something.

I can see, and advise, that one with as damaged a cover as mine should never skimp on the sanding, especially early on. Get the heavy lifting out of the way. I didn't go vigorous or long enough, and had to redo it.

Maybe a third time will be the charm?? Don't mind buying an orbital sander, the hands are throbbing.
 
Isaac C. buddy, you've ignited a war in the section of my mind where the perfectionist in me is ready to drag out the sandpaper and go at it again, and the lazy slob in there as well, saying, "ahh, it's good enough."

I have an orbital buffer, but not a sander. I couldn't find sanding pads higher than 300 or so at Wallyworld, might have to hit Harbor Freight or something.

I can see, and advise, that one with as damaged a cover as mine should never skimp on the sanding, especially early on. Get the heavy lifting out of the way. I didn't go vigorous or long enough, and had to redo it.

Maybe a third time will be the charm?? Don't mind buying an orbital sander, the hands are throbbing.

I'm the same way, but I was like its going to get micro scratches from dusting it off, etc anyway. I'll probably fix the sanding grooves at some point.
 
The sanding pads should be with automative body work section, at least the higher grits. If there isn't any circular ones, if you can find the velcro backed sanding pads you could make your own to fit an orbital sander.
 
Isaac C. buddy, you've ignited a war in the section of my mind where the perfectionist in me is ready to drag out the sandpaper and go at it again, and the lazy slob in there as well, saying, "ahh, it's good enough."

I have an orbital buffer, but not a sander. I couldn't find sanding pads higher than 300 or so at Wallyworld, might have to hit Harbor Freight or something.

I can see, and advise, that one with as damaged a cover as mine should never skimp on the sanding, especially early on. Get the heavy lifting out of the way. I didn't go vigorous or long enough, and had to redo it.

Maybe a third time will be the charm?? Don't mind buying an orbital sander, the hands are throbbing.

Onwardjames, check out this thread.

https://audiokarma.org/forums/index...atched-dust-covers.1398/page-14#post-13186927

I reviewed many of these threads when I had a JVC QL-A2 that had a pretty bad dust cover, and the information I found in it was the best.

I found that the best is to try to judge how deep you need to go, and no further. What I mean by that, is don’t use a coarser grain sandpaper than you need. In general, 800 is really good for most badly scratched dust covers. Sand in one direction only per grade and change direction each time you change grades. This will make it easier to tell that you have removed the deeper scratches from the previous grade. It also seems to give good results.

I had just posted an update in that thread on Thursday night as I had just completed my Thorens TD-160. I had 2 deep scratches and the rest was just surface.

Here’s a sample of the Thorens after I was done.

6C745603-D778-4AD1-B3FF-D767385F1927.jpeg
 
Isaac C. buddy, you've ignited a war in the section of my mind where the perfectionist in me is ready to drag out the sandpaper and go at it again, and the lazy slob in there as well, saying, "ahh, it's good enough."

I have an orbital buffer, but not a sander. I couldn't find sanding pads higher than 300 or so at Wallyworld, might have to hit Harbor Freight or something.

I can see, and advise, that one with as damaged a cover as mine should never skimp on the sanding, especially early on. Get the heavy lifting out of the way. I didn't go vigorous or long enough, and had to redo it.

Maybe a third time will be the charm?? Don't mind buying an orbital sander, the hands are throbbing.

Tim, if the scratches have been sanded and are small, try some headlight cover polish. I've had great success with PlastX.
 
Tim, if the scratches have been sanded and are small, try some headlight cover polish. I've had great success with PlastX.


I swear by that stuff. Many of my dust covers had bad scratches, and over time, I've seemingly buffed many away, only using PlastX. One in particular was horrible, and I just noticed when I moved it the other day it wasn't bad at all.

I will periodically take them off and give them a lengthy polish with PlastX just to keep shiny, and it seems to help, usually while watching some tv or something.,

Sand in one direction only per grade and change direction each time you change grades. This will make it easier to tell that you have removed the deeper scratches from the previous grade. It also seems to give good results.

Okay, this makes sense. I was very unsure how to proceed on that. Also, according to your nice writeup (which NEEDS TO BE A STICKY) you do not opt for an orbital buffer, nay, you recommend hand polishing.

Thanks for the help and tips!!
 
Okay, this makes sense. I was very unsure how to proceed on that. Also, according to your nice writeup (which NEEDS TO BE A STICKY) you do not opt for an orbital buffer, nay, you recommend hand polishing.

Thanks for the help and tips!!

Thanks! I appreciate that. I do have an orbital sander, but only the drill attachment buffer pad that came with the kit I got. I use the hand drill on its slowest speed to do the cutting and polishing, then I use the best quality auto finishing cloth I could find for final dry hand buffing.

Hope it works well for you. These are all details I got out of that rather long, but excellent thread, plus my experience since I started doing it.
 
I swear by that stuff. Many of my dust covers had bad scratches, and over time, I've seemingly buffed many away, only using PlastX. One in particular was horrible, and I just noticed when I moved it the other day it wasn't bad at all.

I will periodically take them off and give them a lengthy polish with PlastX just to keep shiny, and it seems to help, usually while watching some tv or something.,

You probably told me about it to begin with.
 
index.php


This is before -

And this is after. It is NOT perfect, but it is vastly improved, and presentable.
Once my thumbs and joints in my hand recover, I'll go back to 1000 grit once more, and sand in straight lines, intersecting with lower grit for the next run, per I think Bilbo Baggin's recommendation (he's got a great thread on here somewhere). For now, I'm okay with it.

20191103_193622[1].jpg
 
index.php


This is before -

And this is after. It is NOT perfect, but it is vastly improved, and presentable.
Once my thumbs and joints in my hand recover, I'll go back to 1000 grit once more, and sand in straight lines, intersecting with lower grit for the next run, per I think Bilbo Baggin's recommendation (he's got a great thread on here somewhere). For now, I'm okay with it.

View attachment 1662914


Looks great and 100% presentable. I hate having OCD and wanting every last scratch completely removed, so I understand that you want to go back once more. If possible, let it sit a few days and see how you feel about it before attempting because it looks great!
 
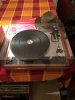
6AA7CB5E-DF8D-48E1-BD3C-4ED1D509EA4A.jpeg I polished the cover on my Pioneer PL41. Here’s the link: https://audiokarma.org/forums/index...-cover-cleaned-up-nicely.691067/#post-9241639

I used emery cloth to sand out deep scratches. This leaves a cloudy patch. Then I used auto body rubbing compound / scratch remover to remove the cloudy area.

I used an orbital sander with a lambs cloth for the polishing procedure over the entire cover.

It turned out OK I think.
 
index.php


This is before -

And this is after. It is NOT perfect, but it is vastly improved, and presentable.
Once my thumbs and joints in my hand recover, I'll go back to 1000 grit once more, and sand in straight lines, intersecting with lower grit for the next run, per I think Bilbo Baggin's recommendation (he's got a great thread on here somewhere). For now, I'm okay with it.

View attachment 1662914

Looking good!

The link to the thread I put content in (there were many AKers who contributed) is above with the picture of my Thorens. I’ve updated my summary to hopefully better explain why I follow this process and why the steps in that sequence. I hope it’s useful. I had to read all 12 plus pages to get this content, so I thought it would be good to summarize for others.
 
Last edited:
Just by accident, I happened to discover that using a very soft cloth spritzed with a light coating of Armor All seemed to really shine up the dust cover, as well as making it semi-repellent to dust. Might give that a try, everyone.

I'm probably gonna wait awhile before re-attempting to take out more scratches. For now, just enjoying the amazing sound of this JVC.

And, @Jim Creek I'll state the obvious - that dust cover appears flawless, man. Very nice work.
 
Back
Top Bottom