• The move to the new server is done. There are some software and database maintenance updates in process. This has us passing the hat around to help out. We appreciate any donations. Seriously, even a dollar helps. The payment page may be found here - https://www.audiokarma.org/support.html

Pulled my parents 500C out of storage today . . .

sabrefencer

AK Subscriber
Subscriber
Unpacked my parents 500C today. Decided to take a look after a long time reading and learning (just getting started) in preparation for doing something with the 500C my parents bought new in in 1963 or 1964 (SN: 43424J). I used to listen to kids records through this unit (I am a few years older than it is). I boxed this unit up in 2005 when my dad moved (probably saving it from the dumpster) and it has not seen daylight again until today. Before that it was in an attic from about 1983, when it was taken out of service. It was in working order at that time, but always seemed to run hot. This unit is complete and appears to have all original tubes - to my knowledge it has never been serviced. It was not heavily used during its 20 year service life in a credenza cabinet (not a Fisher) with Jensen speakers (gone) and a Dual 1009 also still in the box since 2005. Today is the beginning of a long journey to bring this back to life. I have everything to learn, and intend to go slowly.

From a cursory examination i know it needs a new power cord, fuse holder, and V1 (6HA5) which has white deposits in the bulb (I think that means its no good). The gold caps have fallen off 6 of the 8 knobs, but I have them all. I have not opened up the chassis. I have no intention of plugging this in for a while and am in no hurry to hear it in its current state. Other than being a bit dusty from 22 years in an attic, it seems to be complete and clean - no scratches, good graphics, and good dial glass (large number version). Somewhere i have the original owners manual and service manual.

The first decision I need to make is do I try to restore this myself, or entrust someone to do it for me. I really don't know as much as i would like about electronics, but I am mechanically inclined, can read a schematic. I'm reading a 1928 book on how radio works as a primer. I built a Dynaco power amp kit in the 70s and cabinets for my JBLs (S99 Athena clones which i still have and use daily). I can solder and would make sure i got plenty of practice before touching the Fisher. Then there is the investment in tools and equipment. A variac, good soldering station, Fluke MM, etc. Do i buy a tube tester on eBay? Do i need an oscilloscope? And then i need to learn how to use these instruments correctly. I don't intend to restore lots of other equipment, (so i say now) and am not sure i want to invest in the tools for one unit, but it may be worth it just to take the journey (my guess is total cost do DIY is about the same as having a pro do it, but not as much fun) Since there appears to be no "right" way, but lots of wrong ways to restore one of these, not sure i am willing to trust someone else with it. After all it is a member of the family. But i am open to suggestions - i am in Charlotte, NC, so local contacts for parts, tests, know how or moral support would be appreciated.

If i do it myself, from what i have read on AK i am thinking of getting the Metalbone kit and probably Hayseed can caps (I'm not even sure what these do) - but i know i do not want to go the circuit board route. I assume these mods will take care of the power supply issues - if i do these mods first can i power safely it up without a variac? Or should i power it up with a variac as is (after fixing the fuse holder) and take some measurements before i start changing things?

Are the new (made in China) variacs on ebay OK? If yes what voltage should i use when i power it up - 110?

Let the journey and the thread begin.

In this box since 2005:20180204_135509.jpg

First daylight in 12 years:20180204_135607.jpg

A pretty face (I have all the original knob caps):
20180204_145403.jpg


Looks like every thing is present and accounted for:
20180204_154744.jpg

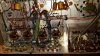
Original quad of Fisher labeled 7591s (marked 7591 not 7591a) and output transformers:
20180204_142315.jpg
V1 in the tuner section (6HA5) has white deposits - does this mean its dead?
20180204_140453.jpg

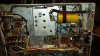
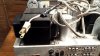
Power cord was cut - probably to install in console - and fuse holder is broken - ebay here i come.
20180204_142250.jpg
 
Register to hide this ad
Nice 500c. BIG NUMBER DIAL IS FAIRLY RARE. You can get it up to running for testing with minimal stress.

Yes the 6GK5 is shot. Get a new one. www.abcvacuumtubes.com $5.00ea. Shipping will be about $7.95 Otherwise the best tube tester is the 500c. It'll tell you if the tubes are working or not.

As for the Cord. Unless you want to restore it to factory spec, just go down to Home Depot or Lowes and get a 6 to 9 ft extension cord (16Ga), and install it thru the strain relief on the chassis. Cut off the female end. The side with the WIDE BLADE is Neutral. The Narrow blade is the HOT SIDE. HOT SIDE goes to the switch. A CL-80 thermistor gets installed between the end of the cord (hot side) and the lead to the switch. Make sure it's out in the open so it can dissipate heat without burning up anything.

Build a DBT (Dim Bulb Tester) and get a 150 and 200W incandescent bulb. It takes that much wattage to crank it up and still be able to use the DBT as a load limiter correctly. Cheaper than a variac, and watching the bulb go bright for a couple seconds then dim down as the inrush subsides is a good indication that it's most likely ok. A variac won't do that. Google "Dim Bulb Tester" or "DBT". Parts less than $20.00 at H.D. or Lowes.

Open it up and take pictures. Overall, then break it up into quarters. Post here and we can tell you what you'll need in addition to the metalbone kit and HAYSEED CAN's. It's a fairly short list, but some of the instructions can be complex so follow along and if you don't understand something, Hit the STOP button and ask questions. Dumb questions are the ones you DON'T ask and can get you injured or killed.

In the 1928 book they may refer to "condensers". They are now called Capacitors. Same thing.
 
The main difference between the 7591 and 7591A is orientation of the plate and metal casing inside. Otherwise identical.
 
Welcome to AK! That's a beautiful 500C you have! Maybe the dilemma regarding how much of the work you do or don't do has the answer in the middle some where. If you're inclined to actually perform the work but want to have it checked over for accuracy, then maybe have someone local with a good reputation look it over once you're finished. Or, just take it slowly, and check the work for each section before moving on to another. Either way, you will find some great folks here and a wide variety of skill levels that you will easily fit into, and all willing to help you along the way.

Looking forward to your progress!

Dave
 
Larry, thanks for the quick reply and Dave thanks for the encouragement -- good idea to get it checked/adjusted after i do the labor intensive stuff. A few questions: 1) Regarding the power cord, if i don't go OEM, is there any reason not to go with a 3 prong cord (observing wire size and polarity as you pointed out) and connecting the third (ground) lead to the chassis ground terminal? I assume this could help reduce hum especially in the Phono section. 2) If i install the CL-80 before attempting to power up (my plan) do i still need the DBT? 3) Will installing the CL-80 permanently limit the current (voltage) to safe levels, or are there other components that need to be installed also before operating on my modern line voltage (measured at 123vAC) without a DBT? Are these all part of the MetalBone Kit?

More info: I opened up the bottom of the chassis and it certainly looks unmolested - no service stickers, friction tape or chewing gum. Siemens rectifier is there - see photo. One more thing i noticed is that someone cut the ears off the faceplate flush with the chassis - that is why it does not say "500C" in the upper left corner (bummer). This must have been done to install in a cabinet -- no impact on sound, of course, and not really noticeable, but depending on how the rest of the project goes, i may decide to spring for a replacement faceplate as part of a cosmetic restoration after i get the electrical and sonic qualities sorted out). 4) Does anyone know if there is a difference between the faceplates for the large number dial vs.the small number dial - for example is the cut-out for the glass the same size? 5) Last question (for today), other than the online vendors that are linked from this site, and ebay, is there a sub-forum (or wanted / for sale message board) or other site where AK members can buy and sell parts etc, without having to deal with ebay.?

Siemens Rectifier -- I know this gets replaced as part of the MB Kit:
20180204_201310.jpg

If i am following the wires and reading the schematic correctly, the hot (+) lead is on the right side of the incoming power cord and connects to the wire that goes to the front panel switch at the solder joint circled in yellow. Feed to switch is the orange braided wire (bottom wire circled in red), and return (hot) from the switch is via upper orange wire circled in red, and is connected to the fuse holder (not visible). The incoming neutral (-) is circled in blue and goes to the outlets and on from there. Assuming i have my polarity correct, i plan on putting the CL-80 at the solder joint circled in yellow - right where the power cord comes in. I assume putting the CL-80 here will ensure the high line voltage does not go through the switch (hopefully preventing it from an early demise). Looking for confirmation on this please. Since i will be replacing the power cord and the fuse holder, while working in this area, installing the CL-80 is the first thing i plan on doing. I will then get the MB kit and go on from there.
InkedInkedInked20180204_201404_LI.jpg


Melted insulation on orange wire (connects V14 to one of the can caps) -- is this an indication of a problem?, or should i just put some heat shrink on it or replace the wire - does not appear to be burned through to the wire.
Photo C2
20180204_200832.jpg

More photos of the belly of the beast:
Photo C3
20180204_200722.jpg

Photo C4
20180204_200732.jpg

PhotoC5
20180204_200844.jpg

Photo C6
20180204_200850.jpg

What is the big yellow paper can - is that a capacitor? What circuit is it in (power supply)?
 
Fisher experts will most likely suggest to replace Selenium Rectifier first. Before you attempt to turn it "on" for the first time.

I'd like to hear about installing modern grounding power cord too!

I ended up installing two CL-80 current limiters (one on line and another on neutral) to drop operating voltages to specs. My wall voltage fluctuates between 121 and 124v.
Do not underestimate Larry's warning about their heat. They get HOT and will bake anything nearby. Make sure they have enough room around them and directly above too. (you are working with unit upside down)

You should still build and use DBT until you are sure that all voltages are where they are supposed to be. Use it every time you made any changes to the circuit. It will help you prevent major damages incase you'd made a mistake. Light bulb (DBT) connected in series with receiver will prevent dangerous currents flow through trouble (shorted) area in the circuit.

I'm pretty sure that cardboard capacitor is a Bias cap (same as Fisher 400 I have). It filters NEGATIVE voltage for Bias supply. If you are replacing Can Caps with Hayseed kit - it will be included.

You are into interesting journey that will keep you busy for a while. You will find that here are many members that will be glad to help you get going, just as they helped me.
I too, started my Fisher 400 rebuild with very limited knowledge of the circuit and I've learned a lot in the process. Made some mistakes, paid for them and moved on forward.
Results are very rewarding. Fisher sounds very, very good! Good luck with your project!
 
I'll answer them in order real quick (I can postpone the scalding hot water shower to my back for a few minutes) Answers in bold.
1) Regarding the power cord, if i don't go OEM, is there any reason not to go with a 3 prong cord (observing wire size and polarity as you pointed out) and connecting the third (ground) lead to the chassis ground terminal? I assume this could help reduce hum especially in the Phono section.
The unit was built so that a Grounded chassis Can induce Ground loops and will induce hum. Leave it at 2 prong.


2) If i install the CL-80 before attempting to power up (my plan) do i still need the DBT?
MOST EMPHATICALLY YES! The DBT is a current limiting device and will glow full bright if there is a short and limit the current as Grindfix alluded to. They can be built by a 4th or 5th grader from a picture(but honestly I'd check the wiring before using it the 1st time with a meter!).

3) Will installing the CL-80 permanently limit the current (voltage) to safe levels, or are there other components that need to be installed also before operating on my modern line voltage (measured at 123vAC) without a DBT? Are these all part of the MetalBone Kit? They will drop the voltage a couple volts, but not the current (AMPS!) There is a difference that you need to understand. No they are NOT a part of the Metal bone kit.

4) Does anyone know if there is a difference between the faceplates for the large number dial vs.the small number dial - for example is the cut-out for the glass the same size? NO difference in Faceplate size overall nor a difference in the dial glass opening.


5) Last question (for today), other than the online vendors that are linked from this site, and ebay, is there a sub-forum (or wanted / for sale message board) or other site where AK members can buy and sell parts etc, without having to deal with ebay.? YES! It's called BARTERTOWN. It's a subscriber only forum, and it costs $25.00 a year. Beats E-PREY Hands down for gear, parts, etc. Gear specific parts may or may not be on Bartertown, just like E-PREY, but they will be in better condition, and usually for a better price. Mouser, DIGIKEY, and other reputable dealers (even tubes) are out there for items pertaining to the FISHER GEAR. So if you think you need something ASK where some of us got our parts, etc. You'd be surprised at the support for old electronics is still out there.

The big yellow cardboard tube is the BIAS section capacitor. It's wired backwards so as to generate NEGATIVE DC VOLTAGE. And it's part of the HAYSEED 500c KIT. Advise you to get the single DUAL CAP vs. the 2 single caps as it's less likely to get wired wrong for a new guy.

Off to the HOT SHOWER to loosen up the old back before bed.

Larry
 
Last edited:
I'll answer them in order real quick (I can postpone the scalding hot water shower to my back for a few minutes) Answers in bold.
1) Regarding the power cord, if i don't go OEM, is there any reason not to go with a 3 prong cord (observing wire size and polarity as you pointed out) and connecting the third (ground) lead to the chassis ground terminal? I assume this could help reduce hum especially in the Phono section.
The unit was built so that a Grounded chassis Can induce Ground loops and will induce hum. Leave it at 2 prong.


2) If i install the CL-80 before attempting to power up (my plan) do i still need the DBT?
MOST EMPHATICALLY YES! The DBT is a current limiting device and will glow full bright if there is a short and limit the current as Grindfix alluded to. They can be built by a 4th or 5th grader from a picture(but honestly I'd check the wiring before using it the 1st time with a meter!).

3) Will installing the CL-80 permanently limit the current (voltage) to safe levels, or are there other components that need to be installed also before operating on my modern line voltage (measured at 123vAC) without a DBT? Are these all part of the MetalBone Kit? They will drop the voltage a couple volts, but not the current (AMPS!) There is a difference that you need to understand. No they are NOT a part of the Metal bone kit.

4) Does anyone know if there is a difference between the faceplates for the large number dial vs.the small number dial - for example is the cut-out for the glass the same size? NO difference in Faceplate size overall nor a difference in the dial glass opening.


5) Last question (for today), other than the online vendors that are linked from this site, and ebay, is there a sub-forum (or wanted / for sale message board) or other site where AK members can buy and sell parts etc, without having to deal with ebay.? YES! It's called BARTERTOWN. It's a subscriber only forum, and it costs $25.00 a year. Beats E-PREY Hands down for gear, parts, etc.

The big yellow cardboard tube is the BIAS section capacitor. It's wired backwards so as to generate NEGATIVE DC VOLTAGE. And it's part of the HAYSEED 500c KIT. Advise you to get the single DUAL CAP vs. the 2 single caps as it's less likely to get wired wrong for a new guy.

Off to the HOT SHOWER to loosen up the old back before bed.

Larry

CL-80 is Inrush Current Limiter.
As I understand, besides lowering wall voltage it buffers current flow caused by mains line voltage fluctuations. it will not protect unit under test as DBT would.

https://www.mouser.com/ds/2/18/AAS-920-325D-Thermometrics-NTC-Inrush-031814-web-850596.pdf
 
Grindfix. The article in the pamphelt pertains only to SWITCHING POWER SUPPLY's. We have transformers, so all the CL-80 does is ramp up from a high resistance to a low resistance to slow down current inrush so the switch contacts don't get slammed with 3A or more, due to the caps acting like a dead short when they are totally discharged. It's rated for 3A which is more than the 500c uses in normal use (usually 170-180W which is about 1.8A). So NO CURRENT LIMITING. The Transformer can handle the inrush, but the switch has proven it has problems with the inrush current which can be as high as 5-6A at startup from cold for a second or two until the main caps are fully charged. Which is one of the reasons that it's recommended that the downside of the switch contacts (there are two sets) are jumpered to even out the load across the 2 of them rather than one and an inrush current limiter installed.

Larry
 
Got it.
I have mine running on a relay with switch only seeing the relay coil winding current. I just did not want to chance the switch which would be a pain to source and replace.
 
Nice find,luckily packed well, no rodent motel/latrine in there. Why change the whole power cord because of the splice? I'd just cut that off & replace the plug with a new one, because that's a lot less work & saves the original. You're only losing a few inches.
I'm kinda in the same boat as you on the restore, have 2 late-models, both working but need a few upgrades, in the works. Listen to one, work on the other, which helps heat the workroom upstairs, plus ready visual reference.
These guys on here that you're hearing back from are GOLD! Immense help, & I'm learning much from them & the forum stickies, which is where I go first so as not to be a pain in their asses. Most if not any questions you have are already addressed there, but be ready to spend some serious time digesting it all.
Have fun,learn much, but be advised there's high voltages present, especially around power tubes & filter caps. Found out in h.s. electronics class what burning flesh smells & feels like when contacting 600+volts. Ya don't want to know! :yikes:
 
Try getting hit with 2 phases of a 440Vac 3 phase. Summer of 81 in shipyard where I worked in Safety Dept. Maint Electrician went to work on overhead crane in shop. No gloves.....dummy! was pulling fuses and had both hands in or on the box. ZAPPPP! Good thing he'd been sweating heavily, as it only burned off the skin on his arms. Looked like burnt Marshmallows, all black and bubbly! And boy DID IT STINK! He lived, but voluntarily retired after his arms healed.

The Shipyard then changed all the 440 boxes to circuit breakers with external levers and lockout tags. The shop and crane had been erected during WWII. We determined that the box had one phase shorted to box(it was mounted to a wood beam), and when he grabbed the fuse on the other phase (he was using a fuse puller but it wasn't long enough and his hand was not on the opposite end) the electricity arced to his fist and across his arms to the other side where it blew off the ends of two fingers on the hand he had on the box. He was DAMNED LUCKY he didn't die. I had to write up the OSHA incident report.

Sabrefencer; The single phase 120V isn't as bad as 440V 3 phase but it still has the potential to kill you. NO JEWELRY PERIOD! Take it all off. Get some 1/4" dowel from Home Depot and cut it into 12" lengths. (This is for probing components during troubleshooting, and moving components and leads around if necessary.) We're not stating these incidents to scare the crap out of you to prevent you working on the gear, we're stating from past experience what can happen if you don't take basic Safety precautions. We want you to repair your parents 500c and get it working for your continued enjoyment, but we also want you upright, on the green side of the grass, and talking to your friends about it.

1.)No working inside the unit with it energized except with meter probes to take voltages or wooden probe to troubleshoot.
2.)NO JEWELRY PERIOD! I've seen too many wedding or other rings melted into the finger from Hi Voltage and low voltage (fairly hi amp) electricity.
If the unit has been energized recently the main filter caps will have some stored electricity in them. Short them to chassis with a 1000ohm 5W resistor and use meter to verify ZERO VOLTS!
3.)Use a DBT when starting it up for the 1st time. A 150W bulb is sufficient for a 500c. This will limit current (amps) and help mitigate damage should there be a short from assy. If it glows at full brightness and doesn't dim, SHUT IT OFF, bleed down the caps and troubleshoot your last work. Do 3-4 components then power it up. If OK (Bulb goes dim) shut off, drain caps and continue. Rinse, repeat until done.:D This procedure will lengthen the time spent under the hood, but it's safer, and you know what parts you just put in so troubleshooting is minimized to those parts.
4.) If you are not sure about something....STOP! Get on here and ask questions. Don't expect an immediate answer, as none of us are on here 24/7, but we can answer within a reasonable time frame (usually less than 12 hours).
5.) a little knowledge is dangerous at times. Don't overthink the problem. Don't get ahead of yourself. STOP. ASK QUESTIONS even if they sound like they would make Dumb and Dumber look like Genius'. The DUMB QUESTIONS are the one's not asked and they'll get you in trouble faster than your mother can say......."You just wait until your Father gets home!"
 
No thanks! I've seen the damage arc flash can do (u-toob vids).
Here's today's progress, ops ck. ok, no smoke leaks. Screen grid stabilizers in.
Next up, rectifier replacement. Have a 200v 4amp rb-40 I can screw to one of the original mounting holes. Also have 2 kbl02's with twice the ratings, but no mounting hole. I think these are overkill. Neg. voltage off oem unit is 16, pos. is 3.58. Will the s/s replacement need series dropping resistors? That's common when working on old radios when going from selenium to a diode.
 
Forgot this in previous post, my bad:whip:
 

Attachments

  • 20180205_154413.jpg
    20180205_154413.jpg
    70.1 KB · Views: 54
You might need a little drop. I get -24 with a new 8a 400V bridge and don't bother as I'm using NEW Tungsol 7591's in my 800c's. Makes it nice when they are idling at 32ma and -21v. If you've got Old Stock tubes or EH7591's you may need the resistor to center up the pots on an IBAM or IBBA. I forget what size Dave uses.
 
No ibam or ibba in it yet, haven't made up my mind on that. May just put a pot in the bias feed. That being, I think I'll just put this bridge in that I have on hand, check results & go from there. Sure wish rat shack & philcap electronics were still around, I need a handful of 1/4watt 10 ohm resistors & some caps for the 500c's & an x101d. Looked at mouser site, not very user-friendly. They want too much specific info just to get to the ordering part. I just want the damn things, I don't care about the temp.rating, color, max voltage, what day of the week they were made, rating of the paint used to mark, etc.
 
Try getting hit with 2 phases of a 440Vac 3 phase. Summer of 81 in shipyard where I worked in Safety Dept. Maint Electrician went to work on overhead crane in shop. No gloves.....dummy! was pulling fuses and had both hands in or on the box. ZAPPPP! Good thing he'd been sweating heavily, as it only burned off the skin on his arms. Looked like burnt Marshmallows, all black and bubbly! And boy DID IT STINK! He lived, but voluntarily retired after his arms healed.

The Shipyard then changed all the 440 boxes to circuit breakers with external levers and lockout tags. The shop and crane had been erected during WWII. We determined that the box had one phase shorted to box(it was mounted to a wood beam), and when he grabbed the fuse on the other phase (he was using a fuse puller but it wasn't long enough and his hand was not on the opposite end) the electricity arced to his fist and across his arms to the other side where it blew off the ends of two fingers on the hand he had on the box. He was DAMNED LUCKY he didn't die. I had to write up the OSHA incident report.

Sabrefencer; The single phase 120V isn't as bad as 440V 3 phase but it still has the potential to kill you. NO JEWELRY PERIOD! Take it all off. Get some 1/4" dowel from Home Depot and cut it into 12" lengths. (This is for probing components during troubleshooting, and moving components and leads around if necessary.) We're not stating these incidents to scare the crap out of you to prevent you working on the gear, we're stating from past experience what can happen if you don't take basic Safety precautions. We want you to repair your parents 500c and get it working for your continued enjoyment, but we also want you upright, on the green side of the grass, and talking to your friends about it.

1.)No working inside the unit with it energized except with meter probes to take voltages or wooden probe to troubleshoot.
2.)NO JEWELRY PERIOD! I've seen too many wedding or other rings melted into the finger from Hi Voltage and low voltage (fairly hi amp) electricity.
If the unit has been energized recently the main filter caps will have some stored electricity in them. Short them to chassis with a 1000ohm 5W resistor and use meter to verify ZERO VOLTS!
3.)Use a DBT when starting it up for the 1st time. A 150W bulb is sufficient for a 500c. This will limit current (amps) and help mitigate damage should there be a short from assy. If it glows at full brightness and doesn't dim, SHUT IT OFF, bleed down the caps and troubleshoot your last work. Do 3-4 components then power it up. If OK (Bulb goes dim) shut off, drain caps and continue. Rinse, repeat until done.:D This procedure will lengthen the time spent under the hood, but it's safer, and you know what parts you just put in so troubleshooting is minimized to those parts.
4.) If you are not sure about something....STOP! Get on here and ask questions. Don't expect an immediate answer, as none of us are on here 24/7, but we can answer within a reasonable time frame (usually less than 12 hours).
5.) a little knowledge is dangerous at times. Don't overthink the problem. Don't get ahead of yourself. STOP. ASK QUESTIONS even if they sound like they would make Dumb and Dumber look like Genius'. The DUMB QUESTIONS are the one's not asked and they'll get you in trouble faster than your mother can say......."You just wait until your Father gets home!"
I'll answer them in order real quick (I can postpone the scalding hot water shower to my back for a few minutes) Answers in bold.
1) Regarding the power cord, if i don't go OEM, is there any reason not to go with a 3 prong cord (observing wire size and polarity as you pointed out) and connecting the third (ground) lead to the chassis ground terminal? I assume this could help reduce hum especially in the Phono section.
The unit was built so that a Grounded chassis Can induce Ground loops and will induce hum. Leave it at 2 prong.


2) If i install the CL-80 before attempting to power up (my plan) do i still need the DBT?
MOST EMPHATICALLY YES! The DBT is a current limiting device and will glow full bright if there is a short and limit the current as Grindfix alluded to. They can be built by a 4th or 5th grader from a picture(but honestly I'd check the wiring before using it the 1st time with a meter!).

3) Will installing the CL-80 permanently limit the current (voltage) to safe levels, or are there other components that need to be installed also before operating on my modern line voltage (measured at 123vAC) without a DBT? Are these all part of the MetalBone Kit? They will drop the voltage a couple volts, but not the current (AMPS!) There is a difference that you need to understand. No they are NOT a part of the Metal bone kit.

4) Does anyone know if there is a difference between the faceplates for the large number dial vs.the small number dial - for example is the cut-out for the glass the same size? NO difference in Faceplate size overall nor a difference in the dial glass opening.


5) Last question (for today), other than the online vendors that are linked from this site, and ebay, is there a sub-forum (or wanted / for sale message board) or other site where AK members can buy and sell parts etc, without having to deal with ebay.? YES! It's called BARTERTOWN. It's a subscriber only forum, and it costs $25.00 a year. Beats E-PREY Hands down for gear, parts, etc. Gear specific parts may or may not be on Bartertown, just like E-PREY, but they will be in better condition, and usually for a better price. Mouser, DIGIKEY, and other reputable dealers (even tubes) are out there for items pertaining to the FISHER GEAR. So if you think you need something ASK where some of us got our parts, etc. You'd be surprised at the support for old electronics is still out there.

The big yellow cardboard tube is the BIAS section capacitor. It's wired backwards so as to generate NEGATIVE DC VOLTAGE. And it's part of the HAYSEED 500c KIT. Advise you to get the single DUAL CAP vs. the 2 single caps as it's less likely to get wired wrong for a new guy.

Off to the HOT SHOWER to loosen up the old back before bed.

Larry

Larry, thanks for the tips. Have taken a few baby steps: 1) Built and tested a DBT. 2) Installed a polarized plug on original power cord to replace spliced in junk. 3) Replaced broken fuse holder and 3.2A fuse. 4) Installed CL-80 thermistor (see photo for installation) in Hot leg of inbound power. 5) Replaced dead V1 (6AH5) - new one looks like an NOS Zenith tube. After this work I attempted to power up through the DBT with a 150W bulb . The bulb lit brightly and the voltage at the input (after the CL-80) dropped to about 50v. I shut it all down. No smoke, no smell. I assume this indicates a short. Are there other tests I can perform, or measurements I should take? If likely culprits are the rectifier or the power supply caps, should i just proceed to getting the caps from hayseed and the metalbone kit, and begin to replace stuff one piece at a time? I would prefer to know what's broken before I replace it, rather than shoot in the dark.

20180219_224119.jpg
 
CL-80 will cook everything above it after unit is upside up. You should move it to the opposite side of the terminal strip where its heat will be absorbed by the metal of the chassis.
Did you perhaps turned it off too soon, before capacitors had a chance to recharge? Variac would be very useful.
My Fisher 400 was turning DBT full bright on first try. I then used both, variac + DBT + Fisher and raised voltage slowly over course of 30 minutes and got it to mains operating voltage and it played until I noticed one of the can caps was getting warmer then other components around. Hayseed option was next for me.
 
Are you using load resistors (or speakers) at speaker terminals? Tube amplifiers should not be powered on without load connected to output transformers. OPTs can get damaged.
Most receivers have dropping resistors for headphone output but I don't know if they are safe enough to rely on.
 
Grind; As long as the the speaker switch is "OFF" (400), or Set to Headphones (500c/800c) turning the FISHER unit on without speakers WILL NOT HURT it as the HEADPHONE or Speaker switch circuits have a load on them to simulate speakers. Just DON'T CRANK it to 11 or even 5-1/2.
 
Back
Top Bottom