• The move to the new server is done. There are some software and database maintenance updates in process. This has us passing the hat around to help out. We appreciate any donations. Seriously, even a dollar helps. The payment page may be found here - https://www.audiokarma.org/support.html

Re-covering Advent Grille cloth

jberger

AK Subscriber
Subscriber
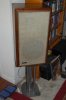
As part of a whole-system score at an estate sale, I got a pair of Advent Loudspeakers (in walnut, not vinyl). As expected they needed refoaming and a good cleanup (can you say 'tobacco haze'?).

But the ugly part was the grille cloth; stained and watermarked, they brought the whole system down, and needed to go.

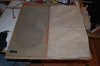
Advent used an open-weave cloth, with a black scrim backing to hide the drivers, so there were two layers of cloth to match. Since I couldn't match on sonics in the fabric store, I used visual transparency as an analogue, and ended up with some black chiffon for the scrim, and an ecru burlap for the outer cloth.
 

Attachments

  • DSC_1013.jpg
    DSC_1013.jpg
    95.6 KB · Views: 116
  • DSC_1040.jpg
    DSC_1040.jpg
    59 KB · Views: 106
  • DSC_1038.jpg
    DSC_1038.jpg
    72.4 KB · Views: 118
Register to hide this ad
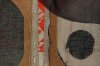
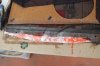
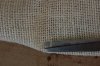
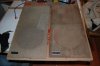
A rough comparison of the before and after looks shows that the burlap has larger threads, but fewer per inch. The chiffon had the opposite problem, but ultimately was more transparent. Original is on the left, and the circle is from the original; you can read the lettering on the box underneath through both cloths.
 

Attachments

  • DSC_1020.jpg
    DSC_1020.jpg
    153.5 KB · Views: 89
  • DSC_1015.jpg
    DSC_1015.jpg
    132.1 KB · Views: 89
  • DSC_1014.jpg
    DSC_1014.jpg
    81.2 KB · Views: 92
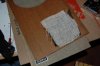
The originals were stapled on together, but the scrim had fallen apart. Fortunately it fell away with a light brushing.
 

Attachments

  • DSC_1025.jpg
    DSC_1025.jpg
    80.5 KB · Views: 65
How does it sound, Part I

I wanted to compare the before and after sound, so I spray-glued a patch of both fabrics over the tweeter hole and swapped back and forth. Ultimately, I found that two layers of scrim matched the sonics the best, so I left a patch of scrim over the tweeter hole.
 

Attachments

  • DSC_1026.jpg
    DSC_1026.jpg
    98.8 KB · Views: 43
One layer, or two?

I decided to apply the cloth in two rounds. Since the scrim would only be visible from the back, I decided to use spray glue to fasten it. I applied a strip along the bottom edge and draped the scrim into place. I used a painting straightedge throughout; first as a shield when spraying the glue, then like a sheetmetal brake, to pull and wrap around all of the fabric at once, and finally as a straightedge for the razor knife to trim. It made for a nice, neat edge.
 

Attachments

  • DSC_1033.jpg
    DSC_1033.jpg
    74.1 KB · Views: 66
  • DSC_1032.jpg
    DSC_1032.jpg
    76 KB · Views: 66
  • DSC_1031.jpg
    DSC_1031.jpg
    82.4 KB · Views: 64
  • DSC_1029.jpg
    DSC_1029.jpg
    73.1 KB · Views: 73
  • DSC_1034.jpg
    DSC_1034.jpg
    87.9 KB · Views: 73
The main event

The guy at the fabric store taught me a neat trick for getting a straight cut. Work loose one thread where you want the cut, hold the opposite side, and pull it out; this will leave a 'ladder' in a straight line to cut.

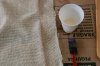
After a rough cut for size, I diluted some carpenter's glue about 50/50 with water, and brushed it into the edge of the fabric, to keep the burlap from unraveling. It made for a nice stiff edge that took to staples well.
 

Attachments

  • DSC_1043.jpg
    DSC_1043.jpg
    91.6 KB · Views: 66
  • DSC_1045.jpg
    DSC_1045.jpg
    141.8 KB · Views: 68
  • DSC_1027.jpg
    DSC_1027.jpg
    130.9 KB · Views: 69
Looks good! I picked up some Advents with crazy paisley cloth on them. I'll follow your lead on re-covering them.
 
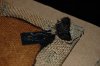
I followed the same basic process with the outer cloth, but fastened these with staples. Advent had used 1/8" upholstery staples, but I used 1/4" without any poking through. They did need a hammer tap to finish them up, as it's hard to staple into masonite without an air stapler. The corner fabric was folded in with a sort of a 'butterfly' fold.

You can see from the 'before' picture that Advent put the cloth on in one shot, and probably had a two-layer cloth on the roll.
 

Attachments

  • DSC_1022.jpg
    DSC_1022.jpg
    65 KB · Views: 73
  • DSC_1036.jpg
    DSC_1036.jpg
    110.2 KB · Views: 70
this is a timely thread as I will be recovering some KLH speakers shortly.

What size staples did you use?

Well done - good tips and tricks - thanks for sharing.
 
The finished product

And here's the finished product. Not pictured: re-glueing the logo plate; replacing the velcro that holds it all in place (put the 'hook' side on the speaker, and it can grab against the cloth as well as the 'loop' piece); replacing the woofer foam; and a light steel wool cabinet rubdown followed by Medium Walnut Watco Danish Wood Oil to remove a water circle.

I also added a center block for another support in the center (think the center spot on dice showing '5'), because these had slowly become concave and the corners stuck out.

Still to come will be a recap, and replacing the screw terminals with 5-way binding posts, and they'll be good to go for a nice break-in run.

Thanks to all of you Audio Karma-er's for sharing your techniques that have helped me.

attachment.php
 

Attachments

  • DSC_1037.jpg
    DSC_1037.jpg
    79.9 KB · Views: 184
Last edited by a moderator:
peterfranks, I used 1/4" T-50 staples because that's what I had, and I couldn't find anything shorter. The staple gun didn't have enough 'oomph' to push them all the way through, so they got a tap with the hammer that embedded them a bit more, and flattened them into the cloth.

I've heard of people using heavy spray starch instead of the diluted glue around the edges, but I think that the glue worked fine; just dilute it enough that it can soak into and around the cloth. And the straightedge trick helped immensely, especially with the spray glue, to get it all in the right place at the right time.
 
Last edited:
peterfranks, I used 1/4" T-50 staples because that's what I had, and I couldn't find anything shorter. The staple gun didn't have enough 'oomph' to push them all the way through, so they got a tap with the hammer that embedded them a bit more, and flattened them into the cloth.

I've heard of people using heavy spray starch instead of the diluted glue around the edges, but I think that the glue worked fine; just dilute it enough that it can soak into and around the cloth. And the straightedge trick helped immensely, especially with the spray glue, to get it all in the right place at the right time.

Great - I have those exact staples so thanks for the advice. I like the diluted glue step - that will keep things tidy.
 
This really calls for pictures...

I mis-remembered. Not paisleys. It's whatever you would call this hideous affront to the eyes. Once I get a replacement tweeter, I'm going to give these some attention. The cloth has to go or the wife will have conniptions immediately before killing me.

crazyadvents_zps0d6968d0.jpg
 
I had trouble with 1/4 staples poking through when I did my Smaller Advents, so I tacked some 3/16x ummmaybe 5/8" wide (It was standard pine molding anyway) around the edge inside, then stapled in a normal fashion with great confidence.
Only thing is, I had to mod the pine a bit to fit past the masonite tweeter board.
 
I considered that, but since my staple gun was wimpy they didn't go through. If I had, I probably would have glued the molding strip into place, and then stapled to it, but as you note, you have to work around the masonite and the blocks holding the velcro.
 
The stuff I found was narrow enough to miss em all except maybe one in the top left corner which took a minimal amount of shaving to miss.
I used one of those lever backwards staplers (Powershot) that takes regular old T-50's, so you are making pressure as you squeeze over the end thats driving the staple (makes more sense to me).
 
I mis-remembered. Not paisleys. It's whatever you would call this hideous affront to the eyes. Once I get a replacement tweeter, I'm going to give these some attention. The cloth has to go or the wife will have conniptions immediately before killing me.

That stuff sure doesn't look transparent to audio. Thanks for posting.
 
Back
Top Bottom