• The move to the new server is done. There are some software and database maintenance updates in process. This has us passing the hat around to help out. We appreciate any donations. Seriously, even a dollar helps. The payment page may be found here - https://www.audiokarma.org/support.html

Re-Plinth TD-150

Sir Bakerman

Active Member
Hello Fellow Spinners,

Some of you may know through my posts on other threads I am re-building my plinth for my Thorens TD-150. I will be using this thread as a showcase to illustrate my progress ( or lack thereof).

I am also going to use it to put forth some questions so I can make this the deck I have dreamed of ever since I returned to vinyl. I hope you stop in and discuss ad naseum all the pros and cons of my feeble attempts to emulate some of the other masterful re-plinthing that has been posted on these great forums.

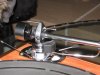
So with out further procrastination here is my deck in it's first modification state:

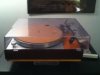
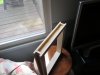
The first is a shot of the 150.

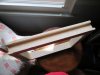
The second is a detail of the SME 3009 I put on it.
 

Attachments

  • IMG_0011.jpg
    IMG_0011.jpg
    79.1 KB · Views: 147
  • IMG_0013.jpg
    IMG_0013.jpg
    68.6 KB · Views: 107
Last edited:
Register to hide this ad
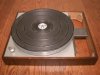
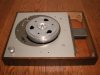
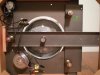
Further pictures. This is what I started with:

Thanks to Ddarch of Vinylnirvana.com
 

Attachments

  • ORIGINAL.jpg
    ORIGINAL.jpg
    76.6 KB · Views: 69
  • TOP PLATE OFF.jpg
    TOP PLATE OFF.jpg
    70 KB · Views: 56
  • Underbelly.jpg
    Underbelly.jpg
    57.7 KB · Views: 62
Last edited:
This is my deck as it sits now. A few modifications. Cork platter. Fluid Dampener,bronze knife bearing . The latest modification is the "Q-up" very nice and helpful.

I've gone through a number of carts in the past few years, most notable a Sumiko Pearl, Ed Saunders Shure V, and finally the Shure V with a Jico stylus. Sorry for the blurry pix but it's an iPhone camera.
 

Attachments

  • 150 now.jpg
    150 now.jpg
    55.4 KB · Views: 78
  • headshell .jpg
    headshell .jpg
    59.5 KB · Views: 97
  • entire.jpg
    entire.jpg
    54.6 KB · Views: 37
  • entire2.jpg
    entire2.jpg
    53.7 KB · Views: 39
Last edited:
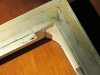
Here is my first foray into the re-plinthing of this. Following Divot Dogs sand filled plinth thread as well as a few other modifications I have some work ahead of me. It a sickness I admit but I think after I accomplish this I can finally sit back and spin some wax....
 

Attachments

  • new plinth1.jpg
    new plinth1.jpg
    62.8 KB · Views: 62
  • corner.jpg
    corner.jpg
    69.1 KB · Views: 51
Very nice! Love the armboard. Did Dave help you restore it functionality + armboard? He does great work.
 
Actually Dave sold me the deck as shown in it's original state. No armboard just the basic deck with a nice quiet motor. So the armboard is my work, on which I will improve now. The addition of the SME 3009 was my doing as well plus numerous mods to the interior with blu-tak and Dyna mat.
 
Actually Dave sold me the deck as shown in it's original state. No armboard just the basic deck with a nice quiet motor. So the armboard is my work, on which I will improve now. The addition of the SME 3009 was my doing as well plus numerous mods to the interior with blu-tak and Dyna mat.

Very cool! Any pictures of the underside with the blu-tak and the dynamat?

I want to add blu-tak to the underneath of my 160 around the cueing plastic as I don't use it anymore. Isolate it a bit.
 
Here is a pic it's not my table but it resembles it closely.I think it's a TD-160 if memory serves.
 

Attachments

  • blutakspecial.jpg
    blutakspecial.jpg
    96.1 KB · Views: 54
  • blutakspecial3.jpg
    blutakspecial3.jpg
    55.1 KB · Views: 48
  • damping_3.jpg
    damping_3.jpg
    60.5 KB · Views: 40
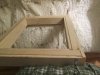
Okay I am finally back on this project. I have ( so far) constructed a sand filled plinth, thanks to Mel's awesome post. It took quite a bit of back and forth but I finally got it put together.
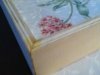
My next step is to attach some Maple board for the exterior with glue. This is to not only add mass but the light color of the maple is lovely. For the top I have some thin pieces of Red Oak that I will use to cover (hide) the sand filled plinth completely. This also is the same kind of wood I used on the armboard, so hopefully it will match up well.
I am going to apply a coat of Briwax to the maple instead of polyurethane to keep the look more furniture like. The poly gloss does nothing for me, and the Briwax is a one step process that will allow for the wood to retain it's natural beauty.
Looks like a busy weekend!
Pictures to follow.:D

Sir B
 
I'm back. As requested here are some photos of my progress.
To begin some shots of the new plinth. Before sand filled and sand filled.
I followed Mel's ( Divotdog) tutorial and made some adjustments as I went.
This has been a labor of love. I am proceeding with caution since I am no woodworker.
Any way the first few pix as promised with more to follow directly.

Sir B

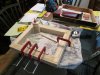
First is a pocket for the back
Second is a pocket awaiting some sand
Third is the first glue up
Fourth is the wood putty seal.
 

Attachments

  • no leaks.jpg
    no leaks.jpg
    48.1 KB · Views: 44
  • sand filled.jpg
    sand filled.jpg
    68 KB · Views: 46
  • Sand pocket.jpg
    Sand pocket.jpg
    53 KB · Views: 36
  • back no sand.jpg
    back no sand.jpg
    54.9 KB · Views: 52
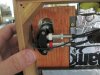
First time dis-assembly. I admit I was nervous. I did find that I was already set up for a SME / RCA interconnect. So if anyone needs a SME RCA kit send me a PM.

Here are the dis-assembly pix.

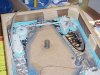
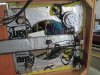
#1 Underneath Damping
#2 SME/RCA connects
#3 Top Plate removed ( This was a piece of CAKE!) I was so worried I'd mess this up. Heat gun applied and gentle prying and off it came.
#4 Sub platter removed
 

Attachments

  • DAMPED UNDERSIDE.jpg
    DAMPED UNDERSIDE.jpg
    87.7 KB · Views: 44
  • SME RCA.jpg
    SME RCA.jpg
    68.3 KB · Views: 42
  • TOP PLATE REMOVED.jpg
    TOP PLATE REMOVED.jpg
    76.2 KB · Views: 37
  • TOP PLATE.jpg
    TOP PLATE.jpg
    73.9 KB · Views: 35
Looks good so far! Just keep in mind that the secret to really good woodwork is the finished product is a series of mistakes that are covering other mistakes. :D
 
Yeah Mel you couldn't put it any better. My first plan ( veneering) was scrapped a few months ago. Hopefully this plan has a good outcome. As I said before I am a lousy woodworker.

More proof of that to follow......

SB
 
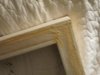
Okay here are some shots of the dry fit and some adjustments I made..........

The support rails for the sub platter and a cut away for the speed knob.
 

Attachments

  • CORNER FIX.jpg
    CORNER FIX.jpg
    71.9 KB · Views: 41
  • SUPPORT RAIL.jpg
    SUPPORT RAIL.jpg
    85.3 KB · Views: 44
  • DRY FIT.jpg
    DRY FIT.jpg
    45 KB · Views: 39
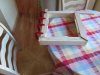
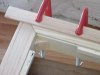
Getting closer....

Red Oak top cover in place. Awaiting the sander and some stain.

Next up the maple sides.
 

Attachments

  • red oak.jpg
    red oak.jpg
    71.3 KB · Views: 27
  • second piece.jpg
    second piece.jpg
    63.7 KB · Views: 21
  • last piece.jpg
    last piece.jpg
    63.4 KB · Views: 29
  • corner.jpg
    corner.jpg
    49.5 KB · Views: 27
Back
Top Bottom