• The move to the new server is done. There are some software and database maintenance updates in process. This has us passing the hat around to help out. We appreciate any donations. Seriously, even a dollar helps. The payment page may be found here - https://www.audiokarma.org/support.html

Re-veneer advice.

Apolek

Well-Known Member
I know there's some folks on the forum who have some serious experience with cabinet work and was wondering if I could get some advice. Getting some speakers soon that appear to have enough veneer damage to warrant a complete re-veneer job (no patching here). Wondering what the best course of action is:

1) Scrape loose veneer and fill voids with a good, two-part wood filler, sand, and re-veneer over the old veneer.

2) Remove all old veneer and adhesive and apply over MDF cabinets.

Personally, I would prefer removing the old veneer, but I suppose it will depend on how well adhered the old veneer is to the cabinet. If it comes off relatively easily with a scraper, placing new veneer over the old would be foolish and removing would be a no-brainer. If it's an immovable object, then is it worth the effort to try to remove it? Then again... the Porter-Cable belt sander would make quick work of walnut veneer :idea:. Overkill?
 
Register to hide this ad
Sand out the old veneer first, it may not be as bad as you think. If it is, do the filling and sanding to the old veneer and re-veneer over top of it. Getting the old stuff off would be impossible. A belt sander would do that but at the expense of the substrate. You will end up with irregularities/undulations that would be noticeable if veneered over. Filling or trying to sand out those irregularities would be a lot more work than doing so to the old veneer layer while in place.
 
Depending on how much old veneer is missing is the key. If there is pieces missing that are two inches wide or more.....strip it. You need a heat gun as the veneer is on with contact cement. The heat gun will soften the glue so you can work it off with a thin putty knife. Light sanding is all you need on the MDF and ready to go.

If veneer damage is less then an inch....spread bondo on it and sand smooth....and then sand everything down well.
 
Got pics? This will help with advice.
Stripping original veneer is very time consuming. Every time I removed veneer, except for my first pair of KLH Sixs, which already had major pieces missing, it took hours. Heat helped, slightly, but ultimately, I had to basically chisel it off with a metal putty knife and hammer.
If the original veneer has minor damage, then fill and veneer over the original like centsless recommended. Most new veneer is 1/42nd of an inch thick, so almost no one could even tell it is on top of the original.
 
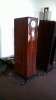
Fabulous work! What's the finish?
I used a Mahogany Red TransTint dye on the red ribbon mahogany veneer to get the shade I wanted.
After that I used clear Minwax polyurethane applied with foam brushes and then (lots and lots of) wet sanding with automotive 1000grt between coats of poly.
I understand the super glossy isn't for everyone but I liked it and that's why I used it.
I used a cherrywood veneer on the table but still used the same dye so I imagine that's why it has a tint like the Hornshoppes.
But more on topic, I did not remove any existing veneer - just sanded it and then used several coats of sanded shellac to smooth everything down before sticking the veneer.
 
I used a Mahogany Red TransTint dye on the red ribbon mahogany veneer to get the shade I wanted.
After that I used clear Minwax polyurethane applied with foam brushes and then (lots and lots of) wet sanding with automotive 1000grt between coats of poly.
I understand the super glossy isn't for everyone but I liked it and that's why I used it.
I used a cherrywood veneer on the table but still used the same dye so I imagine that's why it has a tint like the Hornshoppes.
But more on topic, I did not remove any existing veneer - just sanded it and then used several coats of sanded shellac to smooth everything down before sticking the veneer.
Well worth it I have to say. High gloss finishes aren't good for every piece of gear, but with yours, very classy!
 
Got pics? This will help with advice.
Stripping original veneer is very time consuming. Every time I removed veneer, except for my first pair of KLH Sixs, which already had major pieces missing, it took hours. Heat helped, slightly, but ultimately, I had to basically chisel it off with a metal putty knife and hammer.
If the original veneer has minor damage, then fill and veneer over the original like centsless recommended. Most new veneer is 1/42nd of an inch thick, so almost no one could even tell it is on top of the original.
I'm picking them up Saturday. I'll get some photos up then. For now, they're going in the garage for my heavy metal, high volume system, so appearances aren't important; but come fall, I am planning on dragging them in the workshop and refurbishing/modding them.
 
Just a thought - as you said these are garage metal speakers, you could always fix the veneer issues with putty (if not too bad) then coat over with an opaque finish such as a Minwax Polyshades product (both the black and bombay mahogany are full cover).

Depending on your like for either color, I actually don't think the bombay mahogany looks all that bad - I used it on an old damaged sideboard, and it had looked good for a dozen or so years.

That being said, I am jealous of your veneering work. Your hands must be much steadier than mine.
 
Just a thought - as you said these are garage metal speakers, you could always fix the veneer issues with putty (if not too bad) then coat over with an opaque finish such as a Minwax Polyshades product (both the black and bombay mahogany are full cover).

Depending on your like for either color, I actually don't think the bombay mahogany looks all that bad - I used it on an old damaged sideboard, and it had looked good for a dozen or so years.

That being said, I am jealous of your veneering work. Your hands must be much steadier than mine.

Funny, a coworker suggested painting them flat black and stenciling skulls and pentagrams on them. I'm weird, even though they're garage speakers, I want them to be presentable. I'm thinking Makore with a lovely garnet shellac finish :idea:. Paper backed, PSA sheets... easy job.
 
If the old veneer was original from the factory, not added later by someone like us, it was most likely cut from commercially manufactured veneered sheets. The veneer is bonded to 4 x 12 plywood or MDF or whatever using an array of hot-glue guns and 1,000-pound steel rollers — I visited a factory and saw it in action. It's a far cry from DIY contact glue, or even wood glue with thorough clamping. That's why old veneer is so hard to remove — it's almost a thankless task. Of course sometimes it comes loose through aging, heat (sunlight etc), and that's easy to get off — but parts of it are on there forever. Best, if possible, to strip off any loose old veneer, then putty-fill to make a flat surface. If you use contact glue, keep it out of the sunlight — it bubbles up.
 
If the old veneer was original from the factory, not added later by someone like us, it was most likely cut from commercially manufactured veneered sheets. The veneer is bonded to 4 x 12 plywood or MDF or whatever using an array of hot-glue guns and 1,000-pound steel rollers — I visited a factory and saw it in action. It's a far cry from DIY contact glue, or even wood glue with thorough clamping. That's why old veneer is so hard to remove — it's almost a thankless task. Of course sometimes it comes loose through aging, heat (sunlight etc), and that's easy to get off — but parts of it are on there forever. Best, if possible, to strip off any loose old veneer, then putty-fill to make a flat surface. If you use contact glue, keep it out of the sunlight — it bubbles up.


Thanks, that's what I was wondering. I'll be picking them up Sunday now, so I'll get a better look at them then. Appears the bulk of the old veneer is still firmly attached, so hopefully it will just be some scraping, patching, sanding, and maybe some sealing before applying the new veneer.
 
Back
Top Bottom