audiodon
Addicted Member
Jim McShane has suitable replacements. Send him an email and he'll set you up with the right stuff.
http://pages.prodigy.net/jimmcshane/
http://pages.prodigy.net/jimmcshane/



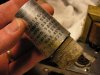
 I started with the single section cardboard covered cap first, as that looked like the easiest to remove, which it was. :yes: I had intended to uncrimp the base to open it up but after jabbing myself twice with a small screwdriver :tears:, I decided to get the dremmel tool out and open the can that way. I wasn't expecting the insides to be as dry and corroaded as they were, they literally just fell out of the can.:yes: Next I cleaned the base up a bit and drilled two small holes for the new leads to go through, and connected them to the proper spots. Positive lead to the large terminal, and the ground lead to one of the base twist-locks, making sure to be careful with the solder since this can has an isolated ground.:yes:


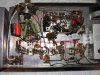
 Upon further inspection I found that the factory had done such a good job of insuring the can was grounded to the chassis with solder, that the solder had worked its way between the top of the chassis and the bottom of the can, and I could not melt it enough to get the can free. At this point I covered the rest of the amp and used the dremmel VERY CAREFULLY to cut open the can while it was still mounted to the chassis. The insides of this cap were just as bad, and came out very easily. I wanted to restuff the cap with all four new caps, but I goofed on the dimensions and could only fit three caps inside.:yes: I decided to leave out the 100 microfarad 250v cap that connected to the single section cardboard cap and mount that one under the chassis. This allowed me to just put the other three caps inside the can. I then started to hook all the wires back up to their proper terminals, soldered in the new carbon comp. resisters and installed the new diodes that I got from Jim McShane. I also wound up replacing two wires, the white wire on the single section, and the purple wire on the multi-section cap with new teflon coated wire that I also got from Jim. The original wires condition were suspect so I decided to change them out.:thmbsp:
I let it play for a couple of hours and it just seemed to get better and better sounding, as everything got warmed up.
Upon further inspection I found that the factory had done such a good job of insuring the can was grounded to the chassis with solder, that the solder had worked its way between the top of the chassis and the bottom of the can, and I could not melt it enough to get the can free. At this point I covered the rest of the amp and used the dremmel VERY CAREFULLY to cut open the can while it was still mounted to the chassis. The insides of this cap were just as bad, and came out very easily. I wanted to restuff the cap with all four new caps, but I goofed on the dimensions and could only fit three caps inside.:yes: I decided to leave out the 100 microfarad 250v cap that connected to the single section cardboard cap and mount that one under the chassis. This allowed me to just put the other three caps inside the can. I then started to hook all the wires back up to their proper terminals, soldered in the new carbon comp. resisters and installed the new diodes that I got from Jim McShane. I also wound up replacing two wires, the white wire on the single section, and the purple wire on the multi-section cap with new teflon coated wire that I also got from Jim. The original wires condition were suspect so I decided to change them out.:thmbsp:
I let it play for a couple of hours and it just seemed to get better and better sounding, as everything got warmed up.