• The move to the new server is done. There are some software and database maintenance updates in process. This has us passing the hat around to help out. We appreciate any donations. Seriously, even a dollar helps. The payment page may be found here - https://www.audiokarma.org/support.html

Refinish Piano Black on Sansui Turntables? SR-838 or 929?

plresults

Active Member
Hi: I have a new-to-me 838 with some minor finish loss. All the color is there, but the gloss is gone where the cover meets the plinth, with the minor-est of black loss. Loss is not all the way to substrate, but getting there in spots. Does any one know of a successful technique to fill or paint the plinth - either on a spot basis, or total basis? Thanks!

Also - what is your preferred way to polish the clear cover, besides the auto car light lens cleaner? Any preferred products?
 
Register to hide this ad
A fine-cut automotive paint polishing compound and proper hand polishing cloth might take those marks out if they haven't gone clean through the finish. I'd not suggest trying to use a lower polisher at all as it is too aggressive and the sling off will make a huge mess.

If the marks are too deep to come out easily with the hand polish approach, you might start with a 3000 grit wet sanding pad (for automotive paint applications) followed by the polishing. A full refinish would require a full teardown to the bare plinth, and the 929 has screen print on the plinth (some versions anyway) that would be lost in a respray. Not sure about the 838 in that regard.
 
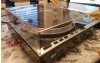
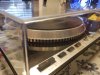
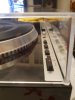
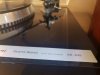
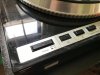
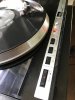
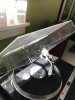
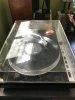
I am restoring an 838 and have had great results polishing the chassis and acrylic cover. Quick back story, I have a black car and for a few summers I tried to find the best polish/wax I could. I would wax the car and no matter what after it rained or time went by the terrible swirl marks re-appeared. That was until I used these three products below and an orbital polisher.

Step 1: https://www.amazon.com/Meguiars-G17220-Ultimate-Compound-fluid_ounces/dp/B06W5HCZ9M
Step 2: https://www.amazon.com/Meguiars-G19220-Ultimate-Polish-fluid_ounces/dp/B06X413M7J
Step 3: https://www.amazon.com/Meguiars-G18220-Ultimate-Liquid-Fluid_Ounces/dp/B06WVGZL5W

The chassis I did by hand using a simple microfiber applicator and very light pressure. The acrylic protection cover got the orbital polisher and it looks like glass. The results were stunning, especially how it looked before.

20210402_191723.jpg
20210402_191731.jpg
20210402_191809.jpg
20210402_192208.jpg
20210412_102156.jpg
 
I am restoring an 838 and have had great results polishing the chassis and acrylic cover. Quick back story, I have a black car and for a few summers I tried to find the best polish/wax I could. I would wax the car and no matter what after it rained or time went by the terrible swirl marks re-appeared. That was until I used these three products below and an orbital polisher.

Step 1: https://www.amazon.com/Meguiars-G17220-Ultimate-Compound-fluid_ounces/dp/B06W5HCZ9M
Step 2: https://www.amazon.com/Meguiars-G19220-Ultimate-Polish-fluid_ounces/dp/B06X413M7J
Step 3: https://www.amazon.com/Meguiars-G18220-Ultimate-Liquid-Fluid_Ounces/dp/B06WVGZL5W

The chassis I did by hand using a simple microfiber applicator and very light pressure. The acrylic protection cover got the orbital polisher and it looks like glass. The results were stunning, especially how it looked before.

View attachment 2192499
View attachment 2192500
View attachment 2192501
View attachment 2192502
View attachment 2192503

Wow. That is amazing, MIJ. So all products for both surfaces, but different application techniques, correct? How did you manage your hand work in the areas nearest the mental controls plate across front? Did you tape that area off? I've posted pics of what I have below. Do you mind sharing your before pics? Thanks!
 
Last edited:
Attached here are pics of the plinth and the cover for the SR-838. Pics 1,2,4,6 show the challenges best.
 

Attachments

  • second_SR838_Pic1_4_12_21.jpg
    second_SR838_Pic1_4_12_21.jpg
    95 KB · Views: 87
  • second_SR838_Pic2_4_12_21.jpg
    second_SR838_Pic2_4_12_21.jpg
    95.3 KB · Views: 81
  • second_SR838_Pic3_4_12_21.jpg
    second_SR838_Pic3_4_12_21.jpg
    95.3 KB · Views: 77
  • second_SR838_Pic4_4_12_21.jpg
    second_SR838_Pic4_4_12_21.jpg
    96.5 KB · Views: 82
  • second_SR838_Pic5_4_12_21.jpg
    second_SR838_Pic5_4_12_21.jpg
    92.7 KB · Views: 83
  • second_SR838_Pic6_4_12_21.jpg
    second_SR838_Pic6_4_12_21.jpg
    103.2 KB · Views: 82
Last edited:
Wow. That is amazing, MIJ. So all products for both surfaces, but different application techniques, correct? How did you manage your hand work in the areas nearest the mental controls plate across front? Did you tape that area off? I've posted pics of what I have below. Do you mind sharing your before pics? Thanks!

Thanks!

Unfortunately below is the only photo I have before I began the work. I didn't know it was going to shine up so well!

Yes, all three products, however on my car sometimes I skip the polish and just do the compound + liquid wax. The sansui LOVES this liquid wax, wait until you see it. Near the metal controls I used my finger on a microfiber cloth and gently walked product onto the table. Yes some got on the silver sticker and black lettering but I would quickly and gently remove it. No issues at all. I did not tape it off.

I took a look at your photos, much of the unit looks just like how mine did! A simple light application of the three products by hand I am suggesting isn't going to do much for the heavy pitting/scratching in the front where the acrylic cover rests. Mine has the same thing.

Remember, you're not necessarily buffing/smoothing out the scratches, you're just using a product that will fill them in/hide them. Especially when doing it by hand, I'm not an expert but using rubbing compound by hand really can make things worse hence why I am suggesting just a light application.

The acrylic top I used a orbital polisher but the same three products.

https://www.harborfreight.com/power...andom-orbit-6-in-da-polishersander-64528.html
https://www.amazon.com/Griots-Garage-11241-Orange-Polishing/dp/B00LJ3BQUU?th=1

If you are concerned at all I'm sure just using the liquid wax will shine it up real good too! I've had a lot of experience using these products / polisher before I got to the Sansui.

PS - It took me a while to figure out but the platter simply lifts up from the table. No need to unscrew anything. DO NOT turn it on its side without removing the platter. I also suggest a twisty tie or similar on the tone arm to secure it when working on it.

20210402_144117.jpg
 
Thanks for the tips. I would also remove the headshell to avoid damaging the stylus as it only takes a minute.
I have used Meguiars #7 to remove swirls and it's amazing.

Good call on the headshell! My cartridge is nothing to write home about so I actually didn't think of that. Turns out I kind of like it after some listening.

That Meguiars #7 looks real pro. I've bookmarked it. Looks like it is #2 in the 3 step process and the directions due state to follow up with a wax. If you haven't tried that Ultimate liquid wax you should give it a shot, it can be found at most auto stores and it really goes well with black.
 
Thanks!

Unfortunately below is the only photo I have before I began the work. I didn't know it was going to shine up so well!

Yes, all three products, however on my car sometimes I skip the polish and just do the compound + liquid wax. The sansui LOVES this liquid wax, wait until you see it. Near the metal controls I used my finger on a microfiber cloth and gently walked product onto the table. Yes some got on the silver sticker and black lettering but I would quickly and gently remove it. No issues at all. I did not tape it off.

I took a look at your photos, much of the unit looks just like how mine did! A simple light application of the three products by hand I am suggesting isn't going to do much for the heavy pitting/scratching in the front where the acrylic cover rests. Mine has the same thing.

Remember, you're not necessarily buffing/smoothing out the scratches, you're just using a product that will fill them in/hide them. Especially when doing it by hand, I'm not an expert but using rubbing compound by hand really can make things worse hence why I am suggesting just a light application.

The acrylic top I used a orbital polisher but the same three products.

https://www.harborfreight.com/power...andom-orbit-6-in-da-polishersander-64528.html
https://www.amazon.com/Griots-Garage-11241-Orange-Polishing/dp/B00LJ3BQUU?th=1

If you are concerned at all I'm sure just using the liquid wax will shine it up real good too! I've had a lot of experience using these products / polisher before I got to the Sansui.

PS - It took me a while to figure out but the platter simply lifts up from the table. No need to unscrew anything. DO NOT turn it on its side without removing the platter. I also suggest a twisty tie or similar on the tone arm to secure it when working on it.

View attachment 2192786

Thank you again. I own three Sansui TT with the piano black finish (two SR-838 and an XR-Q9). I will clean up the newly acquired 838 per your process and almost certainly sell it. It has already been restored mechanically by a pro, and comes with a one-year warranty. It will be a good 'practice' unit for me to do before I try gently polishing the two other tables, which are in far far better condition. The 838 in question sounds amazing, so someone is going to get a great deal once I am finished. Again, I appreciate all of your advice and help, and to the others who commented as well. I will post before/after pics in a few weeks.
 
Last edited:
Sounds good! These 636/838 (and above I am sure) tables are really nice. Take your time and let us know how it turns out :)
MIJ: I finally have all three products on hand. Question: For really deep scratches on the TT cover, did you use any other product before the three Meguiar's products? I've got one deep scratch across the top. Thanks, S
 
Last edited:
MIJ: i finally have all three products on hand. Question: For really deep scratches on the TT cover, did you use any other product before the three Meguiar's products? I've got one deep scratch across the top. Thanks, S

Very nice! No, I did not use any other products on the 838.

For the really deep scratch you may need an orbital polisher, however I cannot guarantee this is the best advice but it did wonders for me. Carefully follow the directions on the bottle and it may just take more time doing it by hand. Take your time and you're going to be amazed!

I have since done a 636 and I became confident using the orbital polisher on the black using the cutting pad. Wow, amazing results. I believe if I had to do it again I would use a 3" pad.

Bonus tip, use the wax and a junky towel to make the rubber mat look like new!

20210430_180732.jpg 20210430_182559.jpg 20210430_182607.jpg
 
Update: I've done the table and am still tweaking the cover. Some observations:

- really deep scratches in the plinth are not likely to come out when working only by hand (as I did)
- the process will so greatly improve the shine of the non-defective areas (like new-ish shine) such that the shine will actually move your eye past the defects
- I did not try my 8 inch orbital polisher on the plinth, as my sense it is just too big. Perhaps a Dremel/similar-size would be more appropriate
- if you work by hand only on plinth (as I did) plan on a 4-6 hours. Don't do this work when you are tired or irritable - bad things more likely to happen.
- sorry I did not do any in-process-pics, but will come back with the finished photos. MIJ is right, for the plinth this process produces great improvements. This pieces is now a great 'two footer', in my case for the plinth. You'd really have to study it in the right light to pick out the defects.
- you can't have too many clean white cotton towels for the plinth & cover work. Both to apply the materials and to clean between products and check progress.

- regarding the dust cover, I modified MIJs approach and added sand paper to the mix: wet 320,1500 and 2000, used with a sanding block mostly, or gently with fingers. I did this because the dust cover is a less risky proposition, due to the thickness of the material, and it being only one color (vs. wood/black/perhaps clear on the plinth) with no metal trim to worry about. And my dust cover was pretty dinged up, likely shipped or used in a way in was never intended to be used.
- the 320 is too coarse. I suspect a 600 or 1000 is a better answer for the coarsest grit. And only use that for the deep scratches, and be very careful how you handle it. A careless bump here or there and you've created more work, especially on the inside of the cover. If I were to do it over again, I might add a 3000. So perhaps the right answer is 1000, 1500, 2000, 3000 for scratch removal. One sheet of each is plenty.
- the outside of the dust cover is several orders of magnitude easier than the inside. When working inside be very careful with the sand paper near the inside corners. Everything - sandpaper and the Meguiar's products, must be applied on the inside inside corners by hand. Count your strokes to get a sense of how much change you are making via stroke numbers. I found 20-30 sand paper strokes and 40-50 for Meguiar's products seemed to be a good approach to my pretty dinged up cover.
- after 320/1500/2000, the cutting paste will clear up the finish to near perfect. If you find a defect after the glaze, repeat the 2000 and cutting paste.
- you may end up doing cutting paste three times or more. That product is the one that gets used the most. The glaze and wax don't require multiple applications, IMO.
- keep a bucket and a spray bottle of water handy to keep the surface clear and the sand paper wet. Dunk your sand paper and block frequently.
- you may want some painters tape to mark defects on the side opposite of the defect (inside vs. outside). If can get a little dicey when you are deciding if a defect is on the inside or the outside of the cover, which leads to me the next point...
- working outside on a cloudy day is a big benefit, as you can hold the dust over up and spot your remaining defects fairly easily.

I probably have three hours in the dust cover at this point. The orbital polisher is a must for the cover in rough shape like mine. I suspect another hour or two on the dust cover to make it perfect. I do believe I am working out scratches now that came from too aggressive use of the sand paper - on the inside.

More to come in a few days, with pics.

p.s. to the naysayers above? C'mon, man. If you've never tried or done this sort of work, save the uninformed speculative lectures - they are unhelpful.
 
Last edited:
Update: I've done the table and am still tweaking the cover. Some observations:

- really deep scratches in the plinth are not likely to come out when working only by hand (as I did)
- the process will so greatly improve the shine of the non-defective areas (like new-ish shine) such that the shine will actually move your eye past the defects
- I did not try my 8 inch orbital polisher on the plinth, as my sense it is just too big. Perhaps a Dremel/similar-size would be more appropriate
- if you work by hand only on plinth (as I did) plan on a 4-6 hours. Don't do this work when you are tired or irritable - bad things more likely to happen.
- sorry I did not do any in-process-pics, but will come back with the finished photos. MIJ is right, for the plinth this process produces great improvements. This pieces is now a great 'two footer', in my case for the plinth. You'd really have to study it in the right light to pick out the defects.
- you can't have too many clean white cotton towels for the plinth & cover work. Both to apply the materials and to clean between products and check progress.

- regarding the dust cover, I modified MIJs approach and added sand paper to the mix: wet 320,1500 and 2000, used with a sanding block mostly, or gently with fingers. I did this because the dust cover is a less risky proposition, due to the thickness of the material, and it being only one color (vs. wood/black/perhaps clear on the plinth) with no metal trim to worry about. And my dust cover was pretty dinged up, likely shipped or used in a way in was never intended to be used.
- the 320 is too coarse. I suspect a 600 or 1000 is a better answer for the coarsest grit. And only use that for the deep scratches, and be very careful how you handle it. A careless bump here or there and you've created more work, especially on the inside of the cover. If I were to do it over again, I might add a 3000. So perhaps the right answer is 1000, 1500, 2000, 3000 for scratch removal. One sheet of each is plenty.
- the outside of the dust cover is several orders of magnitude easier than the inside. When working inside be very careful with the sand paper near the inside corners. Everything - sandpaper and the Meguiar's products, must be applied on the inside inside corners by hand. Count your strokes to get a sense of how much change you are making via stroke numbers. I found 20-30 sand paper strokes and 40-50 for Meguiar's products seemed to be a good approach to my pretty dinged up cover.
- after 320/1500/2000, the cutting paste will clear up the finish to near perfect. If you find a defect after the glaze, repeat the 2000 and cutting paste.
- you may end up doing cutting paste three times or more. That product is the one that gets used the most. The glaze and wax don't require multiple applications, IMO.
- keep a bucket and a spray bottle of water handy to keep the surface clear and the sand paper wet. Dunk your sand paper and block frequently.
- you may want some painters tape to mark defects on the side opposite of the defect (inside vs. outside). If can get a little dicey when you are deciding if a defect is on the inside or the outside of the cover, which leads to me the next point...
- working outside on a cloudy day is a big benefit, as you can hold the dust over up and spot your remaining defects fairly easily.

I probably have three hours in the dust cover at this point. The orbital polisher is a must for the cover in rough shape like mine. I suspect another hour or two on the dust cover to make it perfect. I do believe I am working out scratches now that came from too aggressive use of the sand paper - on the inside.

More to come in a few days, with pics.

p.s. to the naysayers above? C'mon, man. If you've never tried or done this sort of work, save the uninformed speculative lectures - they are unhelpful.

Keep up the good work! Excited to see your thoughts on improving the end result. Glad the products are working so far.

You're right, the compound is 90% of the job. However that final wax really adds that dark, scratch hiding, finish.

The 8" orbital is way too big for the table but it was able to get most of the areas safely. As I noted in my recent 636 post, the cutting pad I used and compound worked wonders on the body. It was a ~30 minute job. I believe a lot of the magic is the cutting pad itself and it's natural abrasive properties. With the platter removed it did get scary around the stylus and silver area but a little bit of patience and good luck everything was fine. Obviously there were a handful of areas that needed to be done by hand.
 
MIJ: Thanks! What size is the pad for your orbital polisher? And did you use the orbital & cutting paste on the plinth?
 
I am restoring an 838 and have had great results polishing the chassis and acrylic cover. Quick back story, I have a black car and for a few summers I tried to find the best polish/wax I could. I would wax the car and no matter what after it rained or time went by the terrible swirl marks re-appeared. That was until I used these three products below and an orbital polisher.

Step 1: https://www.amazon.com/Meguiars-G17220-Ultimate-Compound-fluid_ounces/dp/B06W5HCZ9M
Step 2: https://www.amazon.com/Meguiars-G19220-Ultimate-Polish-fluid_ounces/dp/B06X413M7J
Step 3: https://www.amazon.com/Meguiars-G18220-Ultimate-Liquid-Fluid_Ounces/dp/B06WVGZL5W

The chassis I did by hand using a simple microfiber applicator and very light pressure. The acrylic protection cover got the orbital polisher and it looks like glass. The results were stunning, especially how it looked before.

View attachment 2192499
View attachment 2192500
View attachment 2192501
View attachment 2192502
View attachment 2192503

Thank u for the list of products MIJ, a lot of hard work went into this discovery. Jeff
 
Back
Top Bottom