


Mark_71
Member
I started a thread a while back on refurbishing a Technics SL-D202. This part of the project probably deserves its own thread.
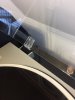
It was missing the dustcover so I purchased a new aftermarket cover on eBay for $89. The new cover was all acrylic - even the hinge tongues, which are the “L” shaped pieces of acrylic bonded on to the back of the cover (pictured). As we all know, those hinge tongues, even the original Technics polycarbonate tongues, are prone to breakage, especially after decades of use. And polycarbonate is a lot stronger than acrylic, which is more brittle and cracks easily. The benefit of acrylic is it is crystal clear, none of that dark or blueish tint. Honestly, I'd prefer a NOS Technics branded dustcover, but I just couldn't find one.
Initially, I was pleased with the acrylic cover, but wary of the acrylic “L” shaped tongues. They fit the hinges fine, the cover opened and closed smoothly, but they were obviously a weak point under constant stress. And after a few months, one tongue cracked at the “L” joint as feared. Note: The original Technics cover was polycarbonate (I believe), the tongues seemed part of the cover’s molded form (not bonded on), and they each had two vertical supports reducing the stress on the joint.
A dustcover is pretty important where I live (heavy construction area), plus I like the look when not in use. And I really liked this particular acrylic cover - it was had nice square edges (some on eBay have a curved front) and it had a higher profile (taller) so it gave the SL-D202 a more substantial look.
Three options:
1) Cut the bottom horizontal part of the “L” tongue off and just forgo the hinges completely (we all know this is better for sound... to fully remove the cover).
2) Use Borea’s fix, which is really straightforward: http://audiokarma.org/forums/index.php?threads/technics-dustcover-fix-redux.656267/
3) Repair / reinforce the acrylic “L” tongue.
I absolutely would have tried Borea’s fix (option 2) had I not already ordered acrylic glue (it was very expensive so I better use it). I also don’t have a lot of power tools (apt living) so drilling holes was a problem.
I decided to repair and reinforce while trying to keep the all acrylic look. I do not recommend this project unless you have a lot of free time. It’s also not exactly cheap, but it came out pretty well, looks much like the original, and is holding nicely.
I did my research and there’s a lot of info out there on bonding plastics and types of plastics, so I went with glueing the hinge joint, fabricating new vertical supports (like the OEM dustcover had) out of acrylic, and gluing them into place using a bonding agent specifically designed for acrylic.
Step-by-Step Instructions, Observations, & Recommendations
1) Buy a sheet of acrylic. I opted for the cheap way and bought a $1.99 acrylic box from The Container Store (pictured). The key here was to make sure the plastic could be sawed without cracking, so not just any clear plastic will do. Acrylic or something like it was needed.
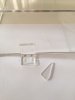
2) Fabricate triangular vertical supports from the acrylic box. I measured some templates from an OEM Technics dustcover. I bought a really fine tiny saw and cut out some right triangles. I sanded the edges until they fit properly. (pictured)
3) Figure out where the vertical supports need to be affixed. I lined them up with a template I made from an OEM Technics dustcover and I measured the spaces between the grooves on the hinges. The margin of error is small. If they don’t line up perfectly, the tongues won’t slide in.
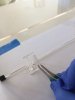
4) Glue on the vertical supports using IPS Weld-on #40 2-part Acrylic Cement Adhesive Kit (pictured)
https://www.amazon.com/Weld-2-part-Acrylic-Cement-Adhesive/dp/B00J9FC1NQ
My research indicated this was the best glue for acrylics; they use it on fish tanks, which are under intense pressure. It cost $40 (better be good). I only needed a tiny amount, but didn’t want to skimp here. There were cheaper options from Weld-On, but the reviews often commented, “not as good as their Weld-On 40.” And it’s not easy to work with - it smells awful, don’t work with it inside, and it comes with two containers that have to be mixed 5:100 (1:20 for simplicity). The containers are really meant to be combined entirely for one time use with no measuring needed, but I didn’t need that much so I measured and mixed. I purchased two baby oral syringes to help measure (they worked perfectly, but had to be thrown out afterwards). This stuff is pretty dangerous so don’t use your kitchen measuring spoons. Wear gloves and a mask. Mix for 1-3 minutes. It starts getting difficult to work with after 3 mins so I recommend mixing 1 min and affixing all parts in 1-2 mins. Let dry for 72 hours. This glue supposedly melts and rebonds the acrylic. It’s really expensive, but it worked. Do not use Crazy glue; it along with most quick glues won’t be strong enough and it will fog the plastic. Recommendation: Less is more here. You don’t need a lot - just a thin line of Weld-On 40 along the supports or you’ll end up sanding down the excess so they slip in unhindered.
5) File and sand the reinforced tongues. Even with all my measuring, they didn’t slide in deep enough so I had to file and sand some areas. Unfortunately filling and sanding acrylic messes up the finish a bit so I had to add step 6)
6) Buff and polish reinforced tongues with Novus 3-2-1 system. I used Q-Tips.
Results
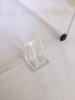
Looks and works great. Better than expected! (several pictures from different angles)
The new reinforced tongues slip in the hinges smoothly, look very much like the original Technics tongues, they're a lot stronger, and they work perfectly. And after a few days of testing they’re still holding firm (I’ll update after a few months).
However, this project took a long time. 5-6 hrs of actual work. And Weld-On 40 is expensive and not easy to use. I learned a lot and could certainly have done the acrylic bonding better (less is more). Overall, I'm happy with the results and it kept the all acrylic look.
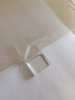
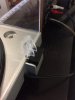
Pictures show cracked "L" tongue (first pic) through the fabrication and bonding process to the completed reinforced tongue acrylic tongue.


It was missing the dustcover so I purchased a new aftermarket cover on eBay for $89. The new cover was all acrylic - even the hinge tongues, which are the “L” shaped pieces of acrylic bonded on to the back of the cover (pictured). As we all know, those hinge tongues, even the original Technics polycarbonate tongues, are prone to breakage, especially after decades of use. And polycarbonate is a lot stronger than acrylic, which is more brittle and cracks easily. The benefit of acrylic is it is crystal clear, none of that dark or blueish tint. Honestly, I'd prefer a NOS Technics branded dustcover, but I just couldn't find one.
Initially, I was pleased with the acrylic cover, but wary of the acrylic “L” shaped tongues. They fit the hinges fine, the cover opened and closed smoothly, but they were obviously a weak point under constant stress. And after a few months, one tongue cracked at the “L” joint as feared. Note: The original Technics cover was polycarbonate (I believe), the tongues seemed part of the cover’s molded form (not bonded on), and they each had two vertical supports reducing the stress on the joint.
A dustcover is pretty important where I live (heavy construction area), plus I like the look when not in use. And I really liked this particular acrylic cover - it was had nice square edges (some on eBay have a curved front) and it had a higher profile (taller) so it gave the SL-D202 a more substantial look.
Three options:
1) Cut the bottom horizontal part of the “L” tongue off and just forgo the hinges completely (we all know this is better for sound... to fully remove the cover).
2) Use Borea’s fix, which is really straightforward: http://audiokarma.org/forums/index.php?threads/technics-dustcover-fix-redux.656267/
3) Repair / reinforce the acrylic “L” tongue.
I absolutely would have tried Borea’s fix (option 2) had I not already ordered acrylic glue (it was very expensive so I better use it). I also don’t have a lot of power tools (apt living) so drilling holes was a problem.
I decided to repair and reinforce while trying to keep the all acrylic look. I do not recommend this project unless you have a lot of free time. It’s also not exactly cheap, but it came out pretty well, looks much like the original, and is holding nicely.
I did my research and there’s a lot of info out there on bonding plastics and types of plastics, so I went with glueing the hinge joint, fabricating new vertical supports (like the OEM dustcover had) out of acrylic, and gluing them into place using a bonding agent specifically designed for acrylic.
Step-by-Step Instructions, Observations, & Recommendations
1) Buy a sheet of acrylic. I opted for the cheap way and bought a $1.99 acrylic box from The Container Store (pictured). The key here was to make sure the plastic could be sawed without cracking, so not just any clear plastic will do. Acrylic or something like it was needed.
2) Fabricate triangular vertical supports from the acrylic box. I measured some templates from an OEM Technics dustcover. I bought a really fine tiny saw and cut out some right triangles. I sanded the edges until they fit properly. (pictured)
3) Figure out where the vertical supports need to be affixed. I lined them up with a template I made from an OEM Technics dustcover and I measured the spaces between the grooves on the hinges. The margin of error is small. If they don’t line up perfectly, the tongues won’t slide in.
4) Glue on the vertical supports using IPS Weld-on #40 2-part Acrylic Cement Adhesive Kit (pictured)
https://www.amazon.com/Weld-2-part-Acrylic-Cement-Adhesive/dp/B00J9FC1NQ
My research indicated this was the best glue for acrylics; they use it on fish tanks, which are under intense pressure. It cost $40 (better be good). I only needed a tiny amount, but didn’t want to skimp here. There were cheaper options from Weld-On, but the reviews often commented, “not as good as their Weld-On 40.” And it’s not easy to work with - it smells awful, don’t work with it inside, and it comes with two containers that have to be mixed 5:100 (1:20 for simplicity). The containers are really meant to be combined entirely for one time use with no measuring needed, but I didn’t need that much so I measured and mixed. I purchased two baby oral syringes to help measure (they worked perfectly, but had to be thrown out afterwards). This stuff is pretty dangerous so don’t use your kitchen measuring spoons. Wear gloves and a mask. Mix for 1-3 minutes. It starts getting difficult to work with after 3 mins so I recommend mixing 1 min and affixing all parts in 1-2 mins. Let dry for 72 hours. This glue supposedly melts and rebonds the acrylic. It’s really expensive, but it worked. Do not use Crazy glue; it along with most quick glues won’t be strong enough and it will fog the plastic. Recommendation: Less is more here. You don’t need a lot - just a thin line of Weld-On 40 along the supports or you’ll end up sanding down the excess so they slip in unhindered.
5) File and sand the reinforced tongues. Even with all my measuring, they didn’t slide in deep enough so I had to file and sand some areas. Unfortunately filling and sanding acrylic messes up the finish a bit so I had to add step 6)
6) Buff and polish reinforced tongues with Novus 3-2-1 system. I used Q-Tips.
Results
Looks and works great. Better than expected! (several pictures from different angles)
The new reinforced tongues slip in the hinges smoothly, look very much like the original Technics tongues, they're a lot stronger, and they work perfectly. And after a few days of testing they’re still holding firm (I’ll update after a few months).
However, this project took a long time. 5-6 hrs of actual work. And Weld-On 40 is expensive and not easy to use. I learned a lot and could certainly have done the acrylic bonding better (less is more). Overall, I'm happy with the results and it kept the all acrylic look.
Pictures show cracked "L" tongue (first pic) through the fabrication and bonding process to the completed reinforced tongue acrylic tongue.

