• The move to the new server is done. There are some software and database maintenance updates in process. This has us passing the hat around to help out. We appreciate any donations. Seriously, even a dollar helps. The payment page may be found here - https://www.audiokarma.org/support.html

Restoring a Turntable Dustcover

Great job!
The condition of the dustcover makes perhaps biggest impact on the prospective turntable buyer (especially a first-time buyer)...
Let's face it, that pioneer didn't look like it was taken good care of before, did it?
Now, I must admit I tried the multi-step technique as explained above couple of times and was experimenting on cutting the number of steps.
I came up with a shorter version - first step is a wet-sand with the automotive sandpaper (at least 600 grid or finer) and the second step is ... brasso metal polish. You can finish it up with a layer of guitar/piano wax for a crystal-like shine...
I find it a bit faster- still alot of elbow grease needed.
Just an alternative for someone who may have this stuff already at home.
Once again, great job!
 
Process Made Easy with Power Tools

Folks,

Sorry I didn't post this update sooner. Once I got a feel for the process, using only elbow grease, I decided to do the next dust cover with power tools. I don't ever want to have to do another one with just elbow grease :no:

I did my next dust cover with the aid of a Black and Decker "Mouse". It is a random action sander that is designed to fit in the palm of your hand, and it really does so nicely. It has an active surface (foot) that is shaped like a small flat iron, which facilitates getting into the corners if you need to do the inside of a dust cover.

I did not use the sanding/polishing cloths and pads supplied with the Mouse. What I did, since the "foot" of the Mouse is covered with velcro "hooks," was to fold up sections of t-shirt fabric that I purchased for the purpose, moisten them, and lay them on the compound I was using at any stage (which had been applied in copious quantity to the dustcover), then place the "Mouse" on top of the fabric (rag), and go at it, using only the light weight of the Mouse to do the work. The Velcro hooks held nicely to the fabric. You, of course, need to use a different sheet of fabric at each stage, and fold the fabric for a bit more thickness between the Mouse and the dustcover.

The job I did with the Mouse turned out even better than the job done by hand, and took only a little over an hour from start to finish.

Here is the thread for that sweetening job, so you can see the results for yourself: http://audiokarma.org/forums/showthread.php?t=45311&highlight=pl-518 The starting condition for this dust cover looked similar to the one at the start of this thread, but no deep gouges, and no need to work inside the dustcover.

Get yourself a Mouse and have a go...

Rich P
 
Also, your local auto parts has most of this stuff alot cheaper. My auto parts didn't sell Mcguires, but they do sell a 3M plastic cleaner which is probably very close. You totally saved that cover, man :thmbsp:
 
Very nice indeed!!! Auto finishing products are great. I use meguire's plastic cleaner and plastic polish as I near the end of dustcover project. They work great! Brad
 
Do you have a way to mend a crack in the plastic where it will not show? Cracks in these turntable covers are very common. My attempt to use liquid Testors plastic glue did not turn out very well.

Charlie
 
CharlieBee said:
Do you have a way to mend a crack in the plastic where it will not show? Cracks in these turntable covers are very common. My attempt to use liquid Testors plastic glue did not turn out very well.

Charlie

That one requires the purchase of a parts unit, I'm afraid. :( I have a couple of units waiting for such.

Rich P
 
Hi
stil looks bit clowdy. had one last week (only outsid, bat 2 bad deep skratches).

started sanding the top were the scratches were with 600 paper on a hardwoodblock with water. After having the deep scratches out a´nd i guess 1/10mm off the complete surface (2 hours sittin' in the sun :)), i went over all outer sides with the Block and paper 1000.

Nice mat surface. then i had one try with a large polishing mashine, but i stopped immediately.. :nono:

polished the cover with a special acrylic polishing material and micro fiber cloth about 8 hours the next four days, while watching tv in the eve.

after 3 hours believing it will never get transparent, its been like new after this treat. Sorry, no pix, but i swear :yes:

but - wouldn't do it for money....

the arms get used to it after a few hours...

Helge
 
Thanks for the tutorial Rich, I can't believe I missed this thread the first time round... Excellent work my friend! :thmbsp:
 
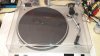
I restored a cover using this method. For a first time i am very happy with the results. It's on a realistic lab 395. I think the next go around I will go to the bar keepers friend first then quickly with rubbing compound. Then hit any spots with steel wool, very lightly, that need it. I think maybe steel wool is a bit to aggressive. I can still see very fine lines from the steel wool but this cover looks 100% better then it did. It does amaze me what can be done with clear plastic.
 

Attachments

  • 20141116_162552.jpg
    20141116_162552.jpg
    53.6 KB · Views: 70
Last edited:
Back
Top Bottom