MuseChaser
Super Member
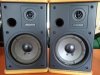
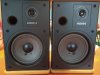
I have five of these that all need their surrounds done. Four of them are from one "batch," I think, and I picked up a fifth to use as the center channel for a matched 5.1 set in the bedroom system. I've done one from the original set of four, and just did the solo one I picked up a week or two ago.
The questions aren't regarding doing the surrounds.. I've done a bunch of surrounds prior with good results.
The single Advent differs from the other four in a couple ways. It has a slightly earlier serial number.
1. Hex screws used to affix baffle rather than JIS or Phillips heads on other four. Not a fan. It was a 3.5mm and I had to go through a bunch of my hex keys and bits to find that size. No big deal of course. Tweeter is glued in upside down on it's plate, compared to the other speakers.
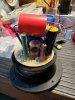
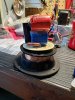
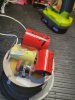
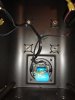
2. Different crossover component manufactures, at least visually. Even with almost half of the surrounds missing on some of these speakers, they still sound amazingly good so I don't feel a need to mess them. Just curious if there was a change at some specific point, or if swapping in whatever was available during a run was common practice. Too much goop to tell what the values are visually.
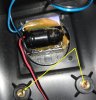
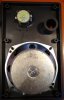
3. Embarrassing question, because I know the answer... "everything matters, and ported speakers need to be sealed at least as carefully as sealed enclosures"... but ... well... going to ask anyway. These speakers had optional wall mounting brackets available when sold. Three of the five have them, and two don't. The threaded inserts indicated by the yellow arrows above are where the mounting brackets bolt to the speaker. If I don't wish to use the bracket, will there be a noticeable difference of any kind of I DON'T caulk or otherwise plug them? The two that don't have brackets just have a thin paper label covering entire area with the four mounting holes in the corners.
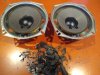
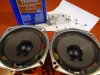
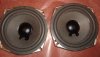
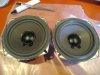
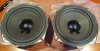
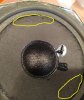
4. This one, I believe, has been re-surrounded before, and not very well. The way the voice coil wires are mated on the cone looks weird, too, as if they were spliced. In any case, the driver works thankfully. However, getting the old adhesive off, which was really dry and required a lot of alcohol, was a chore. Between the roughing up of the cone the last person did, and a bit more I did, there's some pretty rough spots where the paper isn't smooth any more. The worst spots are circled below.
Anything need to be done? Light doping with something? Let it go?
Thanks for any input. I'm knocked out by these little guys. Didn't expect this kind of warmth.
The questions aren't regarding doing the surrounds.. I've done a bunch of surrounds prior with good results.
The single Advent differs from the other four in a couple ways. It has a slightly earlier serial number.
1. Hex screws used to affix baffle rather than JIS or Phillips heads on other four. Not a fan. It was a 3.5mm and I had to go through a bunch of my hex keys and bits to find that size. No big deal of course. Tweeter is glued in upside down on it's plate, compared to the other speakers.
2. Different crossover component manufactures, at least visually. Even with almost half of the surrounds missing on some of these speakers, they still sound amazingly good so I don't feel a need to mess them. Just curious if there was a change at some specific point, or if swapping in whatever was available during a run was common practice. Too much goop to tell what the values are visually.
3. Embarrassing question, because I know the answer... "everything matters, and ported speakers need to be sealed at least as carefully as sealed enclosures"... but ... well... going to ask anyway. These speakers had optional wall mounting brackets available when sold. Three of the five have them, and two don't. The threaded inserts indicated by the yellow arrows above are where the mounting brackets bolt to the speaker. If I don't wish to use the bracket, will there be a noticeable difference of any kind of I DON'T caulk or otherwise plug them? The two that don't have brackets just have a thin paper label covering entire area with the four mounting holes in the corners.
4. This one, I believe, has been re-surrounded before, and not very well. The way the voice coil wires are mated on the cone looks weird, too, as if they were spliced. In any case, the driver works thankfully. However, getting the old adhesive off, which was really dry and required a lot of alcohol, was a chore. Between the roughing up of the cone the last person did, and a bit more I did, there's some pretty rough spots where the paper isn't smooth any more. The worst spots are circled below.
Anything need to be done? Light doping with something? Let it go?
Thanks for any input. I'm knocked out by these little guys. Didn't expect this kind of warmth.