• The move to the new server is done. There are some software and database maintenance updates in process. This has us passing the hat around to help out. We appreciate any donations. Seriously, even a dollar helps. The payment page may be found here - https://www.audiokarma.org/support.html

Sander types and papers best used for cabinets?

thedelihaus

Nocturnal transmissions
What are the best sander types and papers best used for cabinets?

And any helpful hints?

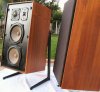
I'm going to embark on sanding and refinishing cabinets soon. JBL L-46s, AR 4xs, Dynaco A-25s, and more.

Interested in what type of sander to get- Orbital? Belt? Flat Pad? Mouse?

Hand-sanding is my old method, but injurys complicate that. Plug-in tools are my desire now.

Also, will need to stock up on sandpaper grades. I'm thinking 180 or 200 for the roughest, with 400, maybe even 800 for the finest.

Any of you wet-sand? Or just dry?

After that's done, any tips for re-sealing the cabs? Any products with good results?

:thmbsp:
 
Register to hide this ad
I'm a hobbyist woodworker and have refinished several speaker and amp cabinets with some success. This is my procedure, of course depending upon the extent of damage you are trying to repair: If there is no scratching, you may be able to go straight to oil and wax - if badly damaged, the below procedure may not fully restore the cabinet.

1) Clean the cabinet with paint thinner to remove old wax, grease, and scuff marks.
2) Use a small electric palm sander: I like the ones where the sanding pad is just under one quarter the size of a regular sand paper sheets - it is a lot cheaper to purchase stock sandpaper sheets than custom paper sizes for your particular sander. The pad on mine is 4.5" x 4.0" - perfect for folding full sheets in four: Much cheaper than the circular custom sanding discs which will nickel and dime you forever. I have attached a photo of the type I like - but all good quality 1/4 sheet ones will work.
3) Start with 220 grit, making sure than you do not touch edges or corners - use your fingers as a guide to prevent accidentally rolling over edges. Do not use a power sander on any surfaces smaller than the sanding pad itself, for example on the front leading edge - to prevent edge rounding. Go easy - you do not want to sand through the thin veneer. Remove all dust, and wipe down the whole cabinet with a thoroughly wet, although not sopping wet, cloth. Let the cabinet air dry - this wet-dry cycle raises the fibres, so that they can be sanded down prior to applying the finish. Lightly sand with 220 again.
4) Repeat 3) with finer sand papers - I do 400 and 600 (and don't forget the wet cycle).
5) Remove all dust with a tack cloth and/or a rag moist with paint thinner.
6) Apply a thick layer of oil - I prefer Watco Danish Neutral for walnut cabs. Let it soak for 15 minutes. Wet sand in the oil with 600 grit. Wipe off excess. Reapply a second layer of oil. Soak for 15 minutes. Wipe.
7) Optional: Let the oil cure for a day or so and repeat as many times as you want. An old rule of thumb says: "Once a day for a week, once a week for a month, once a month for a year, once a year forever!".
8) Once the oil is fully cured - give it several days, more in humid climates such as Boston! - apply wax (I like Minwax Paste Finishing Wax Neutral) in a super-thin layer, and rub down (by hand or polisher) once hard. Repeat as necessary.

You should now have a nice, hand-rubbed sheen to your cab. Anytime the cabinet gets dull, just repeat, and you may be able to go straight to oil/wax if no scratches.

Good luck.

All the best,

 

Attachments

  • 162247_4.jpg
    162247_4.jpg
    46.7 KB · Views: 21
Orbital, no doubt about it.
Get one with the velcro discs for quick grit changes. I love my old Bosch, but almost any name brand one like a DeWalt, Porter Cable, B&D, etc, etc, should suit you fine.

Also, I have no issue with chemical strippers for film finishes. I've used that orange CitriStrip that I've found at estate sales and it makes short work of lacquer and shellac finishes. I've never experienced any delamination issues either.
 
I am a woodworker as well and Njord's step by step advise is spot on.

Sorry Andyman but I would not recommend an orbital for speaker refinishing with the exception of a solid hardwood cabinet (which is virtually unheard of).

The only thing I might add, if you think you will do much of this work you will eventually want some dust collection capability from the palm sander. Generally speaking that will mean a 1 1/4" dust port and some type of shop vac to attach to the port on the sander. If you can afford it, something like a small mini turbo Fein work very well and it will be quieter than a standard shop vac. Dust collection is not essential for the occasional user but if you have enough projects it will be something you will want, so plan ahead.

...a
 
jocko_nc said:
For a speaker cabinet, I use my hands. With or without a block of wood, but still my hands.

Yep. Sanding with the grain. I also like to hand rub my finishes in.
 
Here's another thread discussing wood refinishing as it applies to speakers that you may find useful.
Redboy said:
Njord, thanks for the step by step outline! Have you got any pics of your work to share?
Yes: I have attached some photos of a pair of speakers I did, that looked pretty tired when I got them. Here's a receiver cab I did with the same procedure, although I needed to strip it first of varnish.
 

Attachments

  • ads1.jpg
    ads1.jpg
    58.4 KB · Views: 76
  • ads4.jpg
    ads4.jpg
    78.6 KB · Views: 57
Mr. Snoid said:
Sorry Andyman but I would not recommend an orbital for speaker refinishing with the exception of a solid hardwood cabinet (which is virtually unheard of).

I work with wood too, so I guess it's a matter of familiarity with the tools. 60 grit paper in the hands of a novice would eat through most veneers lickety split, but a much finer grit used skillfully would do just fine. But for someone new, it may be too aggressive.

FWIW, I'd never sand a cabinet to remove a finish in the first place, but lots of folks do; I guess the "mess" of the stripper puts them off, which is unfortunate because in many cases it is much quicker often requiring only minutes on a side.

I do question Njords use of the extremely fine 400 and 600 grits on the raw wood prior to oiling or staining. I've read that many feel that these finer grits really don't add anything at the pre oiling stage and may in fact burnish the wood a bit and prevent maximum absorption of an oil finish; the wood needs to be a bit "rough" to soak it up. Sanding to 220 (or even 150) is recommended and then followed by oil application and sanding with the finer grits. This creates a bit of a slurry to fill and even the surface, and doesn't impede the initial absorption of the oils or stains as much, yet yields just as smooth a final finish.

At any rate, most folks would be amazed at what results can be had for an afternoon's worth of work.:thmbsp:
 
Any tips for dealing with nick, dings, gouges, or other damage in the veneer??

Refinishing an undamaged surface takes some time and care, but seems straightforward. However, I find the prospect of having to repair minor damage is more intimidating, and often keeps a potentially successful project stuck at the bottom of the list.
 
Well, shallow dents can be steamed out sometimes by a technique involving a iron and piece of thick cloth, but scratches, gouges, nicks and chips may require careful removal and replacement of small pieces of veneer.

Do an online search of furniture or veneer repairs and I think you'll find several suggestions, but most of them aren't easy.

Scratches are a bit different. Sometimes shallow ones are limited to the film finish and go away when the film is stripped off. most of the time though there is some damage to the actual veneer. On light scratches application of a new finish or something like Howard' s Restore-A-Finish will remove them by darkening the abraded fibers which show as white lines. sometimes the white lines though become dark brown lines and while less noticeable, they can still be seen if looked for, albeit not until one gets close. Deep, nasty ones into the substrate are bad news and either call for something like a melt in stick to fill the scratch with like colored shellac/wax, or a wholsale removal and replacement of the piece of veneer, which sometimes just might be easier than messing around with cutouts and patches.

FWIW, I'd do some test runs on a scrap cabinet and see what works for you. Take one that's trashed and either try to fix it up or mess it up more and try to fix whatever you did. You know, gouge it with a screwdriver, knock out chip with a chisel, or even smash a corner with a hammer. It's always better to practice on scrap than cause more damage than good to a prized piece because you aren't as adept as you expected!

I've got an AR cabinet out in the garage that's awaiting such a fate. Maybe I can do some before and afters on it and post them here?
 
Andyman said:
I do question Njords use of the extremely fine 400 and 600 grits on the raw wood prior to oiling or staining.
The fun thing about woodfinishing is that there are many methods to achieve the goal of improving the look of your piece, and I always ask other woodworkers about their process. Amazingly, methods tend to vary quite a bit! This is good news for the casual woodfinisher - as long as he follows certain ground rules, he is likely to achieve a substantial improvement to the finish of his piece!

Andyman, with your method you apply the oil at an "early" (150 or 220) stage of abrasion: Do you then wet-sand in the oil with the finer papers, or do you let the early oil cure, and the dry-sand with the finer grits between subsequent oil applications? Again, I am just trying to find out what other enthusiasts do!

Andyman said:
Well, shallow dents can be steamed out sometimes by a technique involving a iron and piece of thick cloth
I can confirm that repeated steaming with an iron and a moist cloth will raise the fibres of the damaged area towards the same level as the surrounding undamaged area. You may still be able to see the scratch as a darker line in the wood, but done right, it will no longer indent into the wood.
 
Njord:
Yes, sand in the oil with the 400 and 600 grits before you let it dry. I've sanded in with the 400 rather than simply apply it and let it soak in as the directions indicate, and then do the next application with the 600 grit. That way you get the benfit of more oil in the wood, a deeper penetration and the smoother wet sanded finish, plus a small bit of pore filling with the slurried oil.
 
Back
Top Bottom