• The move to the new server is done. There are some software and database maintenance updates in process. This has us passing the hat around to help out. We appreciate any donations. Seriously, even a dollar helps. The payment page may be found here - https://www.audiokarma.org/support.html

Sansui AU-217 restoration

JimEGR

AK Subscriber
Subscriber
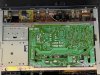
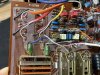
Starting on my Sansui AU-217 restoration. This particular unit is in great condition. It is all original. And really no cosmetic flaws. When I received the unit it did not power up. I found a cut in the power cord and one of the conductors was fully sheared. I temporarily repaired the cord with butt splices. The unit powered up but had no sound out of the left channel. I cleaned all of the controls with F-5. Fully functional now.

Does anyone have a good lead on where to get replacement factory style power cords?

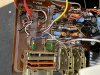
Having just finished my AU-117 rebuild the first thing I noticed under the hood of the AU-217 is a retainer bracket for the input selector shaft. The AU-117 does not have a retainer bracket for the input selector shaft and that resulted in the shaft walking out on my AU-117 and losing mechanical connection to the electrical end. It looks like Sansui resolved this on the AU-217 with the retainer bracket. Was this a running change on all models or only on the AU-217?

Now that everything is working and functional I plan to update/improve the electronics. Big thanks to @Leestereo for the technical support on the spec. If you have any questions about the BOM you can message him directly.

More fun.

Hi-Fi Engine AU-217

B06D49BC-5496-4C9D-B331-BAB896384BC0.jpeg66546E61-9699-43DD-B517-6E91BBA369F2.jpeg779C42BA-508C-48E4-9F26-2995ECE7BB50.jpeg53C34232-B17E-4238-8CC6-25256827432D.jpeg0FCA4843-02FC-4D93-A75F-DB0735FAA5F1.jpeg86AC53A9-8CF9-4C1C-81E1-3B399B410143.jpeg514901C2-3DCB-4894-BBCB-DFB10D7D8C54.jpeg03DAE47A-CBBF-4867-9AA2-5DD22812003C.jpeg
 
Last edited:
Register to hide this ad
With Leestereo's input I am sure that this little amp will be working better than new soundwise. Looking forward to seeing your progress and thoughts about how the upgrades have worked out. At least some of the old components must be quite tired by now and you should see good improvements from replacing them. Leestereo's magic touch should be the icing on the cake.
I lust after some of Sansui's larger amps but often get surprised by the performance of some of their 'little' brothers.
Nice to see this fine 217 getting restored.
Have fun.

Thanks! Another interesting part of this restoration is the AU-217 is very close in power to the AU-555a I rebuilt and run as the daily driver in my primary system. The AU-555a is what focused my attention on these high end lower powered integrated’s for very high quality sound. I’m really looking forward to a head to head comparison between these two.

I actually have two of these AU-217 so I can run a head to head comparison stock 217 vs enhanced 217, too.
 
Last edited:
A head to head could be cool. I would worry that the stock one is no longer capable of sounding like it did when new, or do you mean recapped with original values vs recaped ala Leestereo?
Whatever it will be interesting to compare.

I am just putting the final touches on a 555a, it was smashed up so I had to straighten the rear panel, make a new wooden cover etc. I'm going to compare it to my just finished 717.

True the all original AU-217 vs the restored AU-217 won’t be a totally fair comparison - the components will certainly not be performing at their original best. Still will be interesting to hear the difference though. Recapping with original values would be fun to compare at some point maybe.

After I’m done with the AU-217 I’m restoring an AU-317. The restored 117 vs 217 vs 317 will be a very interesting comparison.
 
Last edited:
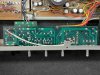
F-2758 Equalizer Board
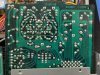
Select electrolytic capacitors, film capacitors and resistors replaced, upgraded and modified.

Before
DD3F4853-2275-4AD8-A1CC-156973B5D579.jpeg

After (not cleaned yet)
5C455E6B-7115-4C4C-AAA3-6D4A11F2EA82.jpeg

Before
564D28A3-B334-4B15-90E4-21F74C225B07.jpeg

After (not cleaned yet)
E98FC58D-9E3F-47D8-ADB1-A460B6CE1238.jpeg

This is only my third restoration so I’m still early in the learning curve. I left the F-2758 board attached to the jumpers and cable. Access was OK but more challenging than the direct access boards on the AU-555a and AU-117 I restored previously.

First post F-2758 restoration play(no RIAA mod) I believe improved detail and separation in the high frequencies and the speakers were quieter at no volume. Quite honestly my ears and brain were a bit fatigued from demoing different bench listening setups though!

I’ve been running some JBL’s I wouldn’t mind sacrificing during initial testing if something goes wrong. I tried some pre and post recording and I wanted to use better speakers so I setup some small ADS I have. I’m still not satisfied with the setup for recording but it was a fun experiment. I need to refine my bench listening setup more.

B2F0A1CF-C1FB-45BA-A548-E2D222A8C83D.jpeg


Some before and after videos below. Not super scientific. Recorded with an iPhone 11. Run at 85db(3 on the Volume nob) for both recordings. U-Turn turntable with Grado Black 3 cartridge. a/d/s/ L400 speakers. The after restoration video shows an improvement - more defined and controlled drums.

Before

After
(No RIAA mod. I will post a follow up video with the RIAA mod next.)

I'm certainly open to any and all feedback.
 
Last edited:
That's quite a change in sound, a big improvement.
Very cool that you have recorded the before and after, it may only be "recorded with a phone" but it still shows the differences in sound.
Also using a phone demonstrates that anyone can do the same without major expenses.
 
That's quite a change in sound, a big improvement.
Very cool that you have recorded the before and after, it may only be "recorded with a phone" but it still shows the differences in sound.
Also using a phone demonstrates that anyone can do the same without major expenses.

Thanks. That was a surprising outcome of the videos - I’m glad I went through the trouble. Introducing some garage science to this process. I’m looking forward to the next phase and documentation.
Edit: Also I added one more @Leestereo mod to the F-2758 board. Will follow up with a video of the new sound.
 
Last edited:
Final mod to the F-2758 Equalizer Board. RIAA.

Final F-2758 after video. This simple upgrade (again, courtesy @Leestereo expertise) sounds like it woke the music up. All instruments are tighter and it sounds like Knopfler's guitar was suddenly invited to participate. Nice improvement - and it sounded good before!
(Google fact: 1969 Fender Telecaster Thinline - This guitar actually belonged to David Knopfler, but Mark used it himself as a slide guitar for “Water of Love” in the early days.)

 
Last edited:
Again another big difference. It is great to hear the progress after each of your upgrades.
I would say how amazing Leestereo is as a resource for us here on AK forums, but I wouldn't like to embarrass him (too much).
Am enjoying hopping on for a ride on your 217 journey.
 
Again another big difference. It is great to hear the progress after each of your upgrades.
I would say how amazing Leestereo is as a resource for us here on AK forums, but I wouldn't like to embarrass him (too much).
Am enjoying hopping on for a ride on your 217 journey.

Thanks a lot. Definitely a huge debt of gratitude to Leestereo and everyone else here. Been wanting to tear into these stereos for years. Didn’t quite have the confidence until AK though. My first soldering project ever was the Leestereo AU-555a a few months ago.

Glad I can contribute something here with the restoration documentation - hopefully of value to everyone. I know I’ve learned a lot and been inspired by reading the restoration threads here. Keeping all of these works of art on the road is a gratifying pursuit.

Off to the next circuit board!
 
Last edited:
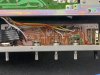
F-2759 Tone Control Circuit Board
Select components replaced.

Before
57C02867-28B0-425A-97CC-B71C938277A3.jpeg

After
C62A1D55-2A26-46B5-A132-A8FBC072F7A7.jpeg

Before
E8278668-EE0C-4C35-9A2F-CCD56E90472C.jpeg

After
BDC5E1A4-357C-4A4B-9EFC-63B58B8B35C1.jpeg


I tore a section of the trace/solder pad removing one of the components. The trace/pads on this series of AU appear to be much thinner than on the older generation AU-555a I restored. Probably some cost savings/more efficient build on this newer gen. I’ve had to be super careful with component removal.

Failure -
You can see the broken pad at the arrow, but just above it you can see a bent pad. I am using a HAKKO desoldering gun and I can see why solder wick is preferred as a less impactful method for solder and component removal. It is really easy to be heavy handed with the desoldering gun. As I've been experiencing. I think what is happening is the solder gun is not removing all of the solder and I am lifting the lead while it is still attached to the trace/pad. The desoldering gun is faster, but at a potential cost to the board.
BD2C9DD3-2DFF-4C19-AA1C-C2BC403CDD01.jpeg

Repair -
I came up with the repair below. First go at this kind of problem solving. Full electrical continuity restored. Mechanically solid. Please let me know if there is a better or different way to make this kind of repair.
61EFFE92-6A84-47FB-91EA-36D5A0B14105.jpeg

Repair
BF67770C-8D1E-4BC3-A50A-11433DB2B010.jpeg

Post F-2759 restore sound test -
I am not hearing much of a change on this one. Maybe a little more detail - I think I hear Mark's finger slide on the string at one point in the song, in this iteration vs the previous one - maybe. Tone controls are flat. Loundness is on. All videos.
 
Last edited:
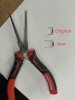
Is there a tool or trick to bending the fusistor leads into standoffs? I’m able to get close to the factory bend but curious if there is a faster better way.

Is the standoff bend still necessary? I am assuming this kind of bend is to keep the component away from the board for air flow cooling vs tight to the board?

D3C5372F-192C-4008-8AE9-A41960020668.jpeg
 
Last edited:
F-2760 Power Amplifier Circuit Board
Replaced select components. Renewed thermal paste. Set bias at 14mV.

Completed! With a nice little pile to show for the work.
98630E38-1AB1-4DA9-89FD-357B1882FE75.jpeg

Still working on cleaning/finish of the circuit boards. Not totally happy with the end results. The AK acetone tip from my AU-117 restoration thread helped considerably though. I'll circle back to this board for better cleaning later.
EFD3CD4E-33ED-499E-955D-937C9490278C.jpeg
FB55EF72-4076-4207-99DB-1BD61A43CF95.jpeg


Went almost perfectly. I did let the smoke out of one small electrolytic cap that I installed in reverse - that was a first. Smoke, hiss, pop. Powered up on a dim bulb tester.
B65E515E-99B4-45CB-A5C6-4AEEF5DA1F91.jpeg

First relay replacement. And this new one was much quieter than the original. So quiet I didn’t hear it click the first time so I pulled it and swapped the old one back in to make sure everything else was proper then I reinstalled the new one and observed it was closing, just very quietly.
B0F7D0FE-6A6A-44CC-9D85-2DC53CD16F75.jpeg

I used 303 Aerospace Protectant on the controls, the backing plates behind the controls, front plate and cover. This stuff renews and protects really well. Good for rubber speaker surrounds too.
78FE9C49-405A-41FF-9420-FC7AD5CDCF7C.jpeg

First impression play definitely revealed improved overall fidelity. I want to let it run in for a while on my secondary system then I’ll move it to my primary for final evaluation.
1F8EEA79-8018-40E5-95EB-85AE98879742.jpeg

First impression from the bench -

Thanks again to @Leestereo for the technical support! And the rest of the AK community. More to go. I have an AU-317 I lucked upon locally I plan to restore next. Fun.
 
Last edited:
Great work!

I believe that the resistor curvatures is to prevent them from overheating during soldering.

Could you say what did you use to replace the 6800uf 50v capacitor?
Thank you
 
Is there a tool or trick to bending the fusistor leads into standoffs? I’m able to get close to the factory bend but curious if there is a faster better way.

Is the standoff bend still necessary? I am assuming this kind of bend is to keep the component away from the board for air flow cooling vs tight to the board?

View attachment 2568044
I use these to form component leads. I raised all the resistors on this board, should help with air flow.form.jpg

https://www.digikey.com/en/products...MI1LnFn93O_AIVS__jBx2kXw5SEAQYAyABEgI_p_D_BwE
 

Nice lead! Pun intended :). Added one to my cart. Have since picked up the resistor lead bending tool @ig88 recommended, too. Discovering good new tools is nearly as much fun as finding the gear. Getting my workshop dialed in right now. Major remodel to improve the function and efficiency of the space. Then back to work.
 
Great work!

I believe that the resistor curvatures is to prevent them from overheating during soldering.

Could you say what did you use to replace the 6800uf 50v capacitor?
Thank you

Thanks! Really love my restored AU-217. I defer to @Leestereo on the component recommendation.
 
Back
Top Bottom