• The move to the new server is done. There are some software and database maintenance updates in process. This has us passing the hat around to help out. We appreciate any donations. Seriously, even a dollar helps. The payment page may be found here - https://www.audiokarma.org/support.html

Sansui SP-5500 Restoration

jozeppy26

Active Member
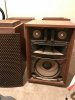
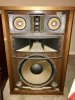
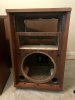
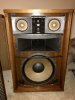
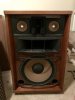
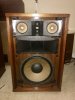
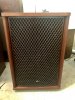
Hey all; I’m starting this thread to catolog the restoration of my SP-5500s. I just picked up 4 of these massive bad boys for $40 today.

I’ll inspect them closer tomorrow or this weekend but right now it appears they’re in pretty good cosmetic shape. I just popped a grill cover off for the first time it seems. DUSTY!

These. Are. Huge.

4781E7C0-0251-4F1F-979B-52D5DB626870.jpeg 5E38F426-2F2F-4C8C-9C76-919926BE5094.jpeg
 
Register to hide this ad
Awesome buy,great deal.Just look dusty with no damage.Do they sound decent as is or need caps?
 
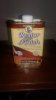
This stuff made both my Sansui Sp-200 speakers and Sansui 2000A look fantastic. They both had some minor wear and scratches and this stuff really did a good job of bringing the wood back to life with out having to sand anything. Good Luck that was a steal.20171101_210802.jpg
 
Last edited:
This stuff made both my Sansui Sp-200 speakers and Sansui 2000A look fantastic. They both had some minor wear and scratches and this stuff really did a good job of bringing the wood back to life with having to sand anything. Good Luck that was a steal.View attachment 1036936

I may give something like that a shot bc I cringe at the idea of sanding these things. I just finished sanding and oiling a pair of Original large advents and those were so much smaller.
 
My speakers were in good shape with some minor wear and light scratches and I was amazed without having to sand anything. I just brought my 2000A to have it serviced and the guy even commented on how nice my case is. I am going to try it on some Advent 1 speakers i bought last week next. An antique store told me about this stuff, they claimed they used it on everything that came in to their shop. It was well worth the money.
 
I found a high grit sand paper just quickly over the surface helped the Restor a Finish. I tried without a little sanding and I felt like it wasn’t penetrating anything. I followed this up with the Howard Feed-N-Wax. Anyway, one speaker is completely cleaned up. I’m going to place Velcro on the grill cover since it was originally screwed on, this way it’s easier to remove.

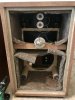
I completely gutted the speaker which holy millions of screws Batman!

B42817B8-70B3-4350-8524-AFB8BF6500D0.jpeg
4C6B1058-9692-4740-8BCB-5D513115CAD4.jpeg

One pic is with flash the other is without.

9F3EDD85-5359-430A-BCD9-FBB7483732EE.jpeg
C3356C3F-138F-4283-AA73-139F82227A33.jpeg
 
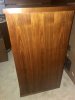
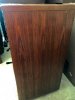
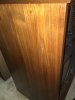
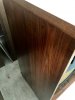
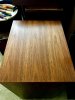
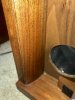
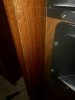
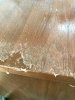
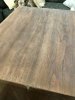
Ok, so I did something crazy and decided to strip the clear lacquer coating the walnut veneer. I was really feeling like the surface didn’t “pop” like other speaker cabs I’ve restored. I applied Goof Off Pro Stripper, lightly scraped off with a stripping tool. Next, I sanded with 180 grit sandpaper. Finally I applied Howard’s Restor-a-Finish followed by Feed-N-Wax.

Results are below followed by a before photo (which was taken before I even cleaned the surface). They feel and look like fresh walnut again.

BEFORE
17F05A98-90BE-4D64-AD19-0FDAAB3E9461.jpeg

AFTER

C8189E11-0824-4856-A0B7-DBBDC9166B97.jpeg
25860D76-658E-41B0-94ED-B735CBF4ED84.jpeg
EA5B0D6F-45F4-48C3-B804-143C6FBDAC12.jpeg
E21B0A1A-8F86-4FA3-B433-3A9216908066.jpeg
BC419341-69BD-471A-9020-D6BF069D41C8.jpeg
37CFC9DD-67A4-495F-B995-408F33EEE679.jpeg
3781BCCA-9447-4138-9D52-C7B48A17F128.jpeg
A58EC516-50A4-454B-86C6-ED41B5930FF4.jpeg
BC87586C-6A41-49C6-BF44-5380265D7D0C.jpeg
 
Those look beautiful, Jo!

How long do the Feed & Wax finishes typically last before they need another application? Do they feel oily or sticky at your current stage and then dry as time goes on, or do they dry in a day or so like Teak Oil? I've never used any Howard's products.

GeeDeeEmm
 
You apply the feed and wax and wait 20 min and rub off extra then polish with a cloth. It adds a bit of shine that wears off. It’s a think yellow oily wax. It doesn’t feel slippery or grimey to the touch and it smells really good.

EDIT:
It appears Feed-N-Wax contains beeswax, carnauba wax, mineral oil, and orange oil. Instructions say to apply every 3-6 months as needed.
 
Last edited:
Beautiful
Work on those! You’re lucky, the cabs look very good without any veneer damage.
This was a terrific score and you’re doing them justice!
Planning a recap as well?

Look forward to your listening impressions.

Glenn

Thanks! The original owners were heavy smokers and the chemical strip followed by light sanding and refinishing really took off a thick layer of nicotine as well! Haha. I’m debating replacing the damping insulation due to odor as well. First, I’m going to try aggressively Lysol spraying the insulation.

Veneer condition really isn’t bad at all, and I’m thinking this is due to the clear varnish applied to the veneer. There are 2 corner dings that unfortunately have chipped the veneer off on the top front right and top back right of one speaker and 1 similar ding on the bottom front left of the other. I haven’t yet evaluated the other 2 speakers in depth. After reading various posts on this forum, it seems repairing chipped corners is pretty difficult.

The lattice grill covers are in pretty good shape, albeit dirty. I quickly submerged one grill cover in water and shloshed it around which seems to have done the trick (my dyson wouldn’t remove the dust as it seems stuck to the fabric inside each lattice cubby). The only problem with doing this is it also altered the curve of the grill (it’s a bit crooked) despite having a metal curved bar screwed into it (so much so that one corner won’t stay Velcroed). I’m still working on a plan to fix this. I’m thinking I’ll steam the front of it and screw it back into the speaker. Once dry, I’ll remove screws and replace with Velcro.

I’m reassembling one speaker now and cleaning the nicotine covered steel horns and frames. I’ll then recap one speaker, compare pre and post sound, then recap the remaining speaker. I’ll post my thoughts on pre and post recap sound later this evening or tomorrow.

TLDR:
Corners are chipped in 3 places, not sure of a good repair option. One lattice grill is bend out of shape slightly, will steam back into shape before messing with the other grill cover. Recapping and posting thoughts on sound tonight or tomorrow.

 
Well scratch the listening test for this evening. I just removed capacitors from the crossover on one of the speakers and realized that Parts express send me 3.9 uF capacitors instead of 4.7 uF capacitors in a bag labeled 4.7. I only checked the bag when I made sure my order was correct. Hopefully they resolve this issue quickly enough but it does delay things a bit.
 
Thanks! The original owners were heavy smokers and the chemical strip followed by light sanding and refinishing really took off a thick layer of nicotine as well! Haha. I’m debating replacing the damping insulation due to odor as well. First, I’m going to try aggressively Lysol spraying the insulation.

Veneer condition really isn’t bad at all, and I’m thinking this is due to the clear varnish applied to the veneer. There are 2 corner dings that unfortunately have chipped the veneer off on the top front right and top back right of one speaker and 1 similar ding on the bottom front left of the other. I haven’t yet evaluated the other 2 speakers in depth. After reading various posts on this forum, it seems repairing chipped corners is pretty difficult.

The lattice grill covers are in pretty good shape, albeit dirty. I quickly submerged one grill cover in water and shloshed it around which seems to have done the trick (my dyson wouldn’t remove the dust as it seems stuck to the fabric inside each lattice cubby). The only problem with doing this is it also altered the curve of the grill (it’s a bit crooked) despite having a metal curved bar screwed into it (so much so that one corner won’t stay Velcroed). I’m still working on a plan to fix this. I’m thinking I’ll steam the front of it and screw it back into the speaker. Once dry, I’ll remove screws and replace with Velcro.

I’m reassembling one speaker now and cleaning the nicotine covered steel horns and frames. I’ll then recap one speaker, compare pre and post sound, then recap the remaining speaker. I’ll post my thoughts on pre and post recap sound later this evening or tomorrow.

TLDR:
Corners are chipped in 3 places, not sure of a good repair option. One lattice grill is bend out of shape slightly, will steam back into shape before messing with the other grill cover. Recapping and posting thoughts on sound tonight or tomorrow.

I repair chipped and badly crunched corners all the time, it's not difficult to do. The important thing is to have some older veneer harvested from another trashed cab for splicing in new pieces.
Take a look at my recent AR-3a restoration thread. Lots of pics showing how to repair damaged corners and chipped veneer.

Bummer about the incorrect cap! That's happened to me as well.
Cheers, Glenn
 
Back
Top Bottom