• The move to the new server is done. There are some software and database maintenance updates in process. This has us passing the hat around to help out. We appreciate any donations. Seriously, even a dollar helps. The payment page may be found here - https://www.audiokarma.org/support.html

Sansui SR-929 Damaged RCA Plugs and Wires (help appreciated)

Crooked14

New Member
Hi, Everyone. I would first like to say that I TRULY appreciate the wealth of knowledge that I have discovered here from this amazing community -- Thank you!

This is actually my first post. As, I use the search function, and it usually works quite well. However, I am at a loss for how to deal with my latest issue.

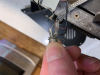
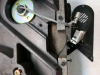
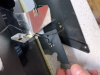
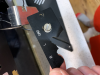
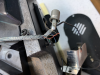
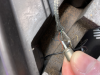
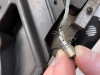
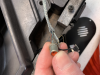
I picked up a used Sansui SR-929 today that needed some initial cleaning, but is otherwise in (assumed) great shape. I knew beforehand that the rear RCA plate was broken, but I did not know to what extent. I thought that the female plugs had just been pushed in through the broken plate... turns out to be much more than that.

Beyond the broken plate, there is only one RCA -- the Red. As it stands, all that is connected to it is the braided shielding wire that comes out of the bottom of the tonearm. This connection is by a looped ring around the outside of the Red RCA. ALL of the other wires: Red, Blue, Green, White... plus 2 Black wires are all severed.

Ok, so I have looked at the service manual. On page 12, it does show these same wires in a crude drawing. But I am not sure what needs to be soldered/reconnected back to what. Also, since I do not have the White RCA at the moment, I definitely do not know what gets connected to that. Is the braided shielding wire only connected to the Red? It seems that this tonearm wires are soldered directly to the RCA's... is that correct? If so, could anyone offer some insight on what goes where? If there is something I am missing, that info would be greatly valued, too.

I will try to post photos for clarity.

Thanks in advance!

Alan
 

Attachments

  • tempImageh2T4pe.png
    tempImageh2T4pe.png
    763.5 KB · Views: 41
  • tempImageuCMrOT.png
    tempImageuCMrOT.png
    705.5 KB · Views: 39
  • tempImage93ibzK.png
    tempImage93ibzK.png
    862.4 KB · Views: 41
  • tempImagew6VMQ7.png
    tempImagew6VMQ7.png
    686.4 KB · Views: 38
  • tempImageYboDNT.png
    tempImageYboDNT.png
    668.9 KB · Views: 38
  • tempImageJe5JMH.png
    tempImageJe5JMH.png
    789.8 KB · Views: 39
  • tempImagejZCFRx.png
    tempImagejZCFRx.png
    777.8 KB · Views: 39
  • tempImageZlv06z.png
    tempImageZlv06z.png
    708.7 KB · Views: 39
  • tempImage3INrvD.png
    tempImage3INrvD.png
    747.2 KB · Views: 37
  • Screen Shot 2021-06-18 at 5.08.34 PM.png
    Screen Shot 2021-06-18 at 5.08.34 PM.png
    508.6 KB · Views: 39
Last edited:
Register to hide this ad
I know this is a rare ‘table… but someone out there has to have more insight than me on this. Any help is appreciated.
 
Typical pinout is white- left signal, red-right signal. Blue-left shield/ground, green-right shield/ground. Confirm by looking at other end, some cartridges have these marked at the respective pins. Be precise in stripping the loose ends! If you lose any strands & need to cut back for another try, you may end up too short. Don't want that!
 
Thanks, Catmanboo (love the name, btw). I guess what is really throwing me off is the shielding braided wire around the Red (right) RCA female input. I’ve never seen this before. How is the White (left) input shielded/grounded? Is it simply from the black ground wire?
 
They all appear to share common shield,as they're all contained in the braided shield. Black wire is for grounding to chassis & to the separate ground lug which is for connecting TT ground wire. If you have a VOM or DMM you can verify all this by doing continuity checks. Use Rx1 scale. Btw.. my handle is a combination of 2 nicknames from 2 different sources, seems to fit so - that's me!
 
Thanks for the clarification. Ok, I am going to give this a go today and see if I can get it fixed. I’ve never soldered tonearm wires before… so, yeah. That part is pretty nerve-wracking. Fingers crossed!
 
Find some similar gauge wire and practice before going in the Sansui. Those little wires take more finesse than anything I've ever done.
 
Thanks. That’s exactly what I did. Several rounds of practice and then I headed in for the operation — and yes, that is precisely what it felt like, the game Operation. So, first pass, got everything soldered up nicely. Was actually surprised that the wires didn’t just melt away. They’re so damned tiny. Checked it all with a meter - from tonearm connects to the RCA terminals. All good. Screwed it all back up, flipped it over, plugged it into my receiver and… the most glorious sound I’ve ever heard!

Then… thought, “I should probably go back and tidy things up.” OMG, should have just left it all alone. 3 hours later, several more solders and now it’s finally on its throne playing so amazingly. But those wires are no joke. I never want to have to do that EVER again. Ever.

Thanks, again, everyone. This community is super awesome.
 
Find some similar gauge wire and practice before going in the Sansui. Those little wires take more finesse than anything I've ever done.
It's not as bad as some make it. I've done micro-wires like this by heating & scraping off insulation with my thumbnail. Too dull to cut strands & it worked!
 
Thanks. That’s exactly what I did. Several rounds of practice and then I headed in for the operation — and yes, that is precisely what it felt like, the game Operation. So, first pass, got everything soldered up nicely. Was actually surprised that the wires didn’t just melt away. They’re so damned tiny. Checked it all with a meter - from tonearm connects to the RCA terminals. All good. Screwed it all back up, flipped it over, plugged it into my receiver and… the most glorious sound I’ve ever heard!

Then… thought, “I should probably go back and tidy things up.” OMG, should have just left it all alone. 3 hours later, several more solders and now it’s finally on its throne playing so amazingly. But those wires are no joke. I never want to have to do that EVER again. Ever.

Thanks, again, everyone. This community is super awesome.
Glad it worked out- the first time. Now you need 4 panel-mount rca connectors

& suitable substrate to mount them on. Make it permanently bozo-proof. Then, hook it all up, crank it up & leave it there!:rockon:
 
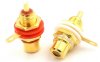
I have had tape decks with broken RCA plug panels being some of them were phenolic. I toyed with the idea of just getting some aluminum black plate from Mc Master Carr and cutting it to fit the cutout plus some space for the screws to mount it but this time I would use the RCA panel jacks I bought on E bay that are way better than those cheap RCA jacks used in typical stereo. the panel can also be cut from a piece of 1 unit rack plate as well. Some assembly is involved.
The Panel jacks are well made with good ground terminal and they have that gold flash whatever that is but it seems to work well and look much nicer. In switch boxes I have made they work very well and the center terminal doe snot get lose like the cheap RCA panel jacks do.
The wiring is just a matter of ohming out what is what on the cartridge to the RCA terminals and being the wires are small low capacitance, do not use too much heat as the insulation may melt away. I find it best to get the solder on the jack and then apply some flux to the wire and wet the solder on the jack and stick the wire in it then it should bond. It will be minimal heating to the wire.
 

Attachments

  • Gold RCA jack.jpg
    Gold RCA jack.jpg
    188.2 KB · Views: 3
New set of problems… man, what an up-and-down day. Thought I was already to get some quality listening going, and then I got struck with the oddest thing yet.
So, I am versed on how to set up a ‘table. I won’t bother with that matter. However, I am also aware that this 929 is a little more complex than my Fluance RT-85 or Hitachi PS-38. Read the manual (twice) and set things up accordingly. Now, to be fair, I do not have the lateral balance weight. But, I’ve balanced out the ‘table so, as I understand it, that weight isn’t fully necessary.

Here’s my NEW problem: I set my VTF with a scale (in this case, 2g) and play a record. Somewhere between the start of the record and midway (that’s as far as I allowed it to get…) the tracking force is evidently much heavier - as my stylus is under full compression, and the cart is almost rubbing the record. So, I lifted the tonearm, removed the record and re-checked the tracking force with my scale. And here is where it get all kinds of crazy - 2.55g. I make the adjustment with the weight. Then it’s .34g. I mean, I barely even turned it. Anyway, after this goes on for longer than most have the patience for, I start to see that the VTF is variable to the extreme. To illustrate: if set it to 2g, then I cradle it in the rest and bring it back out to the platter and rest it on the scale, each time it reads something different. Not vastly different. But 2g then 1.34g then 2.11g… is enough to wonder WTF.

My only guess is that it’s something to do with the bearings..? I mean, I picked this up from Goodwill. So, who knows what it’s been through. Not sure if I should start a new thread or what. I’ve searched this issue out, but nothing has presented itself. Guessing that’s one of the problems of having such a rare turntable.

anyone have any idea what I am overlooking?
 
I have no advice. However, I will commiserate with you. This is a bipolar hobby, for sure. Walk away and come back.
 
Walk away and come back is good advise, and ultimately what I opted for. Slept on it and had some additional thoughts on the matter.

One thing I thought about over night - when I got this turntable, the tonearm was VERY loose, meaning, if I held the arm and jiggled it back and forth, front and back, it had A LOT of play. Also the plastic rear where the counter-weight screws on was sagging pretty bad. So I inserted a screwdriver and tightened up that piece. Coincidentally, tightening this screw also reduced the play in the tonearm. Initially, I tightened it pretty good - to snug. But that also had the effect of stiffening up the tonearm and making it very tight on its pivot - right to left. So I loosened the screw a little and settled for only a slightly saggy butt on the weight mount. But the arm was able to pivot smoothly again.

Not sure if this had any effect on the issue I’m encountering now. Anyway, I thought that it was the lifter not going down. But it was clear of that. It’s like the bearings are stiff, or not moving fluidly. If I lower the lift and let the arm glide down. Sometimes it will actually stop just shy of contacting the platter surface. A few times I pulled it to just off the platter and “massaged” it a few up and downs, below the platter level just to try and work it out of whatever was sticking it up. It seemed to work a little. But the arm still does not behave with consistent results. Sometimes it drops down to the platter. Sometimes not. This, I am sure is also what is effecting the tracking force results.

So, even after a cup of coffee and a night’s sleep, I’m completely at a loss on what is wrong.
 
So, I read up on another thread about someone who had a somewhat similar issue. They suggested to loosen the screw in the counter weight mounting tube. Did that, checked, checked again and then checked one more time and the VTF is steady as can be! Currently listening to the first album since the “fix” and it’s tracking and the stylus is remaining level. I’ll check the weight again once it’s done, but I’m feeling very confident this solved my problem. There’s that uncomfortable play back in the tonearm that so many have commented on with this Knife Edge set up. But it doesn’t seem to have any negative effect of record play. So I’m Happy.


Thanks so much!
 
Back
Top Bottom