• The move to the new server is done. There are some software and database maintenance updates in process. This has us passing the hat around to help out. We appreciate any donations. Seriously, even a dollar helps. The payment page may be found here - https://www.audiokarma.org/support.html

Scott 222C

More updates!


Stripped Bells
IMGP0004_sm-1.jpg


Painting the Bells


Painted!
IMGP0025_sm.jpg


IMGP0026_sm.jpg


Polishing the screw heads
IMGP0028_sm.jpg


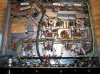
Wow! Your going all out on your 222C . Looks great! This thread has lots of good info. I'm on hold with mine until I get a power trans from a parts chassis I bought. Tubes aren't labeled on the chassis so I'll have to check the pins to see if mine used 6U8's or 7199 tubes. Here's a photo of the guts with the PS trans out. Someone had replaced the original trans with another sometime in the past. Can't wait to get this going. I really like the sound of 7189 amplifiers :yes:
 

Attachments

  • Scott 222C.jpg
    Scott 222C.jpg
    146.7 KB · Views: 89
Very nice, Philip! It really is amazing what a little paint can do to the appearance of the amp.

Thanks Micah for the opportunity! :)

Wow! Your going all out on your 222C . Looks great! This thread has lots of good info. I'm on hold with mine until I get a power trans from a parts chassis I bought. Tubes aren't labeled on the chassis so I'll have to check the pins to see if mine used 6U8's or 7199 tubes. Here's a photo of the guts with the PS trans out. Someone had replaced the original trans with another sometime in the past. Can't wait to get this going. I really like the sound of 7189 amplifiers :yes:

I don't think I could rewire the whole thing, but I'm doing what I can :) Thanks! Also, on my amp, the tubes aren't labelled on the chassis, but there's a sticker on the bottom plate that tells me what tubes go in which position.
 
I didn't order any 25uF/200V caps, grr... it looks like it connects pin 3 to pin 6 on V3-A and V103-A (7199 tubes).

Could I just parallel two 0.1uF/200V caps and call it good? They're PIO K40y-9 caps, the Russians :smoke: ... Or is that a bad idea (putting the Russians in that position :smoke:)
 
I didn't order any 25uF/200V caps, grr... it looks like it connects pin 3 to pin 6 on V3-A and V103-A (7199 tubes).

Could I just parallel two 0.1uF/200V caps and call it good? They're PIO K40y-9 caps, the Russians :smoke: ... Or is that a bad idea (putting the Russians in that position :smoke:)
Hey that's looking real good. Great job so far!!

If you're thinking of paralleling two 0.1uF caps, that would give you 0.2uF, so presumably you mean to use these to replace 0.25uF not 25uF? BTW, those K40Y caps are pretty big, so you might just have a size issue there vs. using a regular poly film/foil cap.
 
Hey that's looking real good. Great job so far!!

If you're thinking of paralleling two 0.1uF caps, that would give you 0.2uF, so presumably you mean to use these to replace 0.25uF not 25uF? BTW, those K40Y caps are pretty big, so you might just have a size issue there vs. using a regular poly film/foil cap.

Thanks!

Yea, 0.25uF--oops! I was just pondering the size issue myself. One of those Russians is smaller than the caps that's in there now, but two gets a little tricky to figure out... hmm, I may just have to find something adequate at the electronics shop downtown.

Bummer.
 

Got this far tonight
IMGP00403_sm.jpg


0.1/1000v K40y-9 cap vs. 0.1/400 original (!) and vs. a 0.1/400 Orange Drop
IMGP00393_sm.jpg


Tools of the trade (everyone need hemostats!)
IMGP00433_sm.jpg

 
School has started! Waiting on more parts before I button this one up.

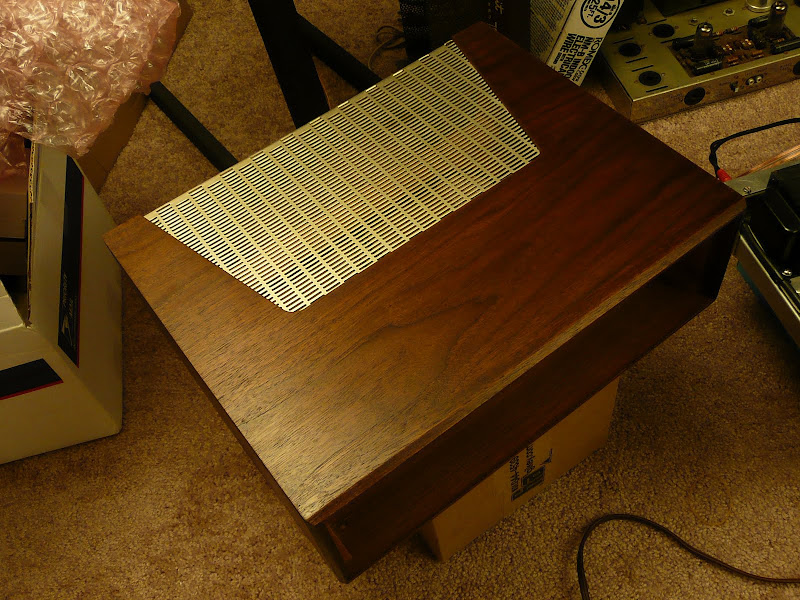
How do you guys clean up your Scott wood cases? My half-assed attempt with steel wool and Restore-a-Finish didn't get me as far as I hope it would've. Then again, I may just build a new case for this one...

Expect updates in a few weeks, possibly with all the lightbulbs loaded into this puppy :)
 
I used a scuff-pad, maybe some 600 grit sandpaper. The veneer isn't too thick so don't rub too hard. Afterwards, I cleaned it off with a damp cloth to remove dust. Let dry, then I applied some Walnut flavored minwax varnish. This will also hide the light-colored nicks where the veneer was chipped off. After that dried, I used some semi-gloss spray urethane.

P1010276.JPG
 
I strip the old finish with stripper and a putty knife. Then it's lots of steel wool and sandpaper. Two coats of sanding sealer and 2 coats of polyurethane (both brushed on) with very light sanding and a tack cloth to pick up dust in between coats. Finally a coat of paste wax. It would be hard to break me of this routine- it's been very effective on many a refinishing job.

The last thing I refinished in 1978 was a Atwater Kent radio:

197804 5632 My Atwater Kent radio.jpg
 
Last edited:
Holy moley! How have I missed this thread until now?!

Great work on that amp, and some great information has been shared here! :thmbsp:

I'll be following along, now.

:lurk:
 
Hey Red, nice to have you along :)

School's hit me in a big way this semester and I've been doing me best to take it all as it comes, as a result everything's taken a back seat, ergo the lack of updates!

I do have a couple questions;

When I first power the amp up, so I want to use a VARIAC? I just bought a 1.8A 0~120V model, I think it should be enough... the schematic for this amp specifies 160~170W at 117V (draw of 1.5A)

Also, upon first power up, how would I go about measuring and adjusting the bias? Should I have the pots swug one way or the other and then adjust from there?


:scratch2:


OH! BIG BIG BIG Thank You to tinkerbelle--she sent me two 0.20uF caps and I needed for the rebuild that I somehow neglected to order! Top-notch in my books :thmbsp: :)
 
You replaced all the power supply electrolytics. That's the real reason to use the variac. You could still use the variac. Monitor your B+ as you bring it up. If you notice any substantial drops in B+ bring it back down.

But, you've replaced all the electrolytics, haven't you? I don't think you'll have a problem with power up. I'd probably just turn it on (assuming I felt real comfortable about how everything was hooked back up).

The thing to keep an eye on is redplating in the EL84M's. But, if the amp runs for 30 minutes you're probably home free.

Now you can relax and let the amp break in for many days/weeks. Then adjust the bias.

That's how I'd proceed.
 
Back
Top Bottom