ikonw8
Active Member
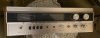
I was so happy to have bought an excellent condition Sherwood S7100A in October 2016. It needed nothing... even the dreaded power switch worked! All the switches and posts were clean, so I didn't touch anything.
Until...
About two months after I bought it... the power switch failed. Without cleaning.. probably just ageing plastic. The trouble is, my unit failed in the off position.
So, I decided to fix it. It's is an easy repair.
1. Unplug the receiver.
2. Remove the screws on the bottom of the receiver.
3. Slide the wood cover backwards and set it aside.
4. Remove all the knobs. They will all just pull off, no hex keys needed. They may be stiff, pull firmly
5. Remove the nuts on the pots. They are the only things that secure the face plate to the receiver. There should be three. One on both ends and one in the middle.
6. Remove the four screws on the left side, near the front, that secure the tuning / knob frame to the chassis. This will help to give you clearance to remove the volume / power pot.
7. Remove the nut holding the volume pot.
8. Push the volume pot through the hole in the frame, seperate the frame from the chassis slightly to create more room.
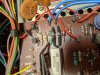
9. You need to short the white and brown wire and the rear of the pot.

10. Unsolder the white and brown wire from the rear pins of the pot.
11. Slip on some heat shrink tubing.
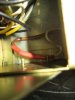
12. Solder the end of the brown and white wire together and apply the heat shrink.
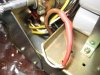
13. Now, your receiver will be on, permanently. Test your work, by plugging the receiver back in.
14. Unplug the receiver and add an on/off cord switch to the power lead. I used Atron LA970 (White), but any similar will do.
15. About 45cm from the back of the receiver, part the AC wires. Cut one wire only. Leave the other intact.
16. Attach the cord switch. The intact wire will route through the switch. The cut ends will need to be trimmed slightly. Lay them in the switch. When you assemble the two haves of the cord switch, the cut ends will be pierced to make contact with the wire. Easy.
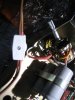
17. Reassemble the receiver in reverse order of dissambly. You may take the opportunity to clean up the tuning scale glass and remove any dust.
18. Test and enjoy.
Thanks.
Until...
About two months after I bought it... the power switch failed. Without cleaning.. probably just ageing plastic. The trouble is, my unit failed in the off position.
So, I decided to fix it. It's is an easy repair.
1. Unplug the receiver.
2. Remove the screws on the bottom of the receiver.
3. Slide the wood cover backwards and set it aside.
4. Remove all the knobs. They will all just pull off, no hex keys needed. They may be stiff, pull firmly
5. Remove the nuts on the pots. They are the only things that secure the face plate to the receiver. There should be three. One on both ends and one in the middle.
6. Remove the four screws on the left side, near the front, that secure the tuning / knob frame to the chassis. This will help to give you clearance to remove the volume / power pot.
7. Remove the nut holding the volume pot.
8. Push the volume pot through the hole in the frame, seperate the frame from the chassis slightly to create more room.
9. You need to short the white and brown wire and the rear of the pot.
10. Unsolder the white and brown wire from the rear pins of the pot.
11. Slip on some heat shrink tubing.
12. Solder the end of the brown and white wire together and apply the heat shrink.
13. Now, your receiver will be on, permanently. Test your work, by plugging the receiver back in.
14. Unplug the receiver and add an on/off cord switch to the power lead. I used Atron LA970 (White), but any similar will do.
15. About 45cm from the back of the receiver, part the AC wires. Cut one wire only. Leave the other intact.
16. Attach the cord switch. The intact wire will route through the switch. The cut ends will need to be trimmed slightly. Lay them in the switch. When you assemble the two haves of the cord switch, the cut ends will be pierced to make contact with the wire. Easy.
17. Reassemble the receiver in reverse order of dissambly. You may take the opportunity to clean up the tuning scale glass and remove any dust.
18. Test and enjoy.
Thanks.