• The move to the new server is done. There are some software and database maintenance updates in process. This has us passing the hat around to help out. We appreciate any donations. Seriously, even a dollar helps. The payment page may be found here - https://www.audiokarma.org/support.html

Snapped off power switch lever; Yeah, I can fix that!

w1jim

I can fix it but good...
Subscriber
Picked up a cool Kenwood Model Nine GX at our recent New England get together a few weeks back that I'm restoring.
The ugliest problem it had was that the lever on the power switch was snapped off flush with the front panel.
After looking around for a replacement I decided that it was fix it time/

Essentially I took a similar lever from a Pioneer switch I had and attached it. Here's how:

1 - Drill 2 small holes in the new lever - I used a #61 drill bit.
2 - Drill 2 matching holes in the old switch lever.
3 - Sand the 2 mating surfaces to remove the coating and clean with some alcohol.
4 - Spread a dab of the ever popular JB weld epoxy on one surface.
5 - Connect the 2 levers with some stainless steel safety wire, bend flush.
6 - Clamp together with some vise grips and allow to harden.
7 - Trim the wire and put a but of heat shrink tubing over it all.

I had to trim the switch mounting slot to allow for the thicker lever.

Another save - now on to the recapping and LED lighting, to be addressed in the Kenwood Forum.


Before


attachment.php


After


attachment.php


attachment.php
 

Attachments

  • SwitchB4a.jpg
    SwitchB4a.jpg
    64.2 KB · Views: 311
  • Switch2.jpg
    Switch2.jpg
    76.6 KB · Views: 308
  • Switch3.jpg
    Switch3.jpg
    82 KB · Views: 310
Register to hide this ad
Nice job! I have done this with Loctite 495. You don't need to reinforce the joint, just make sure it fits together flush before you glue it. Holds up verry well, I consider it to be a permanent repair. You can cut the original lever back and join them behind the front panel to avoid having to enlarge the slot.
 
Actually, the slot I enlarged is on the mounting bracket behind the faceplate - the lever itself passes through the front panel just fine and should be very hard to see.
 
Ooooo.....I have a KA-9100 that is in need of such attention. Thanks for the idears fellas.
Now I'll have to keep an eye out for the business end of that switch, the part you put 'yer fingers on. :D Was MIA when I picked the amp up.
 
**UPDATE**

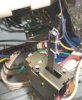
I thought I was being a smart-guy when I repaired the lever on the original toggle switch. Problem is that I found the contacts where fused in the "on" position. I tried to open it up and repair it but the guts fell apart on me.

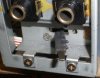
Onto plan B - I took a 3PDT mini toggle switch and a piece of 5/32" brass tubing to extend the lever. Normally I would use a switch with a nut mount but I had this clip in version here so I used that with a little JB Weld to keep it steady.
I put some JB Weld inside the tubing and then crimped it tight.

I was hunting around for a hobby shop to source the brass tubing but was surprised to find that my local hardware store stocked it!
Only $1.79 for a 12" piece.

I found that the original switch had 2 switches in one.
The main contacts and then the small slide switch on top. The small slide switch was "on" when the main power contacts were "off" - probably has something to do with the protection relay.

The original switches power contacts were rated at 5 amps / 125VAC as are the contacts on the replacement switch. I took the liberty of paralleling the contacts on the replacement to double the capacity.
The original .01uf / 250v cap that paralleled the contacts had limited lead length and was bulky so I replaced it with a smaller version I had.

The original toggle switch knob was missing so I used a similar one I had in the parts drawers.
A little heatshrink tubing and a touch of silicon sealant to keep the knob in place finished it up.

Here's the link to the complete restoration of my Kenwood Model Nine GX:
http://www.audiokarma.org/forums/showthread.php?t=432727


attachment.php


attachment.php
 
Again, nice save! Sometimes the extra switch on the power switch is a kill switch for the protection relay so it goes off immediately when the power goes off. Sometimes it's a mute switch.
 
It controls a relay on the PS PCB - I could hear it click.
These Kenwoods have a timer that will shut them off automatically. I could have used that instead of the power switch but they make an annoying little ticky sound - plus they're notorious for breaking.
Seems like everyone had to come out with some special little thing (aka feature) to make their equipment unique and thusly more salable.
Just as often these features were short lived.
 
The original .01uf / 250v cap that paralleled the contacts had limited lead length and was bulky so I replaced it with a smaller version I had.

That little cap may not long survive in this application. It won't necessarily burn or short out, but it will become less and less effective as an arc suppressor over time.
 
Even though it has the same rating - .01uf @ 250v?
If not I'll lengthen the leads on the original ceramic disc and put that back in there.
 
Arc suppressor caps are exposed to rough service conditions, including frequent glitches that zap away the exquisitely thin metal layer inside. Metalized film is 'self-healing' in the sense that shorts are *usually* cleared by vaporizing the metal, but caps that aren't sufficiently robust for AC power line applications are likely to fail early.
 
Back
Top Bottom