• The move to the new server is done. There are some software and database maintenance updates in process. This has us passing the hat around to help out. We appreciate any donations. Seriously, even a dollar helps. The payment page may be found here - https://www.audiokarma.org/support.html

Soldering\Reflow techniques

oldvinyldude

Moderator
Staff member
Moderator
Subscriber
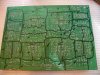
I have begun taking on personal soldering projects. I was able to get a couple of pieces of gear working by reflowing solder joints.

Currently, I have reflowed all connections on a DBX 3BX, in an attempt to restore one channel. Unfortunately, I still have one channel. I figure I got all joints reflowed (80% reflowed once, 18% reflowed twice, and perhaps I missed 2%)

How do folks keep track of what has been done vs ones to be done? I tried to work from side to side-along straight lines, but as I wrote above, I am sure I reflowed many connections twice, and likely missed a few. There must have been 200 or so connections.

Additionally, on perhaps 30%, I heated until most of the solder was melted on the pad, but not the entire pad. I always try to minimize heating time of the connection. Is it ok to leave perhaps 1/3 of the junction unmelted, on these connections?
 
Register to hide this ad
Reflowing hundreds of connections by hand is a some impossible thing to do well enough to be certain that you're helping the problem and not making it worse or causing new problems.

Basic troubleshooting is still required to solve circuit problems - I don't see that many boards that need a massive amount of reflowing to solve problems

The correct method would be to reflow an entire board is in a reflow oven - Chris
 
If you have the service manual and it has the pcb layouts then print out copies of them and use a highlighter marker to mark the positions that you have reworked. Use a different color marker to point out connections that you found with ring cracks etc.

Also print out the schematic and use the same method to pinpoint bad connections, bad parts, good parts etc with different colors.

But that is best done only after finding the original problem. Use a magnifying glass and look for ring cracks. Re-solder them and mark their positions on the prints.

Cheers,
James
 
I always try to minimize heating time of the connection. Is it ok to leave perhaps 1/3 of the junction unmelted, on these connections?

If your iron is at an appropriate temperature, it needn't take long to completely melt most solder connections without damaging the component or the board. A magnifying lamp can help you see clearly when you've reached that full melt.

Personally when I see a suspect joint, I like to take a few more seconds and rework it fully (for me that usually means desoldering the bulk of the joint with a plunger-type sucker, then applying fresh solder). Once I can see that shiny cone made of trusty 60/40 and can satisfy myself from the shape that it's connecting the component leg to the whole pad, I'm ready to move on confidently to whatever's next and not worry.
 
To fix an obviously bad joint, I find that removing the old solder and applying new solder is best to make sure a joint will remain solid after being resoldered.

Much of the time I'll add a small amount of new solder to a joint when reflowing or before removing the old solder, as it helps it flow much more easily than just heating the old solder. Usually I can tell which joints have been retouched because they will appear shinier and fresher with the new solder mixed in.
 
Lots of good advice from previous posts. I'm not big on going over an entire board, but Elnaldo's grid approach would seem to be the way to go about it. I am more inclined to make an educated guess as to the area that might have a problem, and then use high magnification to inspect for flaky looking joints before heating anything up. I use the cell phone camera a lot for this; take close up photos of various areas of the board, and then zoom in to reveal the condition of the soldering.

On the subject of re-flowing joints, especially old work, sometimes the age and oxidation can make things worse; if you encounter a joint that disintegrates when you touch the iron on it, be prepared to clean out the old solder and start over with fresh, rather than heating it over and over and maybe causing more problems.
 
Back
Top Bottom