• The move to the new server is done. There are some software and database maintenance updates in process. This has us passing the hat around to help out. We appreciate any donations. Seriously, even a dollar helps. The payment page may be found here - https://www.audiokarma.org/support.html

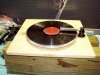
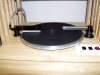
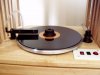
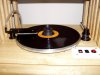
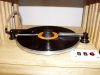
Started my DIY RCM!!!

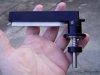
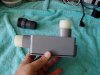
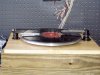
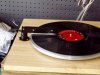
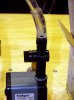
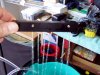
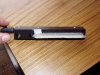
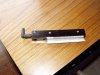
Got the solution dispensing head from VPI today.... $60.00 + shipping of $7.95...
Now all I have to do is decide on where it goes, how I am going to hook it up, and make sure I do it right the first time... Think about it 30 or 40 times... Measure 15 or 20 times and then do it one time:)

You can not see from my pics but there is a vertical pin of about 1/4 inch or so that is on the underside of the head that goes into a hole that is in the bearing / connection. You raise the head up and rotate and the pin holds the head up off the LP and you rotate it out of the way. When you rotate the head into position the spring pulls the head down on to the LP and holds it in place with the pin locked in. That gives you the positive downward force that works the brush bristles into the LP grooves... NEAT...
 

Attachments

  • P02.jpg
    P02.jpg
    118.3 KB · Views: 333
  • P03.jpg
    P03.jpg
    118.2 KB · Views: 230
  • P05.jpg
    P05.jpg
    90.9 KB · Views: 181
  • P06.jpg
    P06.jpg
    113.5 KB · Views: 206
  • P07.jpg
    P07.jpg
    113.5 KB · Views: 236
Last edited:
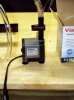
Just ordered a small submersible pump for the cleaning fluid dispensing. Looks like it should work?????

VA302: $7.49
Maximum head: 27.6"
Dimensions: 2" L x 1 1/2" W x 2" H
Wattage: 6
UPC: 006903713825
GPH:130
Variable flow control: yes
Cord length: 6’
http://americanaquariumproducts.com/ViaAqua305.html

My head should be around one foot and the "head VS flow" chart shows 60 GPH at one foot head. All I will need is for a small flow out of the holes... Hope the small holes do not act as high head and stop flow all together...
 
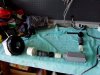
Did a bit more today... 4 or 5 trips to the Lowe's and another hardware store for STUFF to do some plastic cutting and hole drilling and hole filling and... By the time I am done I most likely could have bought one new for $$$$ I am spending:)

1. Pieced out the vac section and decided how it was going to get hooked up.
2. Installed the vac pick-up head.
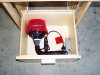
3. Installed the vacuum in the drawer. Took the top handle off and screwed it in place from the back of the drawer into the handle screw holes.
3. Was going to install the fluid dispensing head and cut the hole too big:( Had to plug it and drill it out with a smaller hole saw:(
 

Attachments

  • P105.jpg
    P105.jpg
    109.8 KB · Views: 352
  • P104.jpg
    P104.jpg
    98 KB · Views: 316
  • P103.jpg
    P103.jpg
    123.9 KB · Views: 365
  • P102.jpg
    P102.jpg
    119.4 KB · Views: 250
  • P101.jpg
    P101.jpg
    117.5 KB · Views: 283
Last edited:
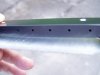
Mounted the fluid dispensing / cleaning head. Will have to adjust after I get it all together. Have to wait till the pump comes so I can see how it all works and make sure I get adequate flow of solution from the head. Also need to get 2 rocker switches and a push button switch to wire it all up. Have a bud at work that I will call on for help:)
 

Attachments

  • P102A.jpg
    P102A.jpg
    77.9 KB · Views: 206
  • P102B.jpg
    P102B.jpg
    103 KB · Views: 220
  • P102C.jpg
    P102C.jpg
    90.1 KB · Views: 171
Got the submersible pump in the mail today. Went to Lowe's and got 3 runs of tubing so that I made sure I had the right size(s). Cost all of $1.85... Hooked it up and put it a container of water and it worked great. Hooked it up to the head and had a bit more flow than I think I will need. Made a reducer from about a 1 1/2 inch section of the 1/2 OD line to the size that fits on the dispensing head and glued in place. Also glued in place the plastic flow control that came with it. I should be able to adjust flow for what I need after I decide what I am going to use to hold the washing fluid.

All I need now are 3 rocker switches and to wire it all up:) Will need some Buds at work to help me pick out the correct rocker switches and to wire it up…

Getting close… :banana: :banana: :banana:
 

Attachments

  • P10004a.jpg
    P10004a.jpg
    136.3 KB · Views: 183
  • P10003a.jpg
    P10003a.jpg
    103.6 KB · Views: 196
  • P10002a.jpg
    P10002a.jpg
    158.5 KB · Views: 221
OMI, Your talented fellow let me know when its working and I'll bring all my records and test it for ya. :D Its looking first class and well thought out.
 
Took a few hrs off from work on friday and went to the BIG city - Dothan - and got 2 rocker switches and a push on switch. Played with the pump and head. Pic showes the flow rate... Still may be a bit much... The little flow control thingy that came with the pump is so-so.. Will see... was going to do some wiring this weekend but decided to add a sprinkle to my system... The coverage was not great and I needed to install a sprinkle in the middle of the yard...
Hmmmmm SIMPLE....
Just dig up the line and add the sprinkler..
Off to Lowes for the STUFF..
Hot as hell on Sat... Dig up the line and cut the line so I can add in the fitting..
Broke the line at a "T"... Oh Sh&%...
Now have to dig up 7 or 8 more feet of line.......
More trips to Lowe's.... And more.... And more.... And more..
All afternoon on Sat until 7...
Started today at 11 and got it finished at 5....
AND did not give myself a case of heat stroke:)
Sooo not much on the RCM this weekend:(
 

Attachments

  • flow.jpg
    flow.jpg
    116.7 KB · Views: 304
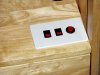
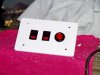
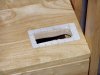
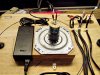
Well I have the rocker and push button switches mounted and am ready to do some wiring... Here are a few pics.

1. The rocker and push button switch.
2. The table with the holes cut in so that I can mount the switches.
3. Used white plastic a junchion box blank that was the exact size I needed. I only had to make 2 trips to the hardware store on this part:)
4. Switches mounted in the blank.
5. Switches on table.
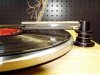
6. Pic showing relationship of switches, platter stuff.
 

Attachments

  • mounted switches in table.jpg
    mounted switches in table.jpg
    98.1 KB · Views: 143
  • switches mounted.jpg
    switches mounted.jpg
    88.8 KB · Views: 154
  • hole for switches.jpg
    hole for switches.jpg
    95.2 KB · Views: 132
  • blank plate.jpg
    blank plate.jpg
    96 KB · Views: 139
  • rocker switches.jpg
    rocker switches.jpg
    105.9 KB · Views: 143
  • table shot.jpg
    table shot.jpg
    93.1 KB · Views: 244
Last edited:
Hot as H#@% today....Got some thunder storms late and it got a bit better. Did a bit more this afternoon.

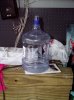
1. Got a 1/2 GAL drink bottle from Wally World to use as the fluid reservoir. Right size and will fit.
2. Cut the top off and the pump fits nicely.
3. Cut a hole in the back of the drawer for the 3 power cords to plug into a power strip that I will have mounted on the back of the drawer (8 ft cord)

Cut down the power cords and attached spades on the ends to attach to the rocker switches. Still have to drill one hole for the plastic hose form the pump to the brush head. If it is not hot as #$%^ his week I will try to get out after work and do the final wiring and hook-up...

getting close :banana: :banana: :banana:
 

Attachments

  • drawer with power strip.jpg
    drawer with power strip.jpg
    145.5 KB · Views: 206
  • bottle top off.jpg
    bottle top off.jpg
    193.4 KB · Views: 252
  • fluid bottle.jpg
    fluid bottle.jpg
    173.3 KB · Views: 200
OMI for some one that says they are diy challenged you sure are doing gooood work.I on the other hand am diyc.
Mushy
 
You have NO idea of how many trips I have made to Lowe's and Rat Shack... How many EXTRA items I have... How many times I had to re-do some thing... And I still have one hole to drill...

Worked on the wiring last night and cut one power cord too short and had to find an orphan cord today to cut to the right length.

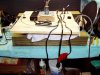
1. I cut the power cords to a short length that would run from the rockers to the back of the drawer and out the hole to the power strip. I think they are long enough.
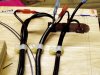
2. Was going to use the wire clamps w/screw to hold the cord up. Did not have any short screws so decided to epoxy them to the underside of the table.
3. Tonight decided to see if the motor ran and while looking at what to do with the power pack decided to epoxy it to the bottom also with 2 cable clamps to hold the cords with. Will use 2 ties after the epoxy dries to wrap up the cords and hold in place.

Not much room in the drawer. I will most likely have to use the back 2 connection screws of the table as a "hinge" and tilt the table up to get at the drawer and do things like add more fluid, etc.

One more MAJOR GLITCH that I have not yet checked out is if I will have enough room to position the fluid dispersion head properly AFTER I hook up the plastic hose. There are the vertical wooden slats on both sides of the drawer... The head rotates perpendicular to the slats and it will be tight... Hind sight would have been to mount it in the corner (like the top of the line VPI).

Also ordered the smaller pump last night… Still not sure if I will get toooo much fluid out of this one. The pump I ordered last night is only good for a 12 inch head.

Like I said DIY challenged….
 

Attachments

  • bottom.jpg
    bottom.jpg
    124.4 KB · Views: 299
  • bottom close.jpg
    bottom close.jpg
    134.6 KB · Views: 404
  • bottom close up.jpg
    bottom close up.jpg
    114.2 KB · Views: 207
IGOR WE HAVE RCM!!!!!!

Finished it and moved it into the house for testing :banana: :banana: :banana:

Works surprisingly good!!!!

Still a few issues to fix...

Will have to remove 2 vertical slats on the fluid dispersion side. Not enough room for the tube to move freely between dispersion setting and clear setting.

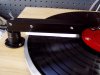
Having the fluid dispersion head and brush and vacuum head 180 degrees apart seems to work great. Turn on the motor and vac and start the pump and brush works the fluid into the LP and then the fluid hits the vac and it is gone. The dirty fluid never gets all the way around...

I have a KABUSA rubber record clamp that works so-so... Looks like a better one may be needed to hold the LP to the platter and keep it turning. Did not want to spend and arm and leg for one… If I do not have the rubber clamp down tight the LP will not rotate.

I think this configuration would work well with an end table or some other larger corner table with a storage compartment. The drawer is not enough room, but the small aquarium pump works great as does the small one gal. shop vac... I may keep my eye open for a suitable table at our local TSs and may try that out.

This was easy to wire up and power up...

Have cleaned about a dozen LPs tonight. Once I remove the slats should make it easer as I will not have to dink around with the tube...

More tweaking as I play with it and have time to evaluate the pluses and minuses...

 

Attachments

  • done 2.jpg
    done 2.jpg
    112.8 KB · Views: 311
  • done 1.jpg
    done 1.jpg
    167.7 KB · Views: 274
Great work!!! Suggestion: before you go and remove the slats on the frame, can you buy a 90 degree elbow to place onto the tube dispenser? You can get them at any hardware store or aquarium center. Question: since you turn the vac on at the same time you wash and vac up all fluid before the platter makes a complete revolution, do you yet see if this is a problem with not letting the fluid "seap into" the grooves for at least a couple of revolutions to wet and loosen any grime embedded deep in the grooves before being loosened enough to be vacuumed? Or does the quick "wash and vac" work just as well?

Great job and great implementation there!! Looking at the stack of LP's you got sitting on the table I'd say you're in for a long cleaning of a 4th of July weekend!! :thmbsp:

Jimmy
 
Good idea on the 90. Will see what I can find.

I was trying it out last night and the lighting was a bit weak to clearly see the interaction of all the parts. I used a "push-on" button to power up the pump. Was hard telling how much fluid was getting on to the LP. The dispersion head has a brush built in. The fluid comes out in front of the brush, so the turning of the LP works the fluid into the brush. Will post some pics to show later. The platter is rotating about 10 or 15 RPMs, so by "pulsing" the fluid on to the LP you are getting a number of complete RPMs of fluid / brush action. Seemed to doing O.K. I will get a better feel as I play with it.

Did notice that there may not have been a need for a reservoir for the spent, picked-up fluid. Seems that the VAC is so powerful that it just sucks the fluid all the way through the system and exhaust it as wet discharge air. I checked how much fluid I used and was surprised at how little was gone from my tank, but did note the exhaust spry had damped the area in the drawer. Was thinking about a small towel or something over the VAC head to catch it.
 
Thanks for the idea Jimmy!!!!!!

Hit Autozone and found a 90 degree vacuum fitting that was just what the Doc ordered:) Did not have butcher the table after all:)

Been cleaning about 25 more LPs and am getting the feel. You have to know when to stop the flow of fluid to keep from over flooding the LP. I have to trim the brush back a bit on the end over the LP. It hangs over the edge of the LP and acts as a "wick" when I apply fluid and it "wicks" it onto the platter, mat and on to the table top... Not a lot, but enough to have keep wiping it up. Will trim off about 1/8 inch later and see how it works then.

One of the holes was over the end of the LP so I covered it with a piece of duck tape.

Looks like I will just have to break down and get a screw type record clamp. The rubber one works so-so, but to get a good tight connection between the LP and spindle and motor it will need to be a screw type clamp.

Tried putting on fluid and let the platter spin for 3 or 4 revs and let the brush work the fluid in. Then move the brush off to the side and let the fluid sit for another 2 or 3 revs and then hit it with the vac.

The VAC removes ALL the fluid in one rev....

The blurry pic shows the LP flooded with solution before vacuuming.
 

Attachments

  • 5.jpg
    5.jpg
    122.9 KB · Views: 188
  • 6.jpg
    6.jpg
    117.3 KB · Views: 157
  • 8.jpg
    8.jpg
    72.5 KB · Views: 208
  • 9.jpg
    9.jpg
    79.7 KB · Views: 192
  • 10.jpg
    10.jpg
    73.9 KB · Views: 294
  • 11.jpg
    11.jpg
    83.8 KB · Views: 182
  • 12.jpg
    12.jpg
    83.2 KB · Views: 264
  • 13.jpg
    13.jpg
    90.5 KB · Views: 204
TY Jimmy...

I just work with ideas and projects that others have done (like your RCM) and try to fit the ideas into my limited DIY ability... And to pass on to others some additional ideas to work with :)

I liked Andaman’s ice cream motor design, but I had the gear head motor already. I even passed on a $5.00 electric ice cream maker today at a yard sale... May regret that one...


.........

Just pulled the trigger and ordered a J.A. MICHELL RECORD CLAMP for $50.00 (clamp and shipping)... That should do the trick in keeping the LP tight and rotating and I can use it on my turntable also...

........

Trimmed the brush and it does not wick all over the place now...
Cleaned 55 LPs tonight :banana:

Only used about a quart of fluid yesterday and today....

I think the better clamp will help out a whole lot and keep the LP and platter rotating the same.

Now I can get caught up on my LP cleaning... I see 3 days of LP cleaning in front of me:)
 
Last edited:
OMI

Great Job

Thanks for sharing! I really believe I will be twice as DIY challanged as You said you were, and I will have all your detailed experience to fall back on. Thanks

I have one question, Do you feel the small motor that you installed is strong enough and will it last under the stains of scrubbing and vacumn loads?

Thanks again


Roger
 
Back
Top Bottom