• The move to the new server is done. There are some software and database maintenance updates in process. This has us passing the hat around to help out. We appreciate any donations. Seriously, even a dollar helps. The payment page may be found here - https://www.audiokarma.org/support.html

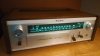
STR 6060FW back from the Garage (or worse)

Nucities

Active Member
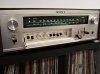
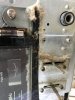
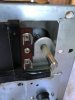
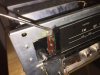
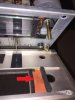
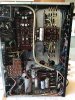
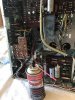
OK, so I got the receiver today off the auction site. I thought the last Sansui I got was dirty but this is a whole new level of gross. The wires and power cord are sticky like fly paper and it looks like some rodents may have made these boards a home for quite a while. It is a mess ....I immediately thought of the "clean the receiver with a garden hose?" thread. The good news is I have the wood case for this and I planned on a top to bottom cleaning anyway....and the kicker is it sounds sweet and I hear no issues, not even a crackle in the switches. So I want to clean this thing and thought Id ask you all for help.

Deoxit is a given.

How can I clean the inside?

Any suggestions on how to get the sticky crap off of it?

I know the lettering on the face plate of these are really easily lost with cleaning... any advice besides "be careful"

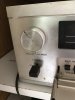
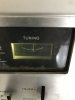
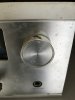
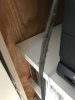
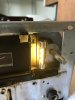
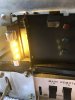
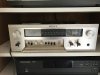
Here are some before picks....
 

Attachments

  • IMG_3682.JPG
    IMG_3682.JPG
    61.4 KB · Views: 105
  • IMG_3683.JPG
    IMG_3683.JPG
    32 KB · Views: 92
  • IMG_3684.JPG
    IMG_3684.JPG
    27.8 KB · Views: 92
  • IMG_3686.JPG
    IMG_3686.JPG
    30.2 KB · Views: 89
  • IMG_3687.JPG
    IMG_3687.JPG
    43 KB · Views: 96
  • IMG_3688.JPG
    IMG_3688.JPG
    30.6 KB · Views: 88
Register to hide this ad
I've received some similarly sticky, filthy Sony units. Here is how I dealt with my 6060

- Pull off the three switch covers, volume knob, balance control, and tuning knob. Note that the three position switch cover has a double bevel (vs one on the others).
- From the hidden control bay, pull off the treble, bass, and AM/FM selector knobs.
- Unscrew the tiny screw holding the cover panel open/close arm. The door will come off with the faceplate.
- Unscrew the screws holding the faceplate (I think 3 on top, 3 on bottom).
- Gently pull loose faceplate.
- Unscrew metal bracket on each end of glass dial. Gently pry loose glass (might need to run an exacto knife between glass and rubber seal to get it going).
- Soak knobs and switch covers in a container of diluted Simple Green. Clean with an old toothbrush.
- For the face plate, I apply Simple Green and scrub around the lettering. I gently pat the lettering with a sponge (no scrubbing).
- For the dial glass, I again scrub the outside surface (without lettering) with a Simple Green solution. On the lettering side, I scrub around the letters with a Q-tip and gently pat the lettering itself.
- Sometimes, the edges of the glass need repainting with green paint. There are fuse type lamps on either end of the glass dial that should be replaced.

For the power cord, I found repeated scrubbing with Simple Green cuts the sticky stuff pretty well. You can tell I'm a fan of Simple Green.

In general, I've found the lettering to be relatively robust but the less you touch them, the safer. The missing Volume lettering on my unit had been rubbed off when I received it (not from my cleaning efforts).

For the interior, I use a small paint brush and a vacuum to get the loose dust off. I use Windex or rubbing alcohol on a Q tip to clean around components. I put a drop of light oil on the axis of each of the tuning pulleys. Obviously, no oil on the string itself or on the pulley surfaces.

Enjoy your STR6060FW!

IMG_0993.JPG
 
Thanks ..you've been a great help. I got started on the face plate this evening. I carefully used a magic eraser and I'm pretty happy with the results. I'll keep at it tomorrow, so far so good. The Simple Green soak is a good idea.

Listened to it for a few hours tonight and it sounds phenomenal and I'd say my expectations were pretty high. I'll need new lamps for the dial, they are burnt out. Any idea where I can pick those up?
 
Thanks ..you've been a great help. I got started on the face plate this evening. I carefully used a magic eraser and I'm pretty happy with the results. I'll keep at it tomorrow, so far so good. The Simple Green soak is a good idea.

Listened to it for a few hours tonight and it sounds phenomenal and I'd say my expectations were pretty high. I'll need new lamps for the dial, they are burnt out. Any idea where I can pick those up?

The go-to guy here on AK is Dave (dgwojo): www.dgwojo.com

He'll make sure you get the right lamps and responds and ships very promptly. Check to see if you need the tuning meter lamp or the AM, FM and stereo lamps as well.
 
Careful with the glass, the stencils for all that info on the glass can wash off on the 7055, may be the same on this one.
 
S
I've received some similarly sticky, filthy Sony units. Here is how I dealt with my 6060

- Pull off the three switch covers, volume knob, balance control, and tuning knob. Note that the three position switch cover has a double bevel (vs one on the others).
- From the hidden control bay, pull off the treble, bass, and AM/FM selector knobs.
- Unscrew the tiny screw holding the cover panel open/close arm. The door will come off with the faceplate.
- Unscrew the screws holding the faceplate (I think 3 on top, 3 on bottom).
- Gently pull loose faceplate.
- Unscrew metal bracket on each end of glass dial. Gently pry loose glass (might need to run an exacto knife between glass and rubber seal to get it going).
- Soak knobs and switch covers in a container of diluted Simple Green. Clean with an old toothbrush.
- For the face plate, I apply Simple Green and scrub around the lettering. I gently pat the lettering with a sponge (no scrubbing).
- For the dial glass, I again scrub the outside surface (without lettering) with a Simple Green solution. On the lettering side, I scrub around the letters with a Q-tip and gently pat the lettering itself.
- Sometimes, the edges of the glass need repainting with green paint. There are fuse type lamps on either end of the glass dial that should be replaced.

For the power cord, I found repeated scrubbing with Simple Green cuts the sticky stuff pretty well. You can tell I'm a fan of Simple Green.

In general, I've found the lettering to be relatively robust but the less you touch them, the safer. The missing Volume lettering on my unit had been rubbed off when I received it (not from my cleaning efforts).

For the interior, I use a small paint brush and a vacuum to get the loose dust off. I use Windex or rubbing alcohol on a Q tip to clean around components. I put a drop of light oil on the axis of each of the tuning pulleys. Obviously, no oil on the string itself or on the pulley surfaces.

Enjoy your STR6060FW!

View attachment 885165

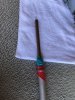
So I suspect I may be missing a few parts. I know my 7065 has a little foil shades that help direct the light to the correct place...does the 6060 have that as well? There were no screws that held the dial glass in place, just some little tin clips. I'm not sure what could be repainted green? The very edge of the glass? It appears that the glass has a green tint to it that is only seen if you are looking at the edge, it is otherwise clear. Also it looks like these bulbs could be replaced at an auto parts store...I think I'm going to give that a shot. I made a little vacuum rig out of some scrap copper pipe and duct tape...pretty hack but it worked. I sucked about two cups of rodents nest out of the inside. Between that and windex, magic eraser and some elbow grease its starting look much better. Haven't had any problems with the lettering.

Progress pictures below
 

Attachments

  • IMG_3718.JPG
    IMG_3718.JPG
    52.8 KB · Views: 37
  • IMG_3719.JPG
    IMG_3719.JPG
    53.1 KB · Views: 37
  • IMG_3725.JPG
    IMG_3725.JPG
    71 KB · Views: 38
  • IMG_3726.JPG
    IMG_3726.JPG
    67.8 KB · Views: 38
  • IMG_3729.JPG
    IMG_3729.JPG
    37.8 KB · Views: 38
  • IMG_3730.JPG
    IMG_3730.JPG
    108 KB · Views: 36
S


So I suspect I may be missing a few parts. I know my 7065 has a little foil shades that help direct the light to the correct place...does the 6060 have that as well? There were no screws that held the dial glass in place, just some little tin clips. I'm not sure what could be repainted green? The very edge of the glass? It appears that the glass has a green tint to it that is only seen if you are looking at the edge, it is otherwise clear. Also it looks like these bulbs could be replaced at an auto parts store...I think I'm going to give that a shot. I made a little vacuum rig out of some scrap copper pipe and duct tape...pretty hack but it worked. I sucked about two cups of rodents nest out of the inside. Between that and windex, magic eraser and some elbow grease its starting look much better. Haven't had any problems with the lettering.

Progress pictures below

never mind about the glass edge question...i now see your picture in the linked post....should've caught that
 
S


So I suspect I may be missing a few parts. I know my 7065 has a little foil shades that help direct the light to the correct place...does the 6060 have that as well? There were no screws that held the dial glass in place, just some little tin clips. I'm not sure what could be repainted green? The very edge of the glass? It appears that the glass has a green tint to it that is only seen if you are looking at the edge, it is otherwise clear. Also it looks like these bulbs could be replaced at an auto parts store...I think I'm going to give that a shot. I made a little vacuum rig out of some scrap copper pipe and duct tape...pretty hack but it worked. I sucked about two cups of rodents nest out of the inside. Between that and windex, magic eraser and some elbow grease its starting look much better. Haven't had any problems with the lettering.

Progress pictures below

Nice work.

I apologize about the dial glass removal instructions. I was thinking of the later STR60x5 and STR70x5 series that have a screwed on clamp holding the glass in place. As you discovered, the STR6060 has those little clips that have to be slid off to free the glass.

I think the light shields are built into the back of the face plate. Hopefully, your unit still has them in place. Probably don't want to submerge the face plate in liquid.

You can get lamps at the auto parts store but I believe they are fatter than the originals. Hopefully they will fit.

IMG_1331.JPG IMG_1332.JPG
 
The last thing I would want to do is steer potential business away from dgwojo, who has helped me out many times, but I'm a convert to green LEDs for my Sonys.
 

Attachments

  • IMG_20170125_084808500.jpg
    IMG_20170125_084808500.jpg
    56.6 KB · Views: 34
The last thing I would want to do is steer potential business away from dgwojo, who has helped me out many times, but I'm a convert to green LEDs for my Sonys.

I wasn't able to get anything at auto supply and emailed dgwojo instead.

He has them...they look great. His price is so fair I think I'll order a pair of warm white and a pair of green LED.
 
Nice work.

I apologize about the dial glass removal instructions. I was thinking of the later STR60x5 and STR70x5 series that have a screwed on clamp holding the glass in place. As you discovered, the STR6060 has those little clips that have to be slid off to free the glass.

I think the light shields are built into the back of the face plate. Hopefully, your unit still has them in place. Probably don't want to submerge the face plate in liquid.

You can get lamps at the auto parts store but I believe they are fatter than the originals. Hopefully they will fit.

View attachment 886039 View attachment 886042

Great yes, the faceplate has the rubbery weatherseal looking stuff as you have shown above. I'll have plenty of time to clean the rest of the unit while I wait for bulbs and paint.
 
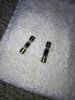
Just a quick update....received the bulbs today from dgwojo. I ended up getting a pair of the green LED bulbs as well as the warm white LED bulbs. After looking at a few examples I liked the more original look that the warm white bulbs provide. That is largely dependent on how well the glass staining goes. I had to special order the green glass stain from DecoArt. My local Michaels apparently stopped carrying it. I notice that the instructions say to let it dry for 4 days and then put the glass in the oven for 20 minutes at 270?....not sure I'm willing to putt the dial glass in the oven. Im thinking a hair drier or heat gun might be a better option but I'd appreciate hearing from one of you who have used this stuff and let me know if you did this last step.

In the meantime I've cleaned the thing top to bottom...vacuum, dust, deoxit, lube everything. Even got the sticky stuff off the power cord with some comet. Once the stain dries its ready to put back together. I refinished the old walnut case that I pulled off an old STR 6050 and that is ready to go as well. Patience ;)
 

Attachments

  • IMG_3734.JPG
    IMG_3734.JPG
    88.8 KB · Views: 38
  • IMG_3738.JPG
    IMG_3738.JPG
    77 KB · Views: 36
  • IMG_3740.JPG
    IMG_3740.JPG
    38.8 KB · Views: 34
  • IMG_3741.JPG
    IMG_3741.JPG
    40.8 KB · Views: 35
  • IMG_3742.JPG
    IMG_3742.JPG
    38.2 KB · Views: 35
  • IMG_3743.JPG
    IMG_3743.JPG
    37 KB · Views: 35
... I notice that the instructions say to let it dry for 4 days and then put the glass in the oven for 20 minutes at 270?....not sure I'm willing to putt the dial glass in the oven. Im thinking a hair drier or heat gun might be a better option but I'd appreciate hearing from one of you who have used this stuff and let me know if you did this last step.

I never had the patience to wait the 4 days they specify. I let it dry a few hours (overnight?) and then put it into service and never had a problem. I figured that the heat of the lamps would provide the heat source to finish the drying process. However, your LED's won't provide any heat so I'd probably let it dry a good 24 hours. I'm guessing that the 4 days is to make sure it holds up to physical handling which of course the dial glass edge won't ever see. Just my experience.....

It's looking a lot better! Are you planning on any electrical restoration work?
 
I never had the patience to wait the 4 days they specify. I let it dry a few hours (overnight?) and then put it into service and never had a problem. I figured that the heat of the lamps would provide the heat source to finish the drying process. However, your LED's won't provide any heat so I'd probably let it dry a good 24 hours. I'm guessing that the 4 days is to make sure it holds up to physical handling which of course the dial glass edge won't ever see. Just my experience.....

It's looking a lot better! Are you planning on any electrical restoration work?

Thanks....I used it for a couple days before doing anything and I loved the sound as is. When I got it I was planning to ship it off for a full recapp but it sounded so I good I think I'll just use it for a while. The deoxit bath it just got likely may have cleared it up so I figure it can only get better.

In the long run I'm fairly confident I'll keep this one so I'm open to a full restoration. We will see.
 
I've had the 6060 set up in my main system since Friday and I am very happy with it. Cosmetically I'm actually surprised how much I was able to do. Big thank to jwhvt for all the advice, you were a tremendous help. Also thanks to dqwojo for the bulbs. I assure you you will be hearing from me again. This site really is an incredible resource.

I'm going to listen to it for a while and then figure out how far I want to go with a restoration. I may just have it bench tested and have it brought up to spec or maybe I,ll do the full recap....we will see.
 

Attachments

  • IMG_3752.JPG
    IMG_3752.JPG
    63.4 KB · Views: 23
  • IMG_3753.JPG
    IMG_3753.JPG
    47.1 KB · Views: 20
  • IMG_3754.JPG
    IMG_3754.JPG
    64.1 KB · Views: 22
My dad picked up a 6060 at a garage sale a few years ago not knowing what gem he had just snagged. I didn't either at the time. I like a dumb ass decided to change out the brown toggle switches with some silver pieces of crap. Now I can't find the originals. I hope I can find them soon. It is really a piece of art. I have read that it was Sony's attempt to try and match or exceed McIntosh. I think they did a fine job.

I need to dig into it and do some work on it. Change out the old bulbs, etc. This has given me the nudge to do it.

Any idea where I can get some original toggle switches?
 
Last edited:
Any idea where I can get some original toggle switches?

Ive seen them sell on eBay. Ironically, I need one as well, the large three toggle has a small crack in it ...almost unnoticeable but I'm guessing with use I may have trouble.
 
Back
Top Bottom