• The move to the new server is done. There are some software and database maintenance updates in process. This has us passing the hat around to help out. We appreciate any donations. Seriously, even a dollar helps. The payment page may be found here - https://www.audiokarma.org/support.html

SX-3500 repair and restoration

I haven't gotten deep into the measurements but did verify the +/- 32 vdc are in spec and the bias for the output transistors passes muster on both channels. I also verified that the the output meter is properly adjusted.

Now I'm waiting for my switches to arrive before proceeding.
 
Looking forward to seeing your switch engineering!

How does it sound with headphones, since the speaker switches don't engage, I wonder?
 
Did a bit of headphone listening and must say it sounds pretty good! No volume imbalance, clear and strong in both channels. Tone controls work; balance fader is good.

I don’t notice an imbalance in the meter either. So either cleaning and lubing them pots took care of it or it’s down stream of the headphone jack if it’s there. Could be in the speaker switches, too.

Will know more once the new switches are in and installed.
 
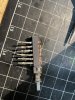
New switches are here; you can see that the pins are shorter than the previous ones:

D96AE6B2-AD4B-42CD-B0BD-6CE69A6A1712.jpeg

So, I cut the pins from the broken switch and am soldering them to the pins of the new switch (tedious, but will hopefully work):

CCCC29B7-F5A0-4ABF-A213-E0BD5F4A3012.jpeg

I’ll finish the first one later today and put in in the unit to verify this approach works before continuing to the others.
 
Got the first switch done (speaker A) and confirmed that it works. So now I can move on to speaker B. The trick is going to be making sure that they align in the correct position to accept the buttons/face plate.
 
I save a lot of the longer leads I snip off caps, etc. for situations like this. I solder the small leads onto the legs of the switch, then I cut a small piece of balsa wood or plastic to place under the switch between the rows of legs to get it to the correct height. If the small leads are long enough I'll make a small loop at the end to crimp on the switch legs to aid in holding it in place while soldering the switch in place. I try to solder the leads in place quickly so I don't reflow my previous work higher up on the legs.
 
Got them both in and working, but of course they weren’t in the right spot to match the faceplate. So I had to take them out and redo them. Got them back in and the B switch works but the A switch only plays the right channel. But if you hold it about 1/3 of the way in only the left plays. :idea:

So, more work to do tomorrow.
 
I save a lot of the longer leads I snip off caps, etc. for situations like this. I solder the small leads onto the legs of the switch, then I cut a small piece of balsa wood or plastic to place under the switch between the rows of legs to get it to the correct height. If the small leads are long enough I'll make a small loop at the end to crimp on the switch legs to aid in holding it in place while soldering the switch in place. I try to solder the leads in place quickly so I don't reflow my previous work higher up on the legs.

Good ideas!
 
The switch will need to be stabilized in place so it can't be pushed backwards when operating the push button. The small leads will give under pressure unlike the originals.

thats part of the reason I liked the idea of using the pins from the old switches. Nice and stable.
 
Since they weren’t aligned with the faceplate and I had to pull them anyway, I changed designs and switched to solid copper wire for pin extensions. I looped the wire around the pins on the switches and soldered them on. Nice and sturdy but easier to adjust to the right height.

I had widen the holes on the PCB with a small drill bit but that was easy enough. Then I aligned the switches via the faceplate before soldering them in place.

They’re in and both working well. I’ll likely use this same approach with the other broken switches (tape monitor and loudness).

Listening now and sounds pretty good. Could probably use a recap and I’ll definitely swap those troublesome transistors.

A couple other minor things to fix:

Speaker B light is out.
Speaker connectors are failing. I’m fairly certain I have a replacement on hand for this, but I may swap to binding posts.
 
Last edited:
I had an SX-3600 that I bought new in 1980.. my first receiver. I sold it after the second trip to the shop for switch replacement. I was afraid this would keep happening after the warranty was over.. $$$$$$$$$

I loved that receiver, but couldn't stand the though of broken switches!
 
Last edited:
Yes, they’re a real problem. Hopefully these are more reliable than the original parts. The switches are cheap at 50 cents a piece, but paying a tech to do a tedious repair like this would not be cheap.
 
The guy at CMC Stereo said Pioneer got a bad batch of switches. I wonder if there are some of those receivers that had reliable switches. I brought this up in another thread a while back and was hoping someone like Markthefixer would comment about if this was a limited problem or affected all receivers that used those switches. I'll bet Pioneer payed a lot of $ for repairing SX-3500 and SX-3600's!
 
That’s a distinct possibility. The failure rate on these is amazingly high. 4 of the 5 switches on this unit are bad. I suspect the 5th isn’t long for this world and will likely replace it proactively since I’m already doing the others.

I’m not knowledgeable enough to know whether there are reliable batches out there but I also primarily shop for units in need of repair so I see broken switches more than good ones just by the nature of my searches.
 
Remaining switches were much easier as they were drop-in replacements. All have been changed out.

Going to give this one a day of listening before deciding whether to proceed with further maintenance or simply post it for sale and pass it along as somebody else’s project.

Any opinions on these units?
 
Last edited:
Back
Top Bottom