• The move to the new server is done. There are some software and database maintenance updates in process. This has us passing the hat around to help out. We appreciate any donations. Seriously, even a dollar helps. The payment page may be found here - https://www.audiokarma.org/support.html

TDA7498 Class D Power Amp - Almost Finished!!!

PR Audio

Super Member
First, I want to thank all of you who in one form or the other took time to explain some concepts. Your help was very valuable, as to do this properly, I'm sure that there still some things that could have been better, but for a first amp project, IMHO, it looks pretty good...:thmbsp:

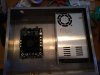
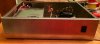
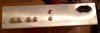
The amp is a Sure AA-AB32189 TDA7498 100WPC @ 6 Ohms Board (aprox. 80 WPC @ 8 Ohms). Power supply is a regulated 36 VDC unit, hookup wire is 300V rated 20AWG (doubled up at some points), the enclosure is a 10" x 12" x 3" from Hammond with cover (not shown), connectors are from PE and Mouser, and PCB feet are from EBay. I am lucky enough to have Home Depot only 3 mins. from my house, and they had all the M3 and M4 screws, nylon standoffs/separators, drill bits, and other misc. screws needed for the project. I avoided using sheet metal screws as much as possible, except for the IEC connector, enclosure feet (have not arrived yet, but on their way), and top cover.

Fabrication and assembly took some 20 hours, but mostly due to it being my first amp project, this type of project should only take 6-8 hours to complete.

When it came to wire length I didn't follow the rule of measuring twice, like I did when marking where to drill for the different components and their location. So, though it will not affect the amp's operation, the inside power cables will not follow the contour of the enclosure, like I pretended it to.

I'm not going to bore you with details, if you have any questions regarding the build just ask. Here are the pictures...:banana:
 

Attachments

  • photo 1.jpg
    photo 1.jpg
    69.3 KB · Views: 88
  • photo 2.jpg
    photo 2.jpg
    61.1 KB · Views: 88
  • photo 3.jpg
    photo 3.jpg
    50.8 KB · Views: 65
  • photo 4.jpg
    photo 4.jpg
    72.1 KB · Views: 141
  • photo 5.jpg
    photo 5.jpg
    79.3 KB · Views: 139
Register to hide this ad
More pics...
 

Attachments

  • photo 8.jpg
    photo 8.jpg
    40.7 KB · Views: 83
  • photo 7.jpg
    photo 7.jpg
    44 KB · Views: 64
  • photo 6.jpg
    photo 6.jpg
    26.7 KB · Views: 93
Looks very tidy inside. You did a nice job and hope it sounds as good as it looks. I particularly like the offsets used with the amp board.
 
Looks very tidy inside. You did a nice job and hope it sounds as good as it looks. I particularly like the offsets used with the amp board.

Thanks...The power supply is mounted on top of 3/8" tall spacers and has about 3/8" separation from the sidewall, that way there is cool air circulating around it. Same for the amp board, but I used feet that are aprox. 1/2" tall for the board, at $3.95 for 8 pieces it wouldn't break the bank.
 
99.9% Finished!!!

OK, so I finished the project. All I need to do is take the top cover do the pattern for the fans and perforate, also do a few perforations on the bottom, so air can circulate better. Hearing it play music as I write this. I could have done a better job with the wiring, but for a first project it looks very nice. Next week I will start building my DIY Hybrid Bookshelf OB Speakers, and then I will use this amp to bi-amp the speakers (low frequency range).

Enclosed are pics with the complete hook-up wiring connected, and the lights working. No chassis grounding issues, no crossed wires, no bad connections, a success!
 

Attachments

  • Top View.jpg
    Top View.jpg
    72.9 KB · Views: 63
  • Top View On.jpg
    Top View On.jpg
    74.2 KB · Views: 52
  • Front View On.jpg
    Front View On.jpg
    68.7 KB · Views: 66
  • Back View.jpg
    Back View.jpg
    66.7 KB · Views: 73
Last edited:
WOW!!! Love the way it sounds!!! The sound coming out from my DIY TABAQ speakers with 3" full range TB drivers is simply amazing for a $110.00 DIY amp, and that includes the $30.00 I spent on the enclosure, plus all the accessories and hook up wire pieces. Not even my CJ MV75 Power Amp with McIntosh MX113 Pre has been able to take these speakers to this level. The CJ has too much power for them, and may play too low also due to the KT90 tubes. Simply amazed, would love to do a head to head comparison with a mid-fi power amp from NAD, Rotel, Marantz, etc. to see how it compares. I can tell you that the bass is beautiful, and the overall sound is very detailed...Sweet sounding amp! HIGHLY RECOMMEND THIS EASY TO DO PROJECT.
 
Tonight I will drill the top cover to make the vents for the PCB and Power Supply fans. I am planning a Hexagon shape, don't know which drill bit, but probably something between 1/8" and 1/4".
 
With the TK2050 I vented the bottom cover as well as the top cover ( directly over the fan ).

The Meanwell PS ( very similar to yours ) fan has never come on, not once, even after running it hard for prolonged periods so I didn't bother venting it.
 
With the TK2050 I vented the bottom cover as well as the top cover ( directly over the fan ).

The Meanwell PS ( very similar to yours ) fan has never come on, not once, even after running it hard for prolonged periods so I didn't bother venting it.

I was planning on drilling two lines of holes lengthwise in a symmetrical pattern, so there is proper circulation of air through the case. I placed the sealed cover on top and had the same experience with the PS, the fan never came on and the PS was cool to the touch. The PCB fan never shuts off, but when I placed my hand on top of it I couldn't feel any significant heat coming from the fan. Overall this amp runs very cool. The feet should arrive early next week, once installed they will improve the air flow. Still amazed at how good the amp sounds and performs. Next project: Finish my DIY Hybrid Bookshelf Speakers, then build a tube DAC for my digital sources (PC, IPhone, IPod, etc.).
 
Tonight I will drill the top cover to make the vents for the PCB and Power Supply fans. I am planning a Hexagon shape, don't know which drill bit, but probably something between 1/8" and 1/4".

No time tonight :no: Too many meetings tomorrow, and Friday going with my wife and kid to the beach condo for the long Memorial Weekend. Will have to wait 'Till Tuesday.
 
Back
Top Bottom