• The move to the new server is done. There are some software and database maintenance updates in process. This has us passing the hat around to help out. We appreciate any donations. Seriously, even a dollar helps. The payment page may be found here - https://www.audiokarma.org/support.html

teac c-1 pinch rollers?

TrevorBarten

Well-Known Member
I have a beautiful teac c-1 that I'd like to get up and running again. It's fully functional except for the pinch rollers that have turned to mush. I'd like to find a replacement but it's proving quite difficult as the pinch rollers aren't any of the common sizes. Does anyone have any tips? Included is a picture of the mechanism and the pinch rollers. I have already cleaned off all the old rubber and still have the threads left.

 

Attachments

  • DSC_7323.JPG
    DSC_7323.JPG
    99.8 KB · Views: 28
Register to hide this ad
I have a C-1 and had the same problem. I ended up using a generic pinch roller that matched the diameter and center hole and made new spacers to center it. Works well.
I did keep my old cores to eventually re-rubber them.
I can see if I still have the link to the correct sized rollers, as they do not need to be as wide as the originals, just centered on the tape path.
Edit: Nope, the listing is too old, I can no longer see it.
Anyway, you only need a generic roller (2) that has the same inner and outer diameter and make 2 shim tubes to center it in the carrier. It's pretty simple.

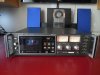
Here is mine in it's full, running glory!
 

Attachments

  • DSCN0168.JPG
    DSCN0168.JPG
    79.3 KB · Views: 25
Last edited:
I have a C-1 and had the same problem. I ended up using a generic pinch roller that matched the diameter and center hole and made new spacers to center it. Works well.
I did keep my old cores to eventually re-rubber them.
I can see if I still have the link to the correct sized rollers, as they do not need to be as wide as the originals, just centered on the tape path.
Edit: Nope, the listing is too old, I can no longer see it.
Anyway, you only need a generic roller (2) that has the same inner and outer diameter and make 2 shim tubes to center it in the carrier. It's pretty simple.

Here is mine in it's full, running glory!
so basically you are suggesting to just try a bunch and if I get any that fit to just adjust the spacers to make room ?
 
Well, that's what I did, because I had no magic help from the internet.
But if you can sit tight for a bit, I can dig out the deck and measure the pinch roller for you.
Right now this seems to be the only available solution. As far as I know Terry was not taking work for a while, so a re-rubber was a no go. The spacers, IF you look at your old rollers, are also just to center the roller. If you pull out one of the assemblies you will see how it was made. To fit a generic roller, those spacers are too long. I made new one's out of some tubing cut to length.
Seriously, it was very simple. I have given up finding correct replacements. I think the C-1 is just too rare for anyone to bother making new replacements. Damn shame, it is one magnificent beast of a deck.
 
Ugh... it's going to be too big a pain to take a pinch assembly out and apart just to measure it. I just don't have the time for it now.
Basically take the pinch assembly out, measure the shaft diameter to get the inner dimension of the pinch roller. Then measure from the center of the shaft to the plastic guide to figure out the outer diameter. Measurement X2 = outer diameter. Then buy the WIDEST roller, usually 6.5 mm or so that has the measurements you need. For example: 13x8X2 for a revox. The pinch rollers are just ordinary one's (NEW) from ebay for a couple of bucks.

Here's a pic of the final outcome. The black tubing is just some heat-shrink I had handy, there is no pressure on the roller, it just gently guides it to stay centered with the plastic tape guides.

You will need to re-center the pinch assembly ITSELF on each side again so the tape runs true over the plastic guides. I used a clear tape with the front plastic cut away to get it very close and then a mirror cassette to fine tune the tape path.
 

Attachments

  • 20230222_163540.jpg
    20230222_163540.jpg
    108 KB · Views: 39
Last edited:
Back
Top Bottom