• The move to the new server is done. There are some software and database maintenance updates in process. This has us passing the hat around to help out. We appreciate any donations. Seriously, even a dollar helps. The payment page may be found here - https://www.audiokarma.org/support.html

technics EPA 250 slow lift

Kenneth312

New Member
I have a lovely Technics SL1025 (SP25 and EPA 250) but years ago the damping on the tonearm lift became too slow.
If i drag the lift with my fingers up and down before usage it becomes a bit better, but it's still not possble to use the lift i a decent way.

I also tried a few years ago to drip chemical alcohol into it but not much effect.

I assume I have disassemble it and clean it and maybe exchange some damping fluid?

So I removed the EPA B500 from the base, and there seem to be only two concentric screws that can be used to open it, but they seem a bit stuck and I dont want to use force on them until I know how to unscrew them.

Can anyone help or point to helpful pictures or videos?

Regards, Kenneth in Lund, Sweden.
 
Register to hide this ad
You need to remove the nameplate to access the two screws that secure the connection block. You’ll then need to desolder the wires to remove it completely. Once that’s done you can access the two screws inside the VTA base to separate them. Have a properly sized JIS driver for those as they tend to have thread lock on them.
 
Hmm, I don't recognize that description.

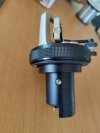
There are two concentric screws which I assume need to be opened to disassemble the base?

I absolutely do not want to destroy the screws, so I would very much appreciate if I could get a hint on which screw to start with (the small (inner) or the outer screw)?

See image below.
 

Attachments

  • IMG20240323093200.jpg
    IMG20240323093200.jpg
    61.7 KB · Views: 9
Hmm, now I did another attempt and removed the screws quite easily.
So now it seems I can rotate the lower base against the upper base, but they still seem to suck together.
 
That screw keeps the relationship of the nested helical pieces. It works like a zoom lens, except now the middle piece is floating. You’ll need get it back in to alignment making sure it didn’t drift an entire rotation, or the adjustment range won’t be correct. Also need to be careful when you fasten it as it and the slot the end rides in are precision machined to slide with no play.

After that you can remove the nameplate at the connector to access the correct screws, as I already said.
 
Ahh, yes, I see! I took a knife and carefully peeled away the nameplate with serial number underneath, so now I see a couple of screws!

Thanks!
 
So now I also removed the two threaded screws deep inside nicely, but it is all still kept together by something? What's my next step?

(Sorry for the stupid questions but I like being careful in these things :-)
 
Back
Top Bottom