

You are using an out of date browser. It may not display this or other websites correctly.
You should upgrade or use an alternative browser.
You should upgrade or use an alternative browser.
Technics SL-100C
- Thread starter AdlerW
- Start date

Frank Sol
Lunatic Member
.
About the voltage
There are a few references online saying the SL100C can be switched (stock) from UK 240v to USA 120vbut cannot confirm it
.
These new Technics tables are 110-240V 50/60hz. As per Technics’ website.
100c is a nice looking TT... Sleek
I'm not sure of the price point... Lot of competition in that range

EWarrior
Active Member
About the voltage
There are a few references online saying the SL100C can be switched (stock) from UK 240v to USA 120v
The model sold in Europe is spec'd for 110–240 V, 50 / 60 Hz. The US model should be 120 V, 60 Hz according to the manual.
Frank Sol
Lunatic Member
.
Not new fresh news but... SL-100C will be available Friday Aug 19th in USA
Amazon USA has only 5 left with (more on the way)

56RETROGRADE
Member
Only 3 left as of 11:30 mt timeAmazon USA has only 5 left with (more on the way)
Frank Sol
Lunatic Member
.
Only 3 left as of 11:30 mt time
All gone... Up to 4 week wait

All gone... Up to 4 week wait
I ordered one on the 18th. Amazon says it should be here (central MO) next week!
It's been a while since I had a Technics and I'm curious to see what their current offering is like.


zenith2134
Lunatic Member
I bought an SL-1500C in Oct... 2020 I believe it was.
Have tried a number of cartridges and preamps with it, and it has been a great unit.
The SL-100C is the exact same table, if you
compare the spec sheets, as you know. Sans preamp and shipping with a different cart.
I think these are all very good tables for the money. They can even play 78 if you want.
Wondering if the KABusa arm damper can be used on the -100C, or more specifically, if anyone has tried it on the -100C yet.
Have tried a number of cartridges and preamps with it, and it has been a great unit.
The SL-100C is the exact same table, if you
compare the spec sheets, as you know. Sans preamp and shipping with a different cart.
I think these are all very good tables for the money. They can even play 78 if you want.
Wondering if the KABusa arm damper can be used on the -100C, or more specifically, if anyone has tried it on the -100C yet.
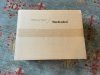
@Frank Sol, @justjed2 - Since you asked, here's initial impressions FWIW. As @zenith2134 points out, the 100c is a 1500c without the phono stage, with a different supplied cartridge, and in black only. It's a couple hundred dollars less spendy as well.
First the unboxing. Packing is great and both the carton and manual include an image showing how all the bits go back in the box for future moves, shipping, etc.

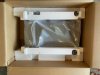
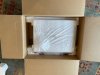
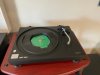
Setup took just under 30 minutes from start to first record. Here's the rubberized coating on the bottom of the platter. It's designed to dampen resonances. The plinth and feet are said to have vibration damping construction as well. The table isn't as inert to transmitting vibrations as some, but it's better than others. I'd call it adequately damped for most situations.
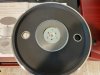
Connections are DEEPLY recessed on the back - Probably not an issue because these are all "set and forget" connections. Still, if you swap cables or want to change the auto up switch prepare to fiddle about.
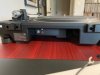
Done!
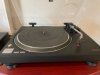
The manual is slim, but complete in almost every area except with regard to the auto up feature, which I first thought wasn't working. A quick internet search gave better information, though. First, the turntable has to be powered off when the auto up switch is moved to "on". Second, the record will spin for between 45 and 60 seconds before the auto up feature activates. Third, to reset the auto up feature between records, return the tonearm to the rest and depress the cueing lever fully until it clicks. Once I did all that, the auto up works consistently.
Instructions in the manual were handy because there were several settings that needed adjustment out of the box. The tonearm lock was disengaged and the tonearm height was too low for the supplied cartridge, so I fixed that. Next, the tonearm lift bar was set higher than I liked, so I lowered that. Both of these were easy fixes, but all adjustment fixtures are black and a little hard to see in dim lighting. A silver height adjustment locking mechanism and silver screw for the tonearm lift adjustment would be appreciated. Minor quibbles from an old guy - youngsters might not have any issues with the black on black scheme.
Fit and finish is excellent. The table looks simple and compact with just a bit of sparkle from the ultra clear dust cover. It has a bit more presence visually than a Rega/Pro-Ject/Music Hall turntable and the black color should pair well with that grey wall color everyone on HGTV uses.
I've been running it through a range of albums this evening and can come back with thoughts on how it operates a little later.
Time to flip the record right now...
First the unboxing. Packing is great and both the carton and manual include an image showing how all the bits go back in the box for future moves, shipping, etc.
Setup took just under 30 minutes from start to first record. Here's the rubberized coating on the bottom of the platter. It's designed to dampen resonances. The plinth and feet are said to have vibration damping construction as well. The table isn't as inert to transmitting vibrations as some, but it's better than others. I'd call it adequately damped for most situations.
Connections are DEEPLY recessed on the back - Probably not an issue because these are all "set and forget" connections. Still, if you swap cables or want to change the auto up switch prepare to fiddle about.
Done!
The manual is slim, but complete in almost every area except with regard to the auto up feature, which I first thought wasn't working. A quick internet search gave better information, though. First, the turntable has to be powered off when the auto up switch is moved to "on". Second, the record will spin for between 45 and 60 seconds before the auto up feature activates. Third, to reset the auto up feature between records, return the tonearm to the rest and depress the cueing lever fully until it clicks. Once I did all that, the auto up works consistently.
Instructions in the manual were handy because there were several settings that needed adjustment out of the box. The tonearm lock was disengaged and the tonearm height was too low for the supplied cartridge, so I fixed that. Next, the tonearm lift bar was set higher than I liked, so I lowered that. Both of these were easy fixes, but all adjustment fixtures are black and a little hard to see in dim lighting. A silver height adjustment locking mechanism and silver screw for the tonearm lift adjustment would be appreciated. Minor quibbles from an old guy - youngsters might not have any issues with the black on black scheme.
Fit and finish is excellent. The table looks simple and compact with just a bit of sparkle from the ultra clear dust cover. It has a bit more presence visually than a Rega/Pro-Ject/Music Hall turntable and the black color should pair well with that grey wall color everyone on HGTV uses.
I've been running it through a range of albums this evening and can come back with thoughts on how it operates a little later.
Time to flip the record right now...
Attachments

Frank Sol
Lunatic Member
.
Wondering if the KABusa arm damper can be used on the -100C...
I've spoke to Keven about this... he said Fluid damper TD-1000 is the one that will fit
He also said he will NOT be doing tonearm rewiring on this model - Too easy to screw-up the auto lift function
.
I've been running it through a range of albums this evening and can come back with thoughts on how it operates a little later.
Time to flip the record right now...
Enjoy and thanks... will be waiting for more
Looks great! I've been waiting for the SL-100C to be available in the U.S. ever since it was first announced a year and a half ago. It just seemed like the perfect option for me, as someone who wants to be able to swap cartridges but doesn't need a built-in preamp. I think I will order one very soon. 
@dcmfan, are you using the stock conical A-T cart? I just can't see a $40 cart on a $1000 table! I'd at least upgrade to the nude elliptical stylus, but that's just me....
Glad to hear it's all you hoped for. It's on my list!
I'm using a microline stylus in the AT body. This weekend I'll come back to post some listening impressions.
Tonight I wanted to post about what I think about the functions and what it's like to use the table.
The power, start/stop, and speed selector buttons are on the front left corner and controlled with silver plastic buttons. The power button sometimes takes a couple of presses to activate. The start/stop and speed selector switches activate more reliably with a light stab. They all feel solid and dependable.
Over on the right side sits the tonearm and its control and adjustment devices. The headshell is attached with a locking collar on the end of the tonearm and is a joy to use. The mechanism is simple, operates smoothly and provides good visual and tactile feedback when it is properly assembled. It's brilliant.
If there's a missed opportunity on this table I think it's in the tonearm lift mechanism. Don't misunderstand - it works and I'm getting used to it, but I think it could be better. Operating the tonearm is the function I'm going to use most frequently and it's an opportunity for Technics to create a moment that makes me go "ooh, that's nice" like the headshell connection does.
On this table, though, the lever has a narrow plastic top with an open area on the underside. It feels like a seam that hasn't been smoothed. The top of the lever is nice and sleek. I wish the bottom part where I put my finger was finished the same way.
The operation of the lift mechanism isn't as smooth as I like to see - there's a bit of a drop as the tonearm descends and it takes a delicate touch to put the stylus on the record softly. If I raise the tonearm mid record it nudges back just a bit so that when I lower it again it's not in the same spot on the record. I can feel a little friction in operating the tonearm lift. These are all minor things, really, but they stand out because the rest of the turntable presents a high level of precision that the tonearm lift doesn't rise to.
The counterweight is friction fit and requires no tools to adjust. There's a separate indexing ring in front of the counterweight and the two need to be moved together to set the tracking force. Most of us have seen this configuration and know how to work it. The counterweight is lightly greased, operates smoothly and stays where it's set.
It's a little bit of a squeeze to fit a hand under the turntable cover to make adjustments to tracking force, so best to pop the cover off when changing cartridges. I also used a digital scale to double check tracking force - a good thing because my skills at moving the counterweight and indexing ring together were sometimes lacking. That's on me.
Appreciate your patience with my long posts- hope they're helpful! Doing my best to be clear and honest.
For the coming weekend I've got a couple of spare headshells and different cartridges to play with. I can do some comparisons with another table and two phono stages to see what I can tease out of the Technics. There's one hurdle in particular I want to try, but probably won't get to it until Sunday.
Different people like different things. It was interesting to read in Herb Reichert's budget cartridge survey, which included, along with models from Goldring and LP Gear, four of the VM95 family: the VM95C, VM95E, VM95ML, and VM95SH. Reichert concluded, "Music-pleasure–wise, Audio-Technica's VM95C was the most satisfying cartridge in this survey. It shifted my perspective and made me reconsider what I thought I knew about phonography." Perhaps the folks at Technics were impressed with its sound, too, and not just the low price.@dcmfan, are you using the stock conical A-T cart? I just can't see a $40 cart on a $1000 table! I'd at least upgrade to the nude elliptical stylus, but that's just me....
https://www.stereophile.com/content...nica-goldring-lp-gear-phono-cartridges-page-2

Did some measuring today.
This is what RPM Test shows for the Technics:

And this is what it shows for my main (belt drive) table:

RPM Test is an iPhone app, so I'm taking these with a grain of salt, and I was surprised to see the two were this close.
With the cartridge supplied by Technics, I've got two AT vm95 bodies and can switch the stylus assembly from one table to the other quickly and compare.
A quick note on the sound of the AT cartridge - I've read that these carts do well with low capacitance (under 200 pf) and out of the box I thought the cart sounded harsh. My phono stage has capacitance of 150 pf and I thought the supplied cables might be pushing that too high. I replaced the supplied interconnect with a set of low capacitance component cables and the low end sound improved and the overall sound seemed better.
This is what RPM Test shows for the Technics:
And this is what it shows for my main (belt drive) table:
RPM Test is an iPhone app, so I'm taking these with a grain of salt, and I was surprised to see the two were this close.
With the cartridge supplied by Technics, I've got two AT vm95 bodies and can switch the stylus assembly from one table to the other quickly and compare.
A quick note on the sound of the AT cartridge - I've read that these carts do well with low capacitance (under 200 pf) and out of the box I thought the cart sounded harsh. My phono stage has capacitance of 150 pf and I thought the supplied cables might be pushing that too high. I replaced the supplied interconnect with a set of low capacitance component cables and the low end sound improved and the overall sound seemed better.