• The move to the new server is done. There are some software and database maintenance updates in process. This has us passing the hat around to help out. We appreciate any donations. Seriously, even a dollar helps. The payment page may be found here - https://www.audiokarma.org/support.html

The Fisher 800b

BostonBrian

New Member
First I want to say how happy I am to have found this great group. Amazing threads going back years with such a wealth of knowledge. I’d love to learn half of what some of these old timers have forgotten. I look forward to going back in the files and learning as much as I can.
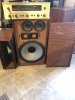
So with much research, and narrowing it down, I finally found a worthy unit at a fair price. Happy to say there’s a new 800b joining the proud family. The reason I chose the 800b was that I do like the occasional AM station (WBZ 1030 Boston) and thought maybe if one day I find an amp to match I could utilize the headphone option that way. Except for 55 years of grime on the chassis, everything seems to work superbly, and what a sound! I had read how these old receivers have a legendary warm tone, but I am truly blown away. This is my first tube receiver, and feel fortunate the seller parted with it for a fair price. After reading all the do’s an dont’s I started to clean with cotton swabs an warm water. That didn’t even touch it! Just kind of moved the grime around. I had some good electrical parts cleaner and figured if it was safe for phenolic and wires etc. so it just might work. I sprayed some in a little cup an dabbed away, being careful as noted of all the places with writing so as not to rub it away. I can’t believe what a shine, an I’m barely half way through but wanted to post. So excited. I look forward to picking the brains of those still around when these units were new to gain more knowledge and happy to share what I have learned as I go through the slow and careful restoration process. Happy Fathers Day ! Cheers
 

Attachments

  • 54EFBD89-7BAA-4C46-A986-6FBF44817B6E.jpeg
    54EFBD89-7BAA-4C46-A986-6FBF44817B6E.jpeg
    119 KB · Views: 62
  • 4C5B4530-085D-4C1E-B9BA-76D9EE461B6E.jpeg
    4C5B4530-085D-4C1E-B9BA-76D9EE461B6E.jpeg
    141.8 KB · Views: 64
  • 276C086A-AB14-4E29-A6F7-88A8DFCA45D1.jpeg
    276C086A-AB14-4E29-A6F7-88A8DFCA45D1.jpeg
    141.1 KB · Views: 62
Register to hide this ad
Welcome to AK! Welcome to the Fisher forum!

I usually use Windex with cotton swabs to clean the chassis on very dirty units. I apply the Windex to the cotton swab rather than just spray it on the chassis. Others use scrubbing bubbles. Both contain ammonia which is ok to use. It is time consuming but will get anything loose off the chassis. Many times the chassis is etched and just looks dirty. If you find your not touching the dirt with those cleaners then you might not have much option. Just beware that the chassis is cadmium plated, so avoid sanding or strong solvents other than mentioned unless you know what you are doing and take the appropriate actions to be safe.

So has your 800B been updated? If not then you may want to look at having the usual updates and safety modifications done to it to protect it from damage due to failure of electrolytic caps and other old parts that do not age well.

Did you get a case with it? That is icing on the cake if you did.

Nice Fisher XP-9c's BTW.
 
Last edited:
Welcome aboard -- great Fisher community here ..
I too face the challenge of the chassis on a Fisher 400...I have a 'before' picture attached, and know this will take some time (yours looks like it is in better shape) .. amazing what just a can of compressed air can do.
 

Attachments

  • Fisher400 Chassis before-20200620_1.jpg
    Fisher400 Chassis before-20200620_1.jpg
    184.6 KB · Views: 34
Hey Tim thank you for the great info and compliments. Yes very time consuming if done correct (I think so far I’m at about 4-5 hours with cotton swabs an just being careful) but it’s a labor of love. I’m maybe a little past halfway done? I’m just imagining all the things that have gone on in the world since this was new, while wiping away the grime. It’s cleaning up better than I thought. Some places the plating is gone, but very minor spots. What looks worn through is often times just sticky dust. Yes, toxic stuff indeed, thank you for the reminder. Gloves an a dust mask aren’t a bother. It did come with the original wood case (It’s on its side in pic next to speaker) an just a quick wipe with Olde English Oil an it looks good as new. No chips, gouges or water discoloration of wood that I can see. The gentleman I bought it from said the upgrades were done, Selenium rectifier and electrolytic caps replaced, but no paperwork proof. I have no reason to doubt him, but didn’t actually see for myself. The day I got it was unseasonably hot, an we were in his garage. He's the one who mentioned it without my asking. I’ll open the bottom later when I wake an snap a few pics. Hopefully someone can verify it has in fact been upgraded. Again, so excited to be here an appreciate the great comments.
 
Hey Kapp, thanks for the warm welcome What an excellent forum that dates back years to help others avoid costly mistakes. I look forward to learn some of the other AK members stories.
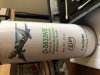
I thought about using the air in the can, an glad in my case I didn’t buy it first. This sludge was so stuck on, I don’t think it would have made much difference. The grimy residue may have actually protected the chassis, if that’s possible? There’s very little pitting of the plating. I’ll take a pic of the can of electrical contact cleaner I had laying around, (Zep product) but I thought if it’s safe on wires, phenolic plastics etc. it should be ok on the chassis. And lift the dirt and grime it did. I’m not exaggerating I’ve used at least 200 Qtips but better safe then sorry. I haven’t removed any tubes yet, but would eventually like to try it on where the tube seats. Thank you guys for the encouragement.
 
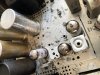
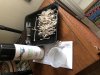
Just a few more pics I took just now, still yet to remove the bottom cover (work tonight).Really shows how grimy the chassis was, an what’s left to clean. Also I included a pic of the spray I used. Looks so far to be safe even on the writing, but extra care was used. The lightest touch just to loosen the dirt.
Does anyone have an idea on products for covering the pitted spots to prevent more corrosion? Like in pic around WX? B7BEDF2C-DBF5-40C8-91A2-02FACA0571F6.jpegFED8D9EA-B4B4-4A64-9D40-6AA54DCE2144.jpeg1B752A71-D9F9-4ECA-BD4F-C1E3996FF90E.jpeg5C933112-F6AE-4F3C-BEE3-B42FA03129DF.jpeg
 
Hey TonyG ! Yep nearly neighbors, just down the Mass Pike. I’m just a few miles out of Boston in Salem MA. I agree the tuning eye is a great feature that gives it a classic look. I see the two bulbs behind the eyes but no bulb behind The Fisher an the symbol. Anyway to make those a bit more lit up as well? (Like between the eyes)
 
Well done. Looking much cleaner. Can't wait to see the under skirt shots to see what has been done to it before.
 
BostonBrian. The Dial Glass lamps are located on the inner front faceplate, outboard of the dial glass. They will light up "The Fisher" and the blue bird of paradise when unit is on along with the rest of the lettering on the dial.
 
BostonBrian. The Dial Glass lamps are located on the inner front faceplate, outboard of the dial glass. They will light up "The Fisher" and the blue bird of paradise when unit is on along with the rest of the lettering on the dial.
Thank you Larry I see them now. EM84A tube x 2 on both sides. I wonder if maybe something is dirty keeping The Fisher writing and bird logo from illuminating a little brighter? Hmmm? Requires further investigation. The face plate knobs I gently pulled back and they seem to be snug, not abnormally tight or loose to remove. Is the champagne colored face plate difficult to remove?
Tim tonight’s my last night of work an I’ll bring some tools home to open the skirt. I Promise to get pics of it opened an uploaded to verify the upgrades. Haven’t really played it except to test it. Most (I’d guess about half, are original Fisher tubes) exceptions: 2 RCA 2 GE an 4 EH 7591 in back. Nearly finished cleaning What a difference. Tiny spots of pitting, but nothing major. Proper speaker cables (Spade to banana) should arrive in the next day or two, then I can concentrate on shelving it in it’s long term cage (Weak attempt at bird humor) HaHa
 
Well done. Looking much cleaner. Can't wait to see the under skirt shots to see what has been done to it before.

Tim I apologize. I didn’t realize there’s only six small screws holding the bottom cover (Skirt) on. Wow super easy to remove. Looks kind of dirty under there, but no critters or droppings. A tiny plastic wire bundle stand off broke off from somewhere, and a small spring found. May be the match to spring holding face plate dial bulbs plate? One didn’t look factory, an maybe they didn’t want to fish it out? Anyway, good to grab it. Don’t want it touching something it shouldn’t. Zap!
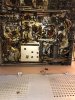
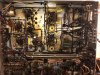
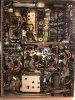
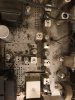
Not sure what I should be looking for but hope these pics help determine if it’s been upgraded or not. Let me know if you need a better shot or closer up? I just wasn’t sure where to focus. C909A08D-914E-4003-BFB7-B408E12E3024.jpeg5666660B-F421-473D-883D-9322E030F620.jpegAA115FCB-7E0E-47E8-AFD0-F95B31E1CD91.jpegB6DC756A-30BF-4998-BDE1-0ADCBDEF8BD6.jpeg
 
BostonBrian, your 800b has certainly been worked on. It looks like most of the old mylar caps were replaced with the newish yellow caps. The FM MPX board has had the 1uF cap changed as well as the old mylars. The output sockets have the 10 ohm shunt resistors to measure cathode current to check bias. The output coupling caps have been changed for newer ones. One of the 1K ohm grid resistors to the output tubes has been changed. And the 100uF bias circuit cap has been changed. Doesn't appear that there is an individual bias circuit and relies on all the output tubes to be matched.

I don't believe your power filtering can caps have been renewed. I don't think they have been stuffed with new caps either, a bit hard to tell. The old cans may be still working well.
 
I wonder too where that spring goes. Sometimes the tuning eye tubes are held in place by a spring and bracket arrangement or it could be for the tuner cord tension spring from the AM or FM sides.

Bruce is right and I'll probably duplicate some of what he's already said.....
The blue caps and yellow caps and at least one of the resistors look recent. (The yellow ones are coupling caps I'm pretty sure. Not so sure about the blue ones.) The big black cardboard cap is original and probably should be replaced - as well as the smaller black cap near it. I'm thinking they are the bias cap (big one) and an AC snubber cap (smaller one) but I could be wrong. I don't have a schematic handy to confirm. I too believe the can caps are probably original. I always update those because they are nearing 60 years old and they don't age that well. A failure in the can caps can take out other expensive parts. If you chose to re-stuff them the cost isn't bad at all. If you buy new then it can be pricey. You have to decide for yourself how much you are willing to spend.
 
The blue caps are electrolytics - the 1uF cap in the MPX, and C84 (100uF) which further filters the bias supply to the output tubes. It appears that C83 (8uF/50v) has been changed, too.

You would probably want to add screen stability resistors to the output sockets. This mod aids in further protection to the 7591A output tubes. Depending on how well matched your 7591A output tubes are, you may want to consider adding an individual/adjustable bias arrangement.
 
Last edited:
Thank you Larry I see them now. EM84A tube x 2 on both sides. I wonder if maybe something is dirty keeping The Fisher writing and bird logo from illuminating a little brighter? Hmmm? Requires further investigation. The face plate knobs I gently pulled back and they seem to be snug, not abnormally tight or loose to remove. Is the champagne colored face plate difficult to remove?
brian, pull gently on all the knobs to take them off, and you will see two hex nuts to come off that hold the faceplate to the backing. use a socket to get them off (half-inch, iirc). once you take off the faceplate you will see the festoon bulbs at either side that illuminate the dial glass and its stencils. you'll want to be very careful removing and cleaning the dial glass back side (where the stencils were applied) as the stencils can be very easy to wipe off...and the glass easy to chip or crack). my 800b had uneven lighting, in part because one bulb's white paint was missing over a big part of it (so it wasn't reflecting back into the edge of the glass, it was lighting behind the faceplate), and i replaced them both with these: https://www.ebay.com/itm/5MM-3-16-OD-SLIM-FUSE-LAMP-FOR-FISHER-MCINTOSH-OTHERS/372632715085

i had to shim the bulb festoons on one side to make sure they were tight in the mounts, and they look just fine. some people say it's a different look than the original, but i like how it looks with these.
 
BostonBrian, your 800b has certainly been worked on. It looks like most of the old mylar caps were replaced with the newish yellow caps. The FM MPX board has had the 1uF cap changed as well as the old mylars. The output sockets have the 10 ohm shunt resistors to measure cathode current to check bias. The output coupling caps have been changed for newer ones. One of the 1K ohm grid resistors to the output tubes has been changed. And the 100uF bias circuit cap has been changed. Doesn't appear that there is an individual bias circuit and relies on all the output tubes to be matched.

I don't believe your power filtering can caps have been renewed. I don't think they have been stuffed with new caps either, a bit hard to tell. The old cans may be still working well.
Wow BHam you can tell all that from those pictures? Although I don’t understand all that yet, I’m focused on learning this new language. It sounds like by your post this unit should give me some solid listening, with less concern of safety. That’s really what I was most concerned about. Thank you for that. Second is safety to the unit. I’m going to plug it into a power strip, to prevent surges or lightning, then that into wall. I may be able to power it up that way an save on Power volume potentiometer too. Just trying to gain a few miles out of them if it could help.
 
Back
Top Bottom