• The move to the new server is done. There are some software and database maintenance updates in process. This has us passing the hat around to help out. We appreciate any donations. Seriously, even a dollar helps. The payment page may be found here - https://www.audiokarma.org/support.html

The Official Elcaset thread!

That is the one. Q-Lectronics, across from Soundhounds.

That's good to know it's not toast without the sidepanels. I have a Sony STR-V2 that has its sidepanels attached to the exterior metal case.

My EL-7s don't have the side panels, but the screws were cut to compensate. I've read about cases where the panels were removed but screws not cut - the screws would then cause major damage to one of the PCBs, redering the unit unuseable. If you take the panels off, make sure you cut the screws or replace them with something shorter.
 
Yes the wood panels should be removable which one would do for rack mounting.

I don't believe you will need to replace the screws at all as I don't think they are needed to hold the case together, just to hold the wood which is after all just trim. If you want to fill the holes you could use a plastic or other type of plug.
 
I would be grateful if anyone who has re-belted their EL-7 recently could recommend a source for these .

I note that there are a couple of listings for belt kits on Ebay and was wondering whether anyone has used these as they are not Sony NOS parts .
 
I note that there are a couple of listings for belt kits on Ebay and was wondering whether anyone has used these as they are not Sony NOS parts .

None of my EL-5's or my EL-7 has needed new belts so can't comment on eBay replacements but personally I wouldn't seek for NOS Sony parts, those are likely to be as aged as the one in your deck! Or wouldn't last too long, either. When replacing belts I would seek for as new parts as possible.
 
I opened up mine at the weekend to see what I might need to take care of maintenance wise and the answer is basically nothing, at least at first glance. The rubber looks good, the capstan motor and capstans spin silently and freely. There's hardly any dust in there.
I'm reluctant to start fiddling with the tape calibrations though, as it's impossible to get hold of a test tape.
 
Only problems with my Elcaset decks so far has been caused by hardened lubricants in the mechanics causing certain parts to move much slower and making fe. winding to activate several seconds later than pressed. One EL-5 had snapped some spring-holders in the brakes but glue worked well.

The whole tape mechanics can be removed easily after un-plugging several cables and removing a few screws.
 
I would be grateful if anyone who has re-belted their EL-7 recently could recommend a source for these .

I note that there are a couple of listings for belt kits on Ebay and was wondering whether anyone has used these as they are not Sony NOS parts .

I haven't done so, but Marrs Engineering on the auction site advertises belt sets for Elcaset decks. He comes highly recommended by the Nakamichi folks, as he apparently uses an OEM Japanese source for the belts.
 
I haven't done so, but Marrs Engineering on the auction site advertises belt sets for Elcaset decks. He comes highly recommended by the Nakamichi folks, as he apparently uses an OEM Japanese source for the belts.

Yes , the very same ebay retailer I was looking at myself Old_School , I might hit the Bin button and check them out !
 
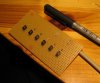
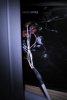
I have made a draft-example replacement remote controller for the EL-5/7 decks. As the rear-panel connector for the remote seems to be hard to get I tried some small push-on connectors and find out that this kind of plug (ST-034/R, 2,8mm -type) can be used. It fits the remote control connector's holes and feels tight enough to stay in place (if the deck/cables that end is not moved often). By bending the pins a little it might stay even better.

Once I had bought the parts and figured out the pin-outs from the service manual it was easy to come up with a small circuit board, solder in some switches and then solder the wires. I used similar design as the EL-7's front panel buttons.

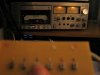
See photos attached. A bit quick-and-dirty solution but works and eases the use of my EL-7 a lot as I can hardly reach to it over my workbench!
 

Attachments

  • IMG_4315.jpg
    IMG_4315.jpg
    50.1 KB · Views: 86
  • IMG_4319.jpg
    IMG_4319.jpg
    51.2 KB · Views: 97
  • IMG_4321.jpg
    IMG_4321.jpg
    46.5 KB · Views: 83
:thmbsp: lausvi!

I have an original remote that was cut to add about 20 feet of cable. I also have a TC-765 and TC-K7II which use the same remote. I've been mulling over some sort of multi-remote to control all 3.
 
Thanks.
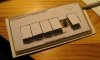
I added some cardboard and a printed paper-top - now it looks a bit more presentable. :D
 

Attachments

  • IMG_4328.JPG
    IMG_4328.JPG
    69.6 KB · Views: 89
Only problems with my Elcaset decks so far has been caused by hardened lubricants in the mechanics causing certain parts to move much slower and making fe. winding to activate several seconds later than pressed. One EL-5 had snapped some spring-holders in the brakes but glue worked well.

The whole tape mechanics can be removed easily after un-plugging several cables and removing a few screws.

Care to make a "how to"guide to do this :) im sure thats whats causing problems with mine
 
I will see if I have enough photos of the opening to make some sort of a guide. Can't remember every screw by heart, though.

At the moment I can't re-open my EL-7 as it's on a bottom of a stack with some heavy stuff on the top.
 
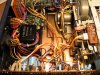
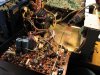
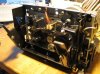
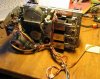
I will attach here some photos of opening of the EL-5/7. Both models are pretty similar except for the mechanics which are a bit more complicated in EL-7.

(This instructions are written purely out of memory and after looking at these photos and I don't take any responsibility over whatever you do to your Elcaset deck! Unless you get it working, that is. :scratch2:)

Remove the top cover by opening four screws (two on left and two on right side). When the front of the deck is facing you: on the left-hand side is the power supply board. This board has a hinge and after removing (or loosening) two screws the board can be turned down. (See photos). All cables from the mechanics section (the cassette compartment) can be unplugged from the power board as all the wires have connectors. But DO MAKE SURE you take photos or the original connection or mark the connectors (fe. use a pen and mark the pairing connector/plug) as it eases the connecting A LOT. The mechanics section has (2-4?) screws that attach it to the bottom plate. You also need to take off the tape compartment window (pull up) and remove the grey plastic panel on that covers the rear of the cassette compartment (two screws, accessible from the front). The you need to loosen the tape-head bridge, the two out-most screws. NOTE: do not alter the adjustment screws on the tape heads! Also note not to scratch the heads. See photos.

After removing those screws, the whole of mechanics can be lifted off the case. Then you should be able to visually go thrue the mechs. and by pushing the solenoids by hand you can feel which ones are sticky. All playback/winding modes are selected by activating one or more of the three solenoids. Use some electronics/switch cleaning-and-lubricating solution to carefully clean up the old grease and make the mechs. to run smoothly. DO NOT get any lubricating/oiling to the belt, capstans or tape heads.

PHOTO1: the insides of an EL-5 (cassette compartment("mechanics") on the right (front of the deck).
PHOTO2: power board loosened and turned aside, mechanics removed. Note the tape-head bridge loosened and hanging on the right.
PHOTO3: cassette mech, front view. Check the area where the white roller is, thats where the transport attaches to the reel-hubs. This part is usually most hardened and will move very stiffly.
PHOTO4: cassette mech, rear view. Motor on the left, three solenoids on the right.

 

Attachments

  • IMG_2471.jpg
    IMG_2471.jpg
    91.2 KB · Views: 134
  • IMG_2530.jpg
    IMG_2530.jpg
    80.9 KB · Views: 130
  • IMG_2476.jpg
    IMG_2476.jpg
    93.5 KB · Views: 140
  • IMG_2474.jpg
    IMG_2474.jpg
    80 KB · Views: 140
Hi!!
Not as yet,ive been "out of action" myself...plan to start a strip down/clean/re-lube in the next week or so.
Thanks again for the information on how to do this!
Paul:thmbsp:
 
Hi all:

Just found a very dirty Sony EL-7 at a thrift shop for $4.99 and had to have it. Even under the grime, it's a beauty. Powers up, fast-forwards and rewinds, but on play seems to be running very fast - maybe a belt issue? Also the meters don't move when it's in play, but I'm assuming a good cleaning could fix a lot of these issues. It came with a blank Sony tape loaded into the machine, no idea what might be on it (if anything)

I'll post again when I have a chance to get to work on it.

Question:

Did anybody ever produce prerecorded tapes for these things?
 
Back
Top Bottom