• The move to the new server is done. There are some software and database maintenance updates in process. This has us passing the hat around to help out. We appreciate any donations. Seriously, even a dollar helps. The payment page may be found here - https://www.audiokarma.org/support.html

The SL-110/Sl-1100 and SP owners club.

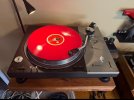
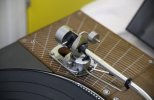
A lot of people remove the lift because it adds noise to the shell via vibrations coming up from the needle. Some arms like Rega with fixed lifts are either cut off or wrapped in shrink tubing for the same reason. It explains why yours was missing when you bought the deck.

Anyhoo, a little noise barely noticeable is not a problem if the convenience of the lift outweighs the noise.

Nice deck. Enjoy! :music:
Thanks. And yeah that makes sense, I've heard of the shrink tubing method. I discern no added noise but it's not a terribly controlled listening environment most of the time around our house. ;)
 
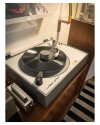
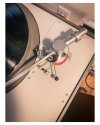
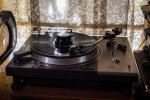
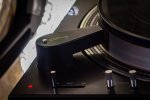
Here is my new resto mod sl1100 that was in very bad shape when i got it (no arm, feet, dust cover, and rough paint). I always wanted an emt 938 but can’t afford one, so i made this.

Lots of little fun details.
 

Attachments

  • IMG_6666.jpeg
    IMG_6666.jpeg
    103.3 KB · Views: 80
  • IMG_6665.jpeg
    IMG_6665.jpeg
    102.6 KB · Views: 76
  • IMG_6664.jpeg
    IMG_6664.jpeg
    106 KB · Views: 73
  • IMG_6656.jpeg
    IMG_6656.jpeg
    97.6 KB · Views: 72
Can add me in the SL1100 owners .... just ordered a components kit (silicon and caps) to get mine up n running again...old age seems to have killed it starting up, the lights are on but nobody home.
 
Picked one up today. Replacing my Grey Research HF-500 with this.

I run a Denon DL-103r and this arm is just a bit too light for it.

I may make a custom Arm board for it and install my Gray 108 tonearm.

While investigating I noticed the plinth is hollow. Seems like a great place for unwanted resonance.

Was thinking I could add some poly batting or other type of dampening material. Anybody done that? What did you use?

Also is there an aftermarket solution for the strobe?
 

Attachments

  • IMG_6762.jpeg
    IMG_6762.jpeg
    79.9 KB · Views: 28
Was thinking I could add some poly batting or other type of dampening material. Anybody done that? What did you use?
I filled my 110 with sand packed in bags arranged so they contacted the top plinth - especially the bearing well - as much as possible. Because this increased the weight substantially, I removed the stock feet and placed spikes under the pan. This modification had a substantial effect on SQ, lifting a perceived false reverb, replacing it with solid dynamics and improved detail.
 
I filled my 110 with sand packed in bags arranged so they contacted the top plinth - especially the bearing well - as much as possible. Because this increased the weight substantially, I removed the stock feet and placed spikes under the pan. This modification had a substantial effect on SQ, lifting a perceived false reverb, replacing it with solid dynamics and improved detail.
Just plastic bags filled with sand? Or something more refined?
 
Just plastic bags filled with sand? Or something more refined?
This was the mid/late '80s. Nothing about it was refined lol.

It worked, though.

PS: the platter responds well to a metal mat. The top hat shape and oversized diameter contributes to a tendency to ring. A metal mat kills the ringing more effectively than the stock rubber mat.
 
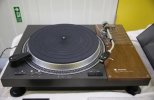
:banana:Hi there! Newbie Here! I just got my hands on one of these. Estate Sale in San Marino, CA. Went looking for photo equipment and found this beauty kinda hidden in the dark in one of the living rooms. Didn't know a lot about it but I knew what it was, and I knew it was special. It came with all you see in the pic - less a fair amount of dirt - and when I tried it there, the speeds fluctuated a lot and were hard to correct. Also once plugged in, it will stay always on. Speeds switched fine, but if turned the switch to "off", it will still play @ 45 RPM's.

They asked $150, I argued the apparent faults and offered $60, which were accepted. Now, knowing exactly what it is and it's actual condition, I know it was an unusually lucky deal. :cool:

I've been playin' with a few old TT's at home over the years. At the moment I still have a Technics SL-D2 with a 681EEE, a Pioneer PL-518 with an Empire LTD450 UG and a rare Stanton Gyropoise 8004 II with the original 681EE and stylus. All very decent sounding players. Nothing like this, though. Not even close.

1770311754688-png.3692836


(S/N 002002!!!) This virtually immaculate SL-1100A came with the cover (and someone added a pair of very solid hinges to it!), the original Strobo Illuminator, a cleaning anti-static arm, a round level screwed to the tonearm board, the original tiny bottle of oil under the platter, and the best of all: The original headshell with a Shure V15 Type III on it and the original stylus in what appears to be new condition! I didn't look at it through the microscope yet but the magnifier in my iPhone shows a very nice clean elliptical shape.

So far all I did was removing the base, cleaned the main switch and the potes with Deoxit D5, cleaned the gunky exterior and cover and adjusted the arm/cartridge to my taste. Plug it in and I'm happy as a clown. All seems to be perfect, just needed a little of well deserved TLC. The speeds still take a little warming time (10/15 minutes) to get consistent but after that they're rock-solid. I'll work on it soon.

I will not review this beast for you. I'm sure most of you know how wonderfully it works. I'll briefly share my experience, though: To sume it up, I'm amazed by it. All this years I day-dreamed about finding a decent SL-1200 for a decent price, but never imagined I'd find one of these "rarities". I'm 65, you know... I lived through the HI-FI era. I can also appreciate fine craftsmanship and efficient design. My take is simple: This is the best turntable I ever got my hands on, period. Zero-nonsense-top-of-the-line stuff. The innovative system, the robustness, the notorious Japanese devotion to efficiency, quality and detail, all combined here simply resulted in a great sounding experience, surely the greatest for me at home so far.:music:

As the old magazine ads read: Perfect execution and outstanding performance on a beautiful, unique design.

I bought the capacitors, transistors and diode kit on the bay. I believe she deserves the effort. I'll be doing the renewal soon and will post the results here. This is a procedure I'm not familiar with but I have experience soldering and fixing hardware of all kinds. I hope it'll not be over-complicated.

If someone have any useful advice, I'd greatly appreciate it. For example: I know the manual tells the oposite, but my first instinct was to remove the clamp, lift the top and clean the motor inside before lubricating. The old oil has been there for more than 55 years. Makes sense?

Truly honored to be part of this club.

 

Attachments

  • TBP SL-1100A-1.jpg
    TBP SL-1100A-1.jpg
    86.4 KB · Views: 61
  • TBP SL-1100A-2.jpg
    TBP SL-1100A-2.jpg
    69.5 KB · Views: 41
  • TBP SL-1100A-3.jpg
    TBP SL-1100A-3.jpg
    54.7 KB · Views: 46
  • 1770311754688.png
    1770311754688.png
    463.2 KB · Views: 174
Last edited:
:banana:Hi there! Newbie Here! I just got my hands on one of these. Estate Sale in San Marino, CA. Went looking for photo equipment and found this beauty kinda hidden in the dark in one of the living rooms. Didn't know a lot about it but I knew what it was, and I knew it was special. It came with all you see in the pic - less a fair amount of dirt - and when I tried it there, the speeds fluctuated a lot and were hard to correct. Also once plugged in, it will stay always on. Speeds switched fine, but if turned the switch to "off", it will still play @ 45 RPM's.

They asked $150, I argued the apparent faults and offered $60, which were accepted. Now, knowing exactly what it is and it's actual condition, I know it was an unusually lucky deal. :cool:

I've been playin' with a few old TT's at home over the years. At the moment I still have a Technics SL-D2 with a 681EEE, a Pioneer PL-518 with an Empire LTD450 UG and a rare Stanton Gyropoise 8004 II with the original 681EE and stylus. All very decent sounding machines.

This SL-1100A (S/N 002002) came with the cover (and someone added a pair of very solid hinges to it!), the original Strobo Illuminator, a cleaning anti-static arm, a round level screwed to the tonearm board, the original tiny bottle of oil under the platter, and the best of all: The original headshell with a Shure V15 Type III on it and the original stylus in what appears to be new condition! I didn't look at it on the microscope yet but the magnifier in my iPhone shows a very nice clean elliptical shape.

So far all I did was removed the base, clean the main switch and the potes with Deoxit D5, cleaned the gunky exterior and cover and adjusted the arm/cartridge to my taste. Plug it in and I'm happy as a clown. All seems to be perfect, just needed a little of well deserved TLC. The speeds take 10/15 minutes to get consistent but after that they're rock-solid.

I will not review this beast for you. I'm sure most of you know how wonderfully it works. My own experience, though, I will share briefly: I'm amazed by it. All this years I day-dreamed about finding a decent 1200 for a decent price, but never imagined I'd find one of these "rarities". I'm 65, you know... I lived through the HI-FI era. I'm also an engineer and can value fine craftsmanship and efficient design; my take is simple: This is the best turntable I ever got my hands on, period. No-nonsense-top-of-the-line stuff. The innovative system, the robustness, the notorious Japanese devotion to efficiency, quality and detail, all combined here and simply result in a great sounding experience, surely the greatest for me at home so far.:music:

As the old magazine ads read: Perfect execution and outstanding performance on a beautiful, unique design.

I bought the capacitors, transistors and diode kit on the bay. I believe she deserves the effort. I'll be doing the renewal soon and will post the results here. This is a procedure I'm not familiar with but I have experience soldering and fixing hardware of all kinds. I hope it'll not be over-complicated.

If someone have any useful advice, I'd greatly appreciate it. For example: I know the manual tells the oposite, but my first instinct was to remove the clamp, lift the top and clean the motor inside before lubricating. The old oil has been there for more than 55 years. Makes sense?

Truly honored to be part of this club.
Killer deal!!! I have yet to own one of these, but very much admire the design. Enjoy it!
 
Well done! What a beauty! I had the same problem with speed drift when I got mine. I sprayed the pots with contact cleaner, replaced the electrolytic caps and the zener diode, which did the trick. If I had my time again and more patience, I would have left the electros alone and just replaced the zener first (after cleaning the pots). I'd have left the electros alone unless they tested bad because the traces on the PCV are very thin and prone to breaking. There is a thread elsewhere here in Audiokarma you can read for details. Good luck! I still love mine and haven't changed a thing on it since I finished restoring it several years ago!
 
MQAsQCP.jpeg


If any SL-1100 owner is interested in this badge, let me know. Free of charge, first come first served. It is adhesive-backed and never used.
 
Last edited:
Just purchased a ln old SL-110 with the following issues.

No power light on startup.
Turns irregularly at 45rpm
No turn at 33rpm at all
Strobe light does power on

Any ideas on where best to start with the diagnostic and service?

Many thanks,
 

Attachments

  • IMG_3265.jpeg
    IMG_3265.jpeg
    114 KB · Views: 25
  • IMG_3267.jpeg
    IMG_3267.jpeg
    123.1 KB · Views: 25
Hello Good people

I had my Sl1100 pcb restored replacing the capacitors, transistors and one zener as per recommendations I found online.

It has the EPA110 tobearm and the original cue mechanism but sadly the cue mechanism is not working as it should. Please share some tips on how to service the cue mechanism. It is spring based but is there somewhere where it needs to be cleaned or grease/ silicone oil needs to be applied.

Regards
 
Here is my new resto mod sl1100 that was in very bad shape when i got it (no arm, feet, dust cover, and rough paint). I always wanted an emt 938 but can’t afford one, so i made this.

Lots of little fun details.
This is one of the most beautiful Technics (any model) i've seen.

Nice idea to use EMT colors.
 
Here’s my SL-1100A SN 005759 which was in a warehouse fire before I restored it. Several external parts melted or charred but the internals were all fine! The only electrical changes I made were tonearm wires, cap C14, and a new power cord. There was one mystery that took a while to figure out. The plastic housing holding the 4 connecting pins on the inside of the tonearm end had melted. It was cheaper to buy a whole new (to me) tonearm than just the end piece. The cartridge was also melted into the headshell. And the platter edges and dots were all super oxidized so I spent hours and hours sanding down to a wet 800 grit. I didn’t want a mirror finish, I just wanted it to feel good to the touch. For the smoke damage on the top I used Wenol with a very light touch, then on the plastic cover I used Novus. The arm lift adjustment knob also broke off in its threads so I tapped a new hole and installed a new setscrew. I also designed and 3d-printed new feet since they had melted in the fire. The metal towers above the feet were all fine. I left one of the old melted feet on the front left for nostalgia.

This table sounds out of this world.

(I posted more videos throughout the process on my instagram @act4audio if you’re curious.)
 

Attachments

  • PXL_20260417_174558779.MP.jpg
    PXL_20260417_174558779.MP.jpg
    140.6 KB · Views: 23
  • PXL_20250206_064436424.MP.jpg
    PXL_20250206_064436424.MP.jpg
    55.7 KB · Views: 21
  • PXL_20250203_005747190.MP.jpg
    PXL_20250203_005747190.MP.jpg
    147.5 KB · Views: 23
  • PXL_20260417_175914826.MP.jpg
    PXL_20260417_175914826.MP.jpg
    67.3 KB · Views: 22
  • PXL_20260417_175531241.MP.jpg
    PXL_20260417_175531241.MP.jpg
    74.7 KB · Views: 22
  • PXL_20260417_175436733.MP.jpg
    PXL_20260417_175436733.MP.jpg
    92.1 KB · Views: 21
  • PXL_20260417_174716296.MP.jpg
    PXL_20260417_174716296.MP.jpg
    129.4 KB · Views: 22
Last edited:
Life hack for the switches and pots: furniture knobs and stainless steel washers. Retro, funny and ergonomic.
 

Attachments

  • 20260624_081735.jpg
    20260624_081735.jpg
    83.3 KB · Views: 22
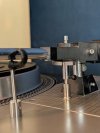
I, too, toyed with the idea of retrofitting practical hinges to the dust cover. But I’m going to skip it. Sound from the speakers would create resonances that would transfer to the player’s chassis. That was likely the reason why hinges were never included in the original design.
 

Attachments

  • 20260624_084859.jpg
    20260624_084859.jpg
    106.2 KB · Views: 11
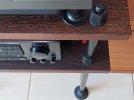
Hier ist ein unglaublich stabiles und robustes Regal für Ihre antiken Schätze: Bohren Sie 24-mm-Löcher in mindestens zwei Regalböden, genau an der gewünschten Position. Besorgen Sie sich vier M24-Gewindestangen in der gewünschten Länge, Metallhülsen und hohe M24-Muttern. Schweißen Sie Unterlegscheiben auf die unteren Muttern. Flache M24-Sicherungsmuttern werden oberhalb der unteren Muttern angebracht, um das Regal vor Ort auszurichten. Fertig! Es lässt sich extrem fest verschrauben und ist dennoch leicht zu demontieren, beispielsweise zum Transport.
 

Attachments

  • 20260624_094344.jpg
    20260624_094344.jpg
    103.1 KB · Views: 13
  • 20260624_094242.jpg
    20260624_094242.jpg
    96.1 KB · Views: 13
  • 20260624_094408.jpg
    20260624_094408.jpg
    104.1 KB · Views: 13
  • 20260624_100958.jpg
    20260624_100958.jpg
    81.5 KB · Views: 14
Last edited:
Back
Top Bottom