• Please note that Audiokarma will be offline briefly for updates early on Monday morning, September 28th.

Toshiba SA-735

Racingh11

Super Member
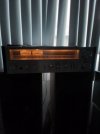
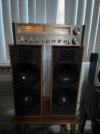
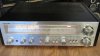
I took this in after it was abandoned in a garage for years. It was pretty dirty and had something leaked on the face-plate. Removed the knobs and face-plate and cleaned them. Freed up the stuck needles on the tuning meters. Buffed and waxed the heat vent and tuner lenz. Replaced a missing foot. Adjusted bias. And aligned the tuner.

The bias was adjusted at 10X the factory spec. and ran hot. It went from 75W line power to 25W after proper setting. That setting was using a lot of the available power and was likely that way since new.

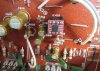
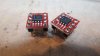
The veneer was broke off on the front edge. I filed the remaining glue and applied a layer of spot putty and sanded it smooth. Then gave the wood a black paint job. It really looks good this way. The person buying this also wants all new electrolytic capacitors and modern opamps on adapter boards for the preamp and phono sections. I will add photos of that when I have them. This is the first receiver I have deleted the factory wood finish on. It really saved this one because is looked bad and there are no covers available for this. Seems to be a somewhat rare model.
IMG_0778.JPG IMG_0779.JPG IMG_0780.JPG IMG_0773.JPG
 
Register to hide this ad
Toshiba makes some good looking and sounding receivers. The sa-7150 is one of my top five keepers. Nice work on that sa-735 too. Looks really sharp!
 
My 735 had a failed phono op amp. I don't remember needing a adapter board.

This is a great receiver. I really enjoyed mine so much I bought the factory service manual.

I'll be watching your progress.
 
My 735 had a failed phono op amp. I don't remember needing a adapter board.

This is a great receiver. I really enjoyed mine so much I bought the factory service manual.

I'll be watching your progress.
It does not require an adapter board. There are many ICs with that pinout, it's that the opamp I'm using is the best of the best and they don't make it in DIP anymore. I am planning to test noise and distortion between the old and new opamps to see if there is a measurable difference.
 
I tested it out today. And there is no measurable difference between the opamps. But that might be because it tests so well as it was. From 20-20khz, it was less than 0.007% THD and .006% IMD at full power into 8 ohms. Quite a ways from it's .08% rating. It definitely sounds better than before. More clarity and much richer bass. I would say that is from the new caps. The originals all tested out of spec.
 
Last edited:
I I'm using is the best of the best

Can you post the op amp model? I tried the numbers from your pic but didn't find anything.

I've done a few op amp 'rolls' and curious what is the best of the best.

Thanks.
 
I went with the OPA1602, I also us the quad OPA1604 in other adapters. If anyone knows of a better audio opamp, please share.
 
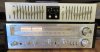
Photos of the inside and with the EQ that's going with it. It's a Harmon Kardon EQ-8. It got all new electrolytic with some film cap upgrades, and cover painted in matching black.
IMG_0822.JPG
IMG_0814.JPG IMG_0800.JPG
 
I went with the OPA1602

Thanks.

I only replaced the failed phono ic with a DD version. I don't think I touched the line level op amp.

I've been using njm2068dd in a few preamps but never thought they were the best of the best.

Like tube rolling, op amps can really make a difference.
 
I took this in after it was abandoned in a garage for years. It was pretty dirty and had something leaked on the face-plate. Removed the knobs and face-plate and cleaned them. Freed up the stuck needles on the tuning meters. Buffed and waxed the heat vent and tuner lenz. Replaced a missing foot. Adjusted bias. And aligned the tuner.

The bias was adjusted at 10X the factory spec. and ran hot. It went from 75W line power to 25W after proper setting. That setting was using a lot of the available power and was likely that way since new.

The veneer was broke off on the front edge. I filed the remaining glue and applied a layer of spot putty and sanded it smooth. Then gave the wood a black paint job. It really looks good this way. The person buying this also wants all new electrolytic capacitors and modern opamps on adapter boards for the preamp and phono sections. I will add photos of that when I have them. This is the first receiver I have deleted the factory wood finish on. It really saved this one because is looked bad and there are no covers available for this. Seems to be a somewhat rare model.
View attachment 2776794 View attachment 2776793 View attachment 2776792 View attachment 2776791
Nice work there, beautiful receiver. Mine it's identical.
 

Attachments

  • 20250714_193650.jpg
    20250714_193650.jpg
    49.8 KB · Views: 4
Do not let it get too hot, with the eq on top !

+99 on your work...


...wish I could too !

Oups, old thread.. Sorry !
 
Great looking receiver, I have the same one but in wood veneer instead of black and love the sound. How did you get the tuning needles unstuck? Mine do not move and the lights have long burnt out, but would love to get the needles moving again if possible.
 
Great looking receiver, I have the same one but in wood veneer instead of black and love the sound. How did you get the tuning needles unstuck? Mine do not move and the lights have long burnt out, but would love to get the needles moving again if possible.
I don't remember on the tuning needles. Probably played with the tension adjustment. The receiver I did, was also wood veneer. Part of it peeled off on the front edge. So I built it back up with auto-body filler, and painted the whole thing black. It looks like it could have came that way.
 
Back
Top Bottom