• The move to the new server is done. There are some software and database maintenance updates in process. This has us passing the hat around to help out. We appreciate any donations. Seriously, even a dollar helps. The payment page may be found here - https://www.audiokarma.org/support.html

Trying to commit to building an RCM

I believe there are three types: green, red, blue

I've only ever used the blue and can't comment on the other types. The blue has held tight on my RCM. I've also broken the seal on blue with a bit of force (not gorilla strength). If you're that concerned, buy a few cheap bolts and nuts, try it with some blue loctite, let it set for a few days and see what kind of force it takes to break.
 
Pretty much complete

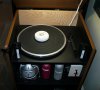
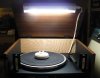
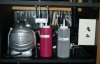
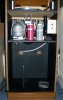
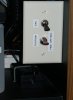
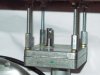
Here's some photos of the finished machine. I have used it several times. It was definitely worth the effort. I am amazed at what it can do for bargain basement lp's, which are the majority of my purchases.

I have not tried the locktite yet-on the list.

Also, still debating the catch container, and how to make it happen.

But for now, I am just cleaning and playing.
 

Attachments

  • P1020029.jpg
    P1020029.jpg
    63.7 KB · Views: 177
  • P1020030.jpg
    P1020030.jpg
    58.8 KB · Views: 142
  • P1020031.jpg
    P1020031.jpg
    64.4 KB · Views: 162
  • P1020032.jpg
    P1020032.jpg
    65.5 KB · Views: 150
  • P1020033.jpg
    P1020033.jpg
    36.7 KB · Views: 118
Last edited:
Couple of updates:

I had asked here, for a solution to the slipping platter shaft on the coupler item. I wound up using a middle ground solution. I used a high quality drill to drill a hole into the platter shaft. I drilled it about 1/2 through the shaft, and it was big enough for the set screw of the coupler to go into. I feared drilling completely through the shaft, as there might not have been enough metal left for strength. I bought a longer set screw from the hardware store, and screwed that snugly into the coupler/platter shaft.

I have not had any more slipping or tightening duties, even without the locktite. :banana:

On the vaccum/catch tank item-I did buy a little shop vac, and attached it's hose to the cleaning wand, as a test. It works fine, but honestly, I did not take the time to modify the hose to fit the wand coupling-I just used electrical tape. As the hose is a tad smaller than the wand coupling, the wand does not move down without some help from me-the lip of the hose is in the way. Also, I did not wire the vaccum into the on board switch, so I have to use the switch on the shop vac.

I know I could solve the wand/hose item, and I could wire the vac into the on board switch, but I think I will just return things as they were, and drain the dirty/spent liquid every 3-4 albums.

Now I have a convenient little shop vac I can keep around the work bench-very handy.

After all is said and done, the whole project cost me close to $300, and took many hours of planning and maybe about 12 hours of work. I could have just gone out and bought a unit for about double that, but I like mine better, and I have the satisfaction of the build-worth a good bit, actually, but impossible to quantify :scratch2:

The biggest thing I learned or should I say, came to believe, is that these things are well worth the cost and/or trouble, for record lovers like me. I started out nearly outraged at their cost (even those hovering around $600-one can easily spend a lot more....), but I see them now as a good value, especially if one buys thrift store/well used stuff, like myself. They always play a bit better, sometimes a lot better after cleaning, and I am relieved from the guilt of dragging my modest stylus(s) (styili?) through the muck of a grungy disk.

Call me a convert :thmbsp:

 
Very well done! :tresbon: The details of your build (and the trials and tribulations thereof) have motivated me to get off my rear and build one of my own.

SteveH
 
Hope you take the plunge, and there are many here who love to share their knowledge, so you are never alone.....
 
I had asked here, for a solution to the slipping platter shaft on the coupler item. I wound up using a middle ground solution. I used a high quality drill to drill a hole into the platter shaft. I drilled it about 1/2 through the shaft, and it was big enough for the set screw of the coupler to go into. I feared drilling completely through the shaft, as there might not have been enough metal left for strength. I bought a longer set screw from the hardware store, and screwed that snugly into the coupler/platter shaft.

Do you have pics you could upload? I'm always curious to see how others solve problems that seem to plague everyone. Sounds like a good fix.
 
I've made this comment before... and it invariably falls on deaf ears, but what the hell I'll say it again.

It is far easier to build a RCM without motor drive.

Moreover, a manually operated RCM is fast & efficient, offers great flexibility in use, and is very effective. At this point, I've cleaned well over 10,000 records with mine.

Here's a link to photos of mine, on the RCG website:

http://www.recordcollectorsguild.org/index.php?name=PNphpBB2&file=viewtopic&t=40503
 
I've made this comment before... and it invariably falls on deaf ears, but what the hell I'll say it again.

It is far easier to build a RCM without motor drive.

Moreover, a manually operated RCM is fast & efficient, offers great flexibility in use, and is very effective. At this point, I've cleaned well over 10,000 records with mine.

Here's a link to photos of mine, on the RCG website:

http://www.recordcollectorsguild.org/index.php?name=PNphpBB2&file=viewtopic&t=40503

That's probably true but building an RCM with a motor really isn't that complicated. I'm all thumbs and even I was able to pull it off. The only real trick is coupling the motor to the platter. Even that isn't really trick. I motorized RCM is fast and efficient as well.
 
Fortunately, there are all sorts of solutions to be had here in the RCM thread, so everyone can find a solution that they are comfortable with. I will freely admit that I am too much a gadget freak to pass on the motor solution :)
 
I have been watching this thread with interest everyone has their own ideas of how to build something. This project is all yours from start to finish and is something to be proud of. A job well done sir!
 
Do you have pics you could upload? I'm always curious to see how others solve problems that seem to plague everyone. Sounds like a good fix.


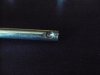
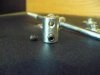
Here are a couple of pictures of the coupler and the shafts drilled as described.

I can't recall what type of drill bit I used-but it's the most expensive type :yes: However, it is a small bit, so I think it set me back about $6. I was able to drill into the metal with moderate arm strength. I did not have to remove the motor, which was a plus. Upon inspection, I would estimate I drilled about 1/3 of the way through the shaft, not halfway, as previously guesstimated.

The original set screws had already made a bit of a divot into the shafts, so I had effectively, a punch already in the metal, so the bit was able to bite where I wanted. Honestly, it surprised me that it did not jump all over, as I had feared. Punching the metal, was strongly suggested by the same person who advised me of the correct drill bit type to buy.

Hope this helps,

Paul
 

Attachments

  • P1020164.jpg
    P1020164.jpg
    44.7 KB · Views: 109
  • P1020166.jpg
    P1020166.jpg
    63.5 KB · Views: 111
  • P1020170.jpg
    P1020170.jpg
    64.6 KB · Views: 112
Just thought I would post a little update:

After 2 years, I have not had any problems with the RCM. It just does it's thing, and I have probably cleaned a few hundred records with it.

Depending on my mood, patience and the condition of the record, I may do the full RCM thing, I might use the Discwasher, but rarely. I might just use the carbon brush on vinyl I know to be clean. So, I am not a slave to the full RCM process, but I am sure glad I have it available.

I also found little "Post It" dots which are perhaps 1/4 inch in diameter, and I use affix them to the inside of the album cover, to mark which albums have been washed. Easy to see, but only visible when I look for them.
 
Back
Top Bottom