MuZak
Active Member
In case anyone is interested..
...in the 14 inch tuned loop, here's how to build it.
For those of you who find the so called "ultimate" almost adequate,
but want a considerable boost... and find it a good compromise
size-wise, here are the details, nice and simple/quick 'n dirty:
Get a 14 inch embroidery hoop... I have a spare or 2 if anyone
wants one.
(feel free to PM)
Get a plaque base (like the one Paul used for the ultimate).
I also got a small wood box at the same craft store to house
the tuning cap.
Get the tuning cap from MTM.
They sell them alone for 15 bux. Might be a bit more now.
I got mine a couple of yrs ago.
http://www.mtmscientific.com/
A short length of dowel makes it a bit easier to mount the hoop.
I used a round one.
26 guage magnet wire... got mine from Rat Shack.
Get a 2 position screw-terminal block like Paul used.
The hoop has 2 sections... inner and outer, which seperate.
You mount the outer to the dowel top with a brass screw.
Drive the screw through it into the dowel.
(be careful since the hoop can break easily)
Another screw thru the base into dowel bottom.
Use brass screws... brass is non-inductive.
Wind 13 or 14 turns of wire around the inner section of the hoop,
leaving a pair of tails several inches long.
Twist them together.
Make sure they're long enough to reach wherever you locate
the tuning cap.
You want the coil winding to be fairly tight with the wire laying close
together... touching.
I used double stick tape in the outside of the inner ring to make
it easier to wind,
You lay the wire into the tape, where it stays put while you continue
to wind the rest.
Keeps it staying put while you assemble the rest too.
Then, optionally add a coupling loop, for use with receivers with
AM ant terminals... otherwise it can only be used placed near
the loopstick of a radio or receiver.
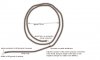
One turn for the pickup loop.
You'll want to wind the main loop... (or primary winding) off
to one side of the hoop.
Wind the pickup (or secondary) off to the other side.
Better to not have them touch.
It actually improves voltage transfer to have them seperated
a bit.
Leave adequate tails twisted together as above.
Insert the inner hoop (with the windings) carefully into the
outer ring.... with the wire tails pointing downward towards
the base.
Mount terminals on the plaque base as Paul did for the ultimate.
Then, mount the cap... (or house it in the small wood box
attached to the base as I did)
Next is to solder the tails from the main loop to the cap.
Solder either end to the solder terminal on the cap.
Don't forget to remove 1/4 inch or so of the enamel.
Use steel wool and acetone.
Either solder the other end to the chassis of the cap, or
put a screw in the threaded hole in the cap, on rear of its chassis.
If you go that route, be VERY careful not to let the screw
interfere with the workings of the cap!!!
Just look into the side of the cap as you thread the screw in
and you'll see how far is to far.
The size is 6-32 for the screw.. use a jam nut to keep it from
going in to far and for attaching a spade too.
Get spades sold as "telephone spades" from Radio shack.
Cat #64-3070.
Strip the enamel and solder one on.
Put the spade between the nut and cap chassis.
Those spades are recommended for your "lead in" cabling too.
After trimming to length, strip/solder the 2 twisted wires
comming from the 1 turn pickup loop to each of 2 spades.
Connect them to your terminal block.
Notes:
I said 13 or 14 turns above.
I found 13 best... 14 shifted the tuning range up a tad to
high on the caps rotation.
Try 14 first... before making the solder connection.
You can remove wire, but you can't add it once its cut off.
Or.. take the chance and go with 13 right off.
Its only magnet wire :arrow:
Stain if ya like....
Its a lot easier than it sounds! ara:
ara:
Its about the same size as the ultimate..
14" in width, and 14 vertical plus the height of the dowel
you choose and plaque base.
Works fairly well...
Waaaaaaaaay better than the "ultimate"!!!!! :thmbsp: :yes:
Good luck!
...in the 14 inch tuned loop, here's how to build it.
For those of you who find the so called "ultimate" almost adequate,
but want a considerable boost... and find it a good compromise
size-wise, here are the details, nice and simple/quick 'n dirty:
Get a 14 inch embroidery hoop... I have a spare or 2 if anyone
wants one.
(feel free to PM)
Get a plaque base (like the one Paul used for the ultimate).
I also got a small wood box at the same craft store to house
the tuning cap.
Get the tuning cap from MTM.
They sell them alone for 15 bux. Might be a bit more now.
I got mine a couple of yrs ago.
http://www.mtmscientific.com/
A short length of dowel makes it a bit easier to mount the hoop.
I used a round one.
26 guage magnet wire... got mine from Rat Shack.
Get a 2 position screw-terminal block like Paul used.
The hoop has 2 sections... inner and outer, which seperate.
You mount the outer to the dowel top with a brass screw.
Drive the screw through it into the dowel.
(be careful since the hoop can break easily)
Another screw thru the base into dowel bottom.
Use brass screws... brass is non-inductive.
Wind 13 or 14 turns of wire around the inner section of the hoop,
leaving a pair of tails several inches long.
Twist them together.
Make sure they're long enough to reach wherever you locate
the tuning cap.
You want the coil winding to be fairly tight with the wire laying close
together... touching.
I used double stick tape in the outside of the inner ring to make
it easier to wind,
You lay the wire into the tape, where it stays put while you continue
to wind the rest.
Keeps it staying put while you assemble the rest too.
Then, optionally add a coupling loop, for use with receivers with
AM ant terminals... otherwise it can only be used placed near
the loopstick of a radio or receiver.
One turn for the pickup loop.
You'll want to wind the main loop... (or primary winding) off
to one side of the hoop.
Wind the pickup (or secondary) off to the other side.
Better to not have them touch.
It actually improves voltage transfer to have them seperated
a bit.
Leave adequate tails twisted together as above.
Insert the inner hoop (with the windings) carefully into the
outer ring.... with the wire tails pointing downward towards
the base.
Mount terminals on the plaque base as Paul did for the ultimate.
Then, mount the cap... (or house it in the small wood box
attached to the base as I did)
Next is to solder the tails from the main loop to the cap.
Solder either end to the solder terminal on the cap.
Don't forget to remove 1/4 inch or so of the enamel.
Use steel wool and acetone.
Either solder the other end to the chassis of the cap, or
put a screw in the threaded hole in the cap, on rear of its chassis.
If you go that route, be VERY careful not to let the screw
interfere with the workings of the cap!!!
Just look into the side of the cap as you thread the screw in
and you'll see how far is to far.
The size is 6-32 for the screw.. use a jam nut to keep it from
going in to far and for attaching a spade too.
Get spades sold as "telephone spades" from Radio shack.
Cat #64-3070.
Strip the enamel and solder one on.
Put the spade between the nut and cap chassis.
Those spades are recommended for your "lead in" cabling too.
After trimming to length, strip/solder the 2 twisted wires
comming from the 1 turn pickup loop to each of 2 spades.
Connect them to your terminal block.
Notes:
I said 13 or 14 turns above.
I found 13 best... 14 shifted the tuning range up a tad to
high on the caps rotation.
Try 14 first... before making the solder connection.
You can remove wire, but you can't add it once its cut off.
Or.. take the chance and go with 13 right off.
Its only magnet wire :arrow:
Stain if ya like....
Its a lot easier than it sounds!
ara:Its about the same size as the ultimate..
14" in width, and 14 vertical plus the height of the dowel
you choose and plaque base.
Works fairly well...
Waaaaaaaaay better than the "ultimate"!!!!! :thmbsp: :yes:
Good luck!