

You are using an out of date browser. It may not display this or other websites correctly.
You should upgrade or use an alternative browser.
You should upgrade or use an alternative browser.
Vandersteen Sock Replacement
- Thread starter powerlight
- Start date


powerlight
Active Member
Wait, so I am confused. It sounded like the original poster was told he couldn't order socks from Vandersteen, but then Shacky says he got them from there. What's the verdict?
I'm not sure who Shacky spoke to, but when I asked I was told they do not sell fabric directly to the public. Like in most organizations, sometimes the answer you get depends who you talk to. :yes:


Want to see a pro do it? (Warning--they use a caulking tube with the Mystery Black Goop.  )
)
(Courtesy of Vandersteen Audio.)
That's helpful, since I just grabbed a pair of Vandy 2Ces and the socks have a little dust/dirt I can't get out, and a couple of small pulls. I would also like to clean out whatever is behind the socks.
)(Courtesy of Vandersteen Audio.)
That's helpful, since I just grabbed a pair of Vandy 2Ces and the socks have a little dust/dirt I can't get out, and a couple of small pulls. I would also like to clean out whatever is behind the socks.

This is a thread resurrection, but likely to reoccur anyway so.... I found a pair of 2Ci at a resale store for reasonable cost. I need to replace one sock and both grill tops. I was quoted for a single $48 sock and $24 for top grill material mounted to fiber board. I also checked the local fabric store-they’ll usually have grill material but it will be inferior to the heavy duty stuff that is on the Vandys.
Last edited:
Interesting--so they sell the replacement grill material for the tops that is already mounted? That's a good idea--thanks for the info! I didn't think the socks were that expensive though. Given the spotty condition of my end caps, I am not comfortable putting too much money into mine until I can see what I can do with the end caps. (I talked of doing new veneer on them in another thread here, but it is beyond my capabilities in terms of tools and working space to do it.)
Plus, I cannot decide which color to go with, although knowing that they sell the top grill material direct from Vandersteen, I might decide to change mine over to the cream color vs. the black, so they are not such eyesores in the room.
Plus, I cannot decide which color to go with, although knowing that they sell the top grill material direct from Vandersteen, I might decide to change mine over to the cream color vs. the black, so they are not such eyesores in the room.
I got the impression Wildcat that the tops would be the fabric mounted over the fiberboard insert, but I could be wrong on that....Interesting--so they sell the replacement grill material for the tops that is already mounted? That's a good idea--thanks for the info! I didn't think the socks were that expensive though. Given the spotty condition of my end caps, I am not comfortable putting too much money into mine until I can see what I can do with the end caps. (I talked of doing new veneer on them in another thread here, but it is beyond my capabilities in terms of tools and working space to do it.)
Plus, I cannot decide which color to go with, although knowing that they sell the top grill material direct from Vandersteen, I might decide to change mine over to the cream color vs. the black, so they are not such eyesores in the room.
I had that same impression. Not having had them apart, I don't know what holds them into the tops--it could be screws or glue, I'm thinking.I got the impression Wildcat that the tops would be the fabric mounted over the fiberboard insert, but I could be wrong on that....
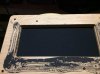
You have to take the tops off and you use a small pry tool to separate the “insert” from below so you can lift the grill insert out from the top... it fits into the top piece from below, then put in the new one.... I haven’t done it yet—I’m guessing they used the same black glue you see and pegs.I had that same impression. Not having had them apart, I don't know what holds them into the tops--it could be screws or glue, I'm thinking.
Last edited:
I finally got around to at least hooking up the Vandys. Although I wouldn’t call the Pioneer Elite AVR receiver I use in the garage ideal, the Vandys show very impressive clarity and imaging.
I did remove the damaged sock on one speaker however, and there is plenty of fabric to canablaize for also damaged top grills.
The only issue is that the top grill fabric is more of “ordinary” thin stuff while the main sock is thicker material. I’ll keep ya’ll updated as I progress.
-Rmac587
I did remove the damaged sock on one speaker however, and there is plenty of fabric to canablaize for also damaged top grills.
The only issue is that the top grill fabric is more of “ordinary” thin stuff while the main sock is thicker material. I’ll keep ya’ll updated as I progress.
-Rmac587
powerlight
Active Member
The video posted by Wildcat is a great resource. Wish I saw this before tackling mine! Lol!

danomar
My spoon is too big.
This thread was useful for rebuilding my 2Bs, so I will update it with a few things I learned.
New socks are available from Vandersteen for $48 each ($96/pair). They are available in black, charcoal, and beige colors. The new material seems nicer than the original; the socks also seem more acoustically transparent than the originals, but that might have more to do with crusty old socks accumulating dust and whatnot.
The top inserts are available for $24 each/$48 for the pair. These are completely new frames with material already wrapped and stapled. My top inserts were impossible to remove completely in one piece. The replacement inserts are very nicely made and fit very well.
I DeOxit-ed the heck out of the rheostats for treble and midrange levels on both speakers. I could get two of them reasonably clean, but two still made a bit of noise and one had a point (at the recommended setting, of course) with a dead spot that would not go away. I got four new ones from Vandersteen for $40.

All of the prices included shipping. I ordered the socks and inserts at the same time. I do not know if I would have saved money on the replacement rheostats if I had ordered them with the fabric items. $40 seems just a teensy bit expensive until one realizes that shipping (UPS Ground) probably cost one-third of that amount.
I will note that Vandersteen cannot process payments other than by personal check, money order, or C.O.D. via UPS. I sent money orders from the local supermarket chain and the items were shipped the day Vandersteen got my money.
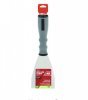
The only thing I will add to the process of removing the tops and bottoms is to use a stiff chisel-edged scraper, not a screwdriver. Using a flat blade screwdriver as shown in the YouTube video caused unnecessary damage for me—probably because the wood on my speakers is old and brittle. Also because at least one corner will be stuck where a dowel is (intentionally?) seemingly glued on. A very stiff scraper with a metal handle end that can be hammered made removing the second speaker's plates much, much easier and resulted in negligible damage.
I needed to remove and re-do the caulking on the first speaker. Richard Vandersteen told me that he uses non-hardening butyl caulking for three sides and "household" silicone across the front. I got some butyl caulking intended for sealing gutters and general roofing.
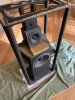
The original butyl caulking across the sides and back are mostly visible as is the silicone strip across the front. I think these are intended to isolate the top and bottom pieces from the speaker frame to avoid vibration resonance issues. They also help to hold the top and bottom on to some extent, but the top dowels and bottom screws do most of the work.
I used Scotchbrite pads to remove stains and blemishes on the top and bottom plates. I then used linseed oil twice to treat the veneer. Nothing else.
These compare the old and new before I secured to top plate on the first speaker.
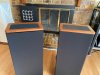

Once I figured out the first one, the second speaker took a fraction of the time to do. It was not a difficult task, but it was tedious—especially removing the staples. Funny thing about the staples, I thought I would use fewer but ended up using almost as many as original to ensure the socks stay consistently tight across all sides. There is a good reason for using so many.
I hope this helps anyone else considering restoring their older classic Vandersteens to give it a try.
New socks are available from Vandersteen for $48 each ($96/pair). They are available in black, charcoal, and beige colors. The new material seems nicer than the original; the socks also seem more acoustically transparent than the originals, but that might have more to do with crusty old socks accumulating dust and whatnot.
The top inserts are available for $24 each/$48 for the pair. These are completely new frames with material already wrapped and stapled. My top inserts were impossible to remove completely in one piece. The replacement inserts are very nicely made and fit very well.
I DeOxit-ed the heck out of the rheostats for treble and midrange levels on both speakers. I could get two of them reasonably clean, but two still made a bit of noise and one had a point (at the recommended setting, of course) with a dead spot that would not go away. I got four new ones from Vandersteen for $40.
All of the prices included shipping. I ordered the socks and inserts at the same time. I do not know if I would have saved money on the replacement rheostats if I had ordered them with the fabric items. $40 seems just a teensy bit expensive until one realizes that shipping (UPS Ground) probably cost one-third of that amount.
I will note that Vandersteen cannot process payments other than by personal check, money order, or C.O.D. via UPS. I sent money orders from the local supermarket chain and the items were shipped the day Vandersteen got my money.
The only thing I will add to the process of removing the tops and bottoms is to use a stiff chisel-edged scraper, not a screwdriver. Using a flat blade screwdriver as shown in the YouTube video caused unnecessary damage for me—probably because the wood on my speakers is old and brittle. Also because at least one corner will be stuck where a dowel is (intentionally?) seemingly glued on. A very stiff scraper with a metal handle end that can be hammered made removing the second speaker's plates much, much easier and resulted in negligible damage.
I needed to remove and re-do the caulking on the first speaker. Richard Vandersteen told me that he uses non-hardening butyl caulking for three sides and "household" silicone across the front. I got some butyl caulking intended for sealing gutters and general roofing.
The original butyl caulking across the sides and back are mostly visible as is the silicone strip across the front. I think these are intended to isolate the top and bottom pieces from the speaker frame to avoid vibration resonance issues. They also help to hold the top and bottom on to some extent, but the top dowels and bottom screws do most of the work.
I used Scotchbrite pads to remove stains and blemishes on the top and bottom plates. I then used linseed oil twice to treat the veneer. Nothing else.
These compare the old and new before I secured to top plate on the first speaker.
Once I figured out the first one, the second speaker took a fraction of the time to do. It was not a difficult task, but it was tedious—especially removing the staples. Funny thing about the staples, I thought I would use fewer but ended up using almost as many as original to ensure the socks stay consistently tight across all sides. There is a good reason for using so many.
I hope this helps anyone else considering restoring their older classic Vandersteens to give it a try.