• The move to the new server is done. There are some software and database maintenance updates in process. This has us passing the hat around to help out. We appreciate any donations. Seriously, even a dollar helps. The payment page may be found here - https://www.audiokarma.org/support.html

Wood Finishing Ideas

ScooterMcTav

I know less than I think
Hello All,

After purchasing a set of nice Soliloquy 6.2 speakers last year, I painted them grey to blend in with our new home's decor. Although they look fine, I was considering selling them, which means I need a strip and refinish. Or, I'll like the results of the refinish so much, they may move back into the main system (if I can tweak the x-overs a bit to fill the sound while I have them apart).

Them in their original color:

1482813-soliloquy-62-for-sale-or-trade-unique-color-with-other-options.jpg


Pretty horrible, and actually a lot more red in person. Very Pecan-y. Now in Grey:

79EF5CB2-5C49-476A-9F2C-F38B0E1CCA17_zpsn0vkzvgy.jpg


So I figure that when I'm done chemically stripping them, it will take off the grey paint, as well as the varnish or seal on top of the factory color. Then I'm a bit befuzzled as to what to do. Of note, I am unsure of the veneer species; though it has a very smooth texture without many carbon marks, so I'm going to guess birch. Also interesting to note that a clear birch was one of the colors offered.

Now ideally, I was thinking in a few different directions:

- If the color is dye, not pigment, I can bleach it out of the wood returning it to a birch-ish color. I can then hand rub in a few coats of Minwax ebony stain, making them mainly black, but with some wood tone and texture to it, finishing with a satin finish lacquer or urethane

- If the color is pigment, I then rub in a green stain to bring them to a darker walnut color. I then add some ebony on top to darken them down to almost a black mahogany. Then finish with a satin lacquer or urethane.

In either case, I have read a recommendation to let a heavy coat of the black dry on, then do a light sand to darken the deeper and more absorbant areas of the speakers. Sanding veneer gives me the heebie jeebies, especially as these guys still have crisp corners and edges on them. That being said, when one googles these speakers, many of the same color have a nicer tonal texture (IMHO) than the bland caramel pudding of mine.

So what are the thoughts of this approach, and has someone done something similar? Anything I'm forgetting in steps between the strip and stain that would make my life easier?

Open to suggestions and recommendations. And do we have a guess as to if the original finish was dye or pigment?
 
Register to hide this ad
Seems like it'd almost be easier applying new veneer, and nothing easy about doing that. I've tried removing "antique" re-finishes on veneer from old consoles and such, and never had what I'd call spectacular results. I think they look good in gray ... why not leave it to the buyer to decide?
 
Hi
I would guess that your best bet would be to strip them and see what is under there.
The original finish dose look a little artificial.
I've just re finished the cabs on my old mission's using teak oil with good results.
 

Attachments

  • image.jpg
    image.jpg
    34.1 KB · Views: 36
Seems like it'd almost be easier applying new veneer, and nothing easy about doing that. I've tried removing "antique" re-finishes on veneer from old consoles and such, and never had what I'd call spectacular results. I think they look good in gray ... why not leave it to the buyer to decide?

A little bit of the old - good from far - far from good conundrum. They look fine by my eyes, but I think someone being asked to pony up a solid chunk of coin might have some slightly higher standards. And yes, I've done some veneering and laminate work before too, and agree, nothing easy about that. Stripping and restaining is like a picnic compared to that.

Hi
I would guess that your best bet would be to strip them and see what is under there.
The original finish dose look a little artificial.
I've just re finished the cabs on my old mission's using teak oil with good results.

Thanks for the tips. I have a set of Celestion Ditton 15s I might treat to that particular teak oil treatment.

What's underneath should be pretty good as I did not sand or damage the original finish in any way before painting, and used an alkyd paint. In fact, I can scrape off, or heat and peel the grey I put on there - albeit through a backbreaking and agonizingly slow process. I'm more concerned about getting the red out of the wood before adding black to it.

But yes, the original finish could have used a little more texture to it - possibly something in the veneering process took some of the carbon marks out of the wood. Or, it is a very light birch with very little carbon in it, leading to a very bland post-stain finish. Here's a better pic of them (wow, just noticed the seller was willing to ship them to Australia!):

1092798-soliloquy-62-speakers-in-cherry-designed-by-phil-jones.jpg


Even raising some contrast in that grain would improve the looks 100%.

Problem is I want some wood to show through when done. I have a pair of genuine wood veneer Monitor Audio speakers in black, and it seems such a shame, as the beauty of the veneer is lost.
 
Maybe before you get too far into it, try polishing up what you got? No loss if it doesn't work out. As long as the paint's thick enough and a consistent color, you can work wonders with "super grit" sanding pads. Run em up to around 4K grit with a final wet sand, and the gloss can cover up most any smallish defect.
 
Any wood, no matter how open the grain, can be made smooth like that with the right technique. It can also be made to look more raised. If you want the texture of the grain to show more, you can raise the grain before staining by using water. Prep the wood for finish as you normally would by removing all old finish down to bare, clean wood. Then, as a last step before staining, wipe with a wet rag, allow to soak in evenly for several minutes, then wipe off excess. You should already see more texture. Allow to dry for a couple of days, then finish as you normally would. This technique is used often when finishing wood flooring after sanding. Open grained woods like oak will raise more than finer grained woods like walnut or mahogany, but that's a good way to get the grain texture you seem to be looking for. By opening the grain pores with water, you also allow more stain pigment to get in the wood, creating more contrast.

To me, that wood looks like cherry with no stain, just an oil or clear coat, but hard to tell from the photos. Just have to be careful not to burn through that veneer. It will not be possible to create more contrast properly without removing ALL old finish first.
 
Thanks for more tips guys. Should hopefully have nicer weather next week to start the stripping.

Skizo, I'm hoping I'll be able to bleach them out to a nice colour, but moving into a darker neutral transparent black. I know it won't have the right texture, but I love the look of the Spendor and MA finishes.

Great tips bberkom on bringing up the grain. Howeve, I'm pretty sure this isn't finished cherry, as I can see the overspray in the driver holes and where the backplate is located.

Hoping the chem strip will take care of all of the old finish, then I'm left with either browning the red, or bleaching the red out.
 
So I found out why the grain was so muted. When colouring these speakers, a ton of pigment stain was sprayed on then sealed. When the varnish came off, it was a bright red.

After removing the paint and varnish, I can see we have a lovely grain pattern in the wood, though there is still lots of pigment stain.

So what I have done on a trial side is:
-Give it a careful sand to remove some top stain
-Rub in some green dye to knock down the red (rit in 99% alcohol)
-lay on a coat of Minwax ebony, let it sit for :15, then rubbed it off

Currently the color is a nice warm walnut, though I wouldn't mind it taking more black.

I could certainly rub less of the Minwax off, but when I've seen this done before, it can leave an inconsistent finish. That being said, after the first coat dries, will it take more black with each coat?

Or do I let the stain dry on, then sand it to take off the excess? As always, the less sanding on veneer the better.

Or, do I add some black dye to them first? The way dye takes makes me a bit nervous as well, as there is no coming back from a poor black dye job.

If I just need to be patient and throw on a few more coats of Minwax, that is certainly the path of least resistance.
 
This speaker looks like bleached mahogany, and then tinted into a cheery color. One thing the home novice doesn't understand most finishes are a process of colors to get the final result.
1092798-soliloquy-62-speakers-in-cherry-designed-by-phil-jones.jpg
You might bleach to get the wood lighter so you have room to work to get a darker color, or you might need to pull red out of the wood.

Then you can start the color with a back ground stain, generally die at this point. This can shift how the color reads and give a glow reading though the finish.

The die stain is sealed and the next stain will be a oil stain and glazed on. This is where you can control the color better because the wood doesn't just suck it up how it wants to. You can wipe it on , lightly wipe it off and work it with a dry brush stippling it to look even. Then you lock this in with finish, the finish has to be sprayed at this point as not to move the stain.

As you build up the finish you can see your color. Tint (ie: color in the finish) can be used at this point, again sprayed on. It's controllable and you can see what's happening to the color as you do it. You can darken light areas, shift the color hue one way or another, and darken the whole piece, depending on whats needed. Tint can also give depth or add age with amber as if the finish yellowed over time.
 
This speaker looks like bleached mahogany, and then tinted into a cheery color. One thing the home novice doesn't understand most finishes are a process of colors to get the final result.
View attachment 899981
You might bleach to get the wood lighter so you have room to work to get a darker color, or you might need to pull red out of the wood.

Then you can start the color with a back ground stain, generally die at this point. This can shift how the color reads and give a glow reading though the finish.

The die stain is sealed and the next stain will be a oil stain and glazed on. This is where you can control the color better because the wood doesn't just suck it up how it wants to. You can wipe it on , lightly wipe it off and work it with a dry brush stippling it to look even. Then you lock this in with finish, the finish has to be sprayed at this point as not to move the stain.

As you build up the finish you can see your color. Tint (ie: color in the finish) can be used at this point, again sprayed on. It's controllable and you can see what's happening to the color as you do it. You can darken light areas, shift the color hue one way or another, and darken the whole piece, depending on whats needed. Tint can also give depth or add age with amber as if the finish yellowed over time.

If I was going to guess at the veneer, I would have actually suggested birch. It does have a few small birds-eye sections in it, and would have been naturally light with a small amount of carbon black in it. Plus the factory colors were clear birch, red, and dark brown, which makes me think all speakers were made with birch, then sprayed red or brown with pigment stain for the non-birch colors.

Although I thought of bleaching, since the stain was obviously pigment stain, and I wanted to leave some contrast in the wood, I decided against using two-part bleach.

The green dye was good in moving the red to a walnut color, so the tone is right - I just want it to take more black that it received from the Minwax wiped off. I'll try the light wipe, and dry brush stipple or drag to see if I can get a reasonable finish with the Minwax. Adding a black tint to the finish would be nice, but I'm not sure I have the technology to execute that. I was still debating if I go with spray-can varnish or brush on poly for a finish - however, I really wanted them the right color before finishing in the event I need to use clear spray-on varnish..

FWIW, the trial color with the dye and Minwax is very close to a set of walnut Monitor Audio RX1 I used to have. Just want them a bit blacker, as I like the warmer walnut undertone.
 
Last edited:
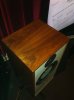
Thought I'd post up a few interim pics. This is the first box stripped, dyed, and one coat of Minwax ebony rubbed in.

ECF16640-FC73-4E27-8695-B9E18E8B4749_zps04ejhdgv.jpg


The look is pretty good, though I'd still like it darker. I'm pretty sure another coat of ebony won't make much difference, so I figure I either:

- Use a technique to lay on a heavy coat of the ebony, making a fake grain
- Try polyshades Jacobean to darken it down
- Use some of the Minwax to dye some varnish and lay on a few coats

Suggestions?
 
This is the first box stripped, dyed, and one coat of Minwax ebony rubbed in.

Suggestions?

If you are working one cabinet ahead of the other your going to loose your consistency and it will be hard to get them both to match. One thing I learned be consistent, be it a crapy or good job at least you have all parts matching.

Strip all at the same time
Sand all at the same time
stain all at the same time
and on and on,every step need to be done on all parts together.
 
The look is pretty good, though I'd still like it darker. I'm pretty sure another coat of ebony won't make much difference

Well yes and no...I take it that's the darkest of that product.

Generally minwax like that is a stain and a bit of sealer so it hold to the would for people using a brush to clear coat over it. If you let it dry good you could get away with more stain coats before any clear coats. Next time don't just rub all the stain off hard. Put it on and lightly work it evenly, you can use a folded rag and kinda brush with it, with the grain. A 3" dry bush would be good also to even the stain. With the brush you pat the tip of the bristles all over the surface, then cleaning the brush on a clean rag in the other hand. You can the lightly brush with the grain to smooth it more.
 
If you are working one cabinet ahead of the other your going to loose your consistency and it will be hard to get them both to match. One thing I learned be consistent, be it a crapy or good job at least you have all parts matching.

Strip all at the same time
Sand all at the same time
stain all at the same time
and on and on,every step need to be done on all parts together.

The other speaker has 3 sides done - working them at the same time. Infortunately, the first bit of dyeing and staining I did, one speaker got two sides done, and one only had one side done. So it's only a little behind the other, and I will finish its first stain and dye tonight.

Well yes and no...I take it that's the darkest of that product.

Generally minwax like that is a stain and a bit of sealer so it hold to the would for people using a brush to clear coat over it. If you let it dry good you could get away with more stain coats before any clear coats. Next time don't just rub all the stain off hard. Put it on and lightly work it evenly, you can use a folded rag and kinda brush with it, with the grain. A 3" dry bush would be good also to even the stain. With the brush you pat the tip of the bristles all over the surface, then cleaning the brush on a clean rag in the other hand. You can the lightly brush with the grain to smooth it more.

Yes, one of my concerns laying on a heavier coat of stain would be that it would rub off when I put on protection. Also, it will obscure the grain more - one of the biggest issues I had with the original thickly sprayed on red.

Polyshades is a combo polyurethane and stain, a product I had successfully used on a hutch before. So realty if I decide to go that way, that is pretty much it, unless I want to restrip.

Now with the oil stain in the wood, I'm guessing it may be too late to add a black dye to the veneer?
 
Well, after debating for a full day, I knew I didn't want to use polyshades. I also wasn't enamoured with doing a dirty drag with the Minwax. So I stopped into a local paint and hobby store to see if they had anything different.

Sure enough, they carried a brand of stain called Old Masters, and they had three different types of it, including one called "wiping stain". It was described as a translucent, heavy body stain that could be laid over top of existing stain after a light sanding. Seeing as they had a dark greenish mahogany color (Spanish Oak) and I didn't mind knocking the red down a bit more, I thought it worth a try.

It certainly is very heavy, but is also super easy to dirty drag. I started with a pseudo tiger-wood look, decided against the look, so then did a very gentle rub. The result speaks for itself.

E1D1B2F4-91F9-4FF8-B728-7A8E013630C1_zpsgt5lejvc.jpg


You can see both the previous and new color in the photo.

Very nice, easy to work with product, and it got me to the color I wanted while still showing off the lovely grain. I may have to go spray poly now instead of oil rub, but I love the result.

Product info if anyone is interested:

http://www.thepaintstore.com/v/Old_Masters/WipingStain_PI.pdf
 
And just to tie off the thread, here's the finished product. Steps of the project were:
- Full chemical strip
- Firm sanding to remove all traces of varnish and to pull down the orange-y color
- Used RIT Dark Green dye in alcohol to pull down the red further, and create a more brown tone
- Two coats of Minwax Wood Finish Ebony stain to raise the color of the grain and darken
- Light sanding
- One coat of Old Masters Wiping Stain in Spanish Oak, dirty dragged and lightly rubbed
- Two coats of Minwax Spray Polyurethane

Net result was a very nice walnut color with warm undertones. In the final pic it looks a little dark, and it looks more medium walnut in the sun. The grain pops nicely:

0F4759F1-EAFE-49F8-906E-264BCC282B33_zpsatfoh2rr.jpg


A very drawn out project, but in the end, worth all the time invested.

Although I was not happy with these with my other gear, yesterday was the first time they were hooked up to the tube amp. It sounded really, really good.
 
Last edited:
Well yes and no...I take it that's the darkest of that product.

Generally minwax like that is a stain and a bit of sealer so it hold to the would for people using a brush to clear coat over it. If you let it dry good you could get away with more stain coats before any clear coats. Next time don't just rub all the stain off hard. Put it on and lightly work it evenly, you can use a folded rag and kinda brush with it, with the grain. A 3" dry bush would be good also to even the stain. With the brush you pat the tip of the bristles all over the surface, then cleaning the brush on a clean rag in the other hand. You can the lightly brush with the grain to smooth it more.

Trying to darken a stain result be piling on more coats of Minwax type stain, which is usually pigment in a binder, often including dye, is not a good idea. The binder that holds such stain to the wood is a very weak sealer, formulated to have all excess wiped off before drying. Layering it on to create substantial films leaves you with a weak layer under final top coats and jeopardizes the durability of the finish.

On bare wood, you can achieve darker tones by varying dye concentration, but with sealed wood, which may be the result of stripping veneer surfaces, you would need to use toned finish--ie, finish including dye or pigment. Multiple coats can be applied since the finish material in the toner is much more robust than the binder in Minwax style stain. Applying toner is best done with spray equipment in order to achieve even results.
 
Trying to darken a stain result be piling on more coats of Minwax type stain, which is usually pigment in a binder, often including dye, is not a good idea. The binder that holds such stain to the wood is a very weak sealer, formulated to have all excess wiped off before drying. Layering it on to create substantial films leaves you with a weak layer under final top coats and jeopardizes the durability of the finish.

On bare wood, you can achieve darker tones by varying dye concentration, but with sealed wood, which may be the result of stripping veneer surfaces, you would need to use toned finish--ie, finish including dye or pigment. Multiple coats can be applied since the finish material in the toner is much more robust than the binder in Minwax style stain. Applying toner is best done with spray equipment in order to achieve even results.

Hi Steve,

Understanding the issues with bonding by dirty dragging Minwax, both layers of the Ebony were rubbed in fairly firmly, as not to create bonding or adhesion issues.

What made the Old Masters wiping stain different is it was made to be left on heavy, with active binders in the pigment to hold it tight. It was a very heavy consistency stain (more like paint than stain) but once allowed to dry, it would not rub off like Minwax, showing it was fairly well bonded.

If I had to do the project again, I may have done a layer of black dye after adding the green - this may have then avoided me needing to use the slow-to-dry and somewhat finicky wiping stain. Either way, the results were what I was looking for.
 
Back
Top Bottom