

You are using an out of date browser. It may not display this or other websites correctly.
You should upgrade or use an alternative browser.
You should upgrade or use an alternative browser.
Yamaha cr-2020 refurb time
- Thread starter bktheking
- Start date

chuckworkb
Super Member
I'll be watching for the updates. :yes:
Next time I see one at my local used record store, I think I am just going to buy it.
Next time I see one at my local used record store, I think I am just going to buy it.


4seatPilot
"Broker"
The best looking receiver ever made right there
:thmbsp: Just picked mine up from my brother's place - I bought it last year, but I had only seen it once since he picked it up. It's just as good as yours Fez!

pingu_turbo
On a constant search...
 This is brilliant bk, what is it with you and great looking gear?
With trying to avoid a debate, what caps did you use in the ps board?
 I'm sure you've put alot of thought and research & reason into it.
bring on the 1060!

Very, very nice. The Yammy dwarfs that house in the last pic!
ROFL:lmao:
Last edited:
4seatPilot
"Broker"
I just ordered for my own project.... Panasonic FM/FC. here's the project if you're interested...
I also have one with all Nichicon PW if you prefer... Price is about the same.
I also have one with all Nichicon PW if you prefer... Price is about the same.
Last edited:

kenkirk
Active Member
Warning!
Warning! Don't touch the heat sinks on the power relay board with power on.
Spark city. Result not do good. Blew some transistors. I was trying to
Measure the heat sinks for better replacements. Just added to the order!

I am restoring/ destroying my old trusty cr2020.
Ken
Warning! Don't touch the heat sinks on the power relay board with power on.
Spark city. Result not do good. Blew some transistors. I was trying to
Measure the heat sinks for better replacements. Just added to the order!
I am restoring/ destroying my old trusty cr2020.
Ken
4seatPilot
"Broker"
uh, yeah. They are not isolated from the case of the TO-220 case... so the heatsink is electrically connected to the collector of the transistor. I bet you jumped!
They needed to be replaced more suitable parts anyway... but did you blow up some of the smaller ones too?
They needed to be replaced more suitable parts anyway... but did you blow up some of the smaller ones too?
kenkirk
Active Member
uh, yeah. They are not isolated from the case of the TO-220 case... so the heatsink is electrically connected to the collector of the transistor. I bet you jumped!
They needed to be replaced more suitable parts anyway... but did you blow up some of the smaller ones too?
Not sure. I have checked them with the diode function of my Fluke in circuit. But not sure. I have a Super Cricket on the way. The small transistors in the area have been well cooked over the years so since I am recapping the relay board I think I will replace the ones in that area anyway. I will check them for sure when the Super Cricket arrives next week. The spark from the heat sink sparked my creative side...
Ken
kenkirk
Active Member
I blew enough on mine to make eyes, ears and nose and a mouth!
Well that should be done in oil and canvas...

Ken


bktheking
Gitter Done!
Pretty much all done, couple last things and it will be complete.
1. Here's the cap pile once they are done, less the monsters of course!

2. I wasn't impressed with the heatsinks on the tip41c's on the cap board, I measured them last night at 150F, too fricken hot! Tonight I took a heat sink from a video card and chopped it up and added heatsinks to the crappy heatsinks. Dropped the temp down to 124f.

1. Here's the cap pile once they are done, less the monsters of course!
2. I wasn't impressed with the heatsinks on the tip41c's on the cap board, I measured them last night at 150F, too fricken hot! Tonight I took a heat sink from a video card and chopped it up and added heatsinks to the crappy heatsinks. Dropped the temp down to 124f.
bktheking
Gitter Done!
3. I don't like that these units vs the 2040's don't have a lit dial, the thing looks dead IMO. I got to googling LED strips and it just so happens that mouser now carries a new product made by JKL industries called the ZFS LED ribbon. It's made in sections so you can cut it down. Basically, if you order the led strip for $16 you get enough to do 2 2020's- handy for guys like 4seatpilot who own 10 2020's and 20 1020's . They run off of a 12 volt supply, I tapped into the lamp feed. I now have to match the meters with new leds- that's the part that is left. The ZFS strips have an adhesive backing, simply cut it in half (so you are left with 2 equal lengths) and you are ready to go to it.
1. Solder 2 wires to the strip.
2. Remove the faceplate so you can gain access to the lip above the dial.
3. Remove the adhesive backing and stick it to the faceplate.
4. Run the wires between the meters and the chassis.
5. Solder the leads to the lamp feed, one red one white off of the cap board.
That's pretty much all there is to it. If you wanted to get fancy you could affix something to diffuse the light perfectly. At sight level you can tell the leds are there. My receiver will be low to the ground so I'll never see it.
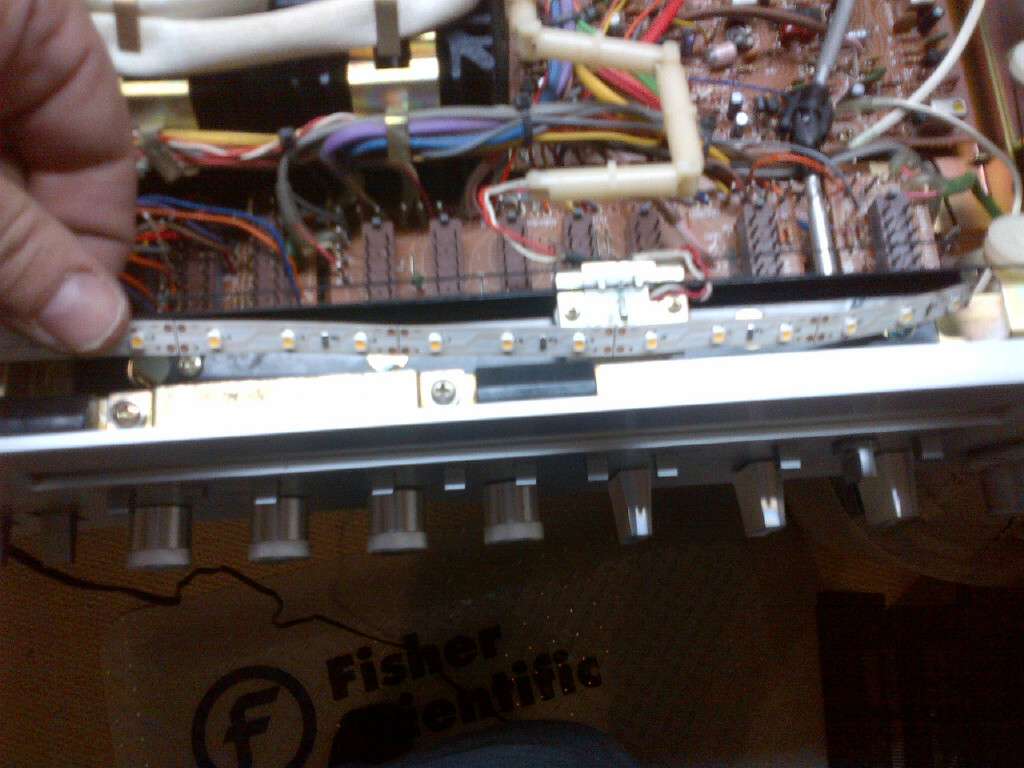
Now this is what i'm talking about, a dial you can actually see! I'm certain this will work for any 20 series. If it's too long you can cut off a length, they are 2 inches each.
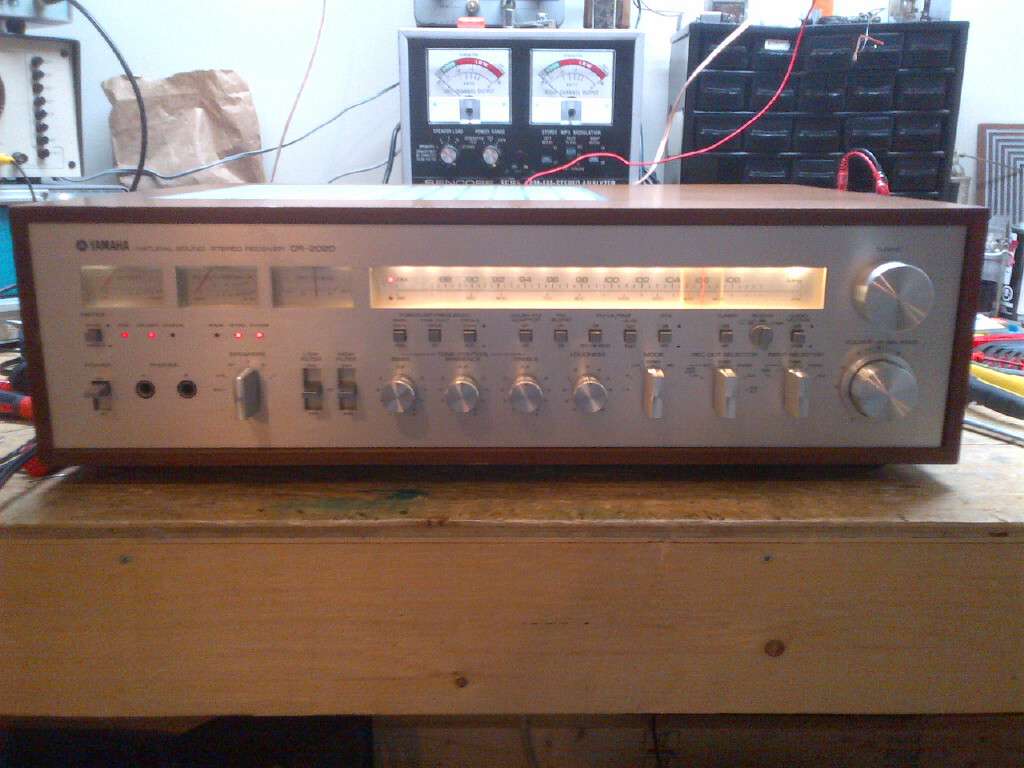
. They run off of a 12 volt supply, I tapped into the lamp feed. I now have to match the meters with new leds- that's the part that is left. The ZFS strips have an adhesive backing, simply cut it in half (so you are left with 2 equal lengths) and you are ready to go to it. 1. Solder 2 wires to the strip.
2. Remove the faceplate so you can gain access to the lip above the dial.
3. Remove the adhesive backing and stick it to the faceplate.
4. Run the wires between the meters and the chassis.
5. Solder the leads to the lamp feed, one red one white off of the cap board.
That's pretty much all there is to it. If you wanted to get fancy you could affix something to diffuse the light perfectly. At sight level you can tell the leds are there. My receiver will be low to the ground so I'll never see it.
Now this is what i'm talking about, a dial you can actually see! I'm certain this will work for any 20 series. If it's too long you can cut off a length, they are 2 inches each.
4seatPilot
"Broker"
Nice! Did it work putting it on the underside of that lip? It looks great - looking forward to the matching LEDs in the meters.
bktheking
Gitter Done!
I'm off today. I've been running it for the last 3 hours through my new set of dynaco a-25's. I'm sold, this thing is a party receiver- it's a clear sounding unit that loves to be cranked up.
I can't see why, unless there isn't room, this led strip can't be used for any type of dial application.

I can't see why, unless there isn't room, this led strip can't be used for any type of dial application.
Last edited: